Hello there and thanks for checking out this workflow!
What's new in v12? : Fixes and SubGraphs compatible with the latest ComfyUI Updates!
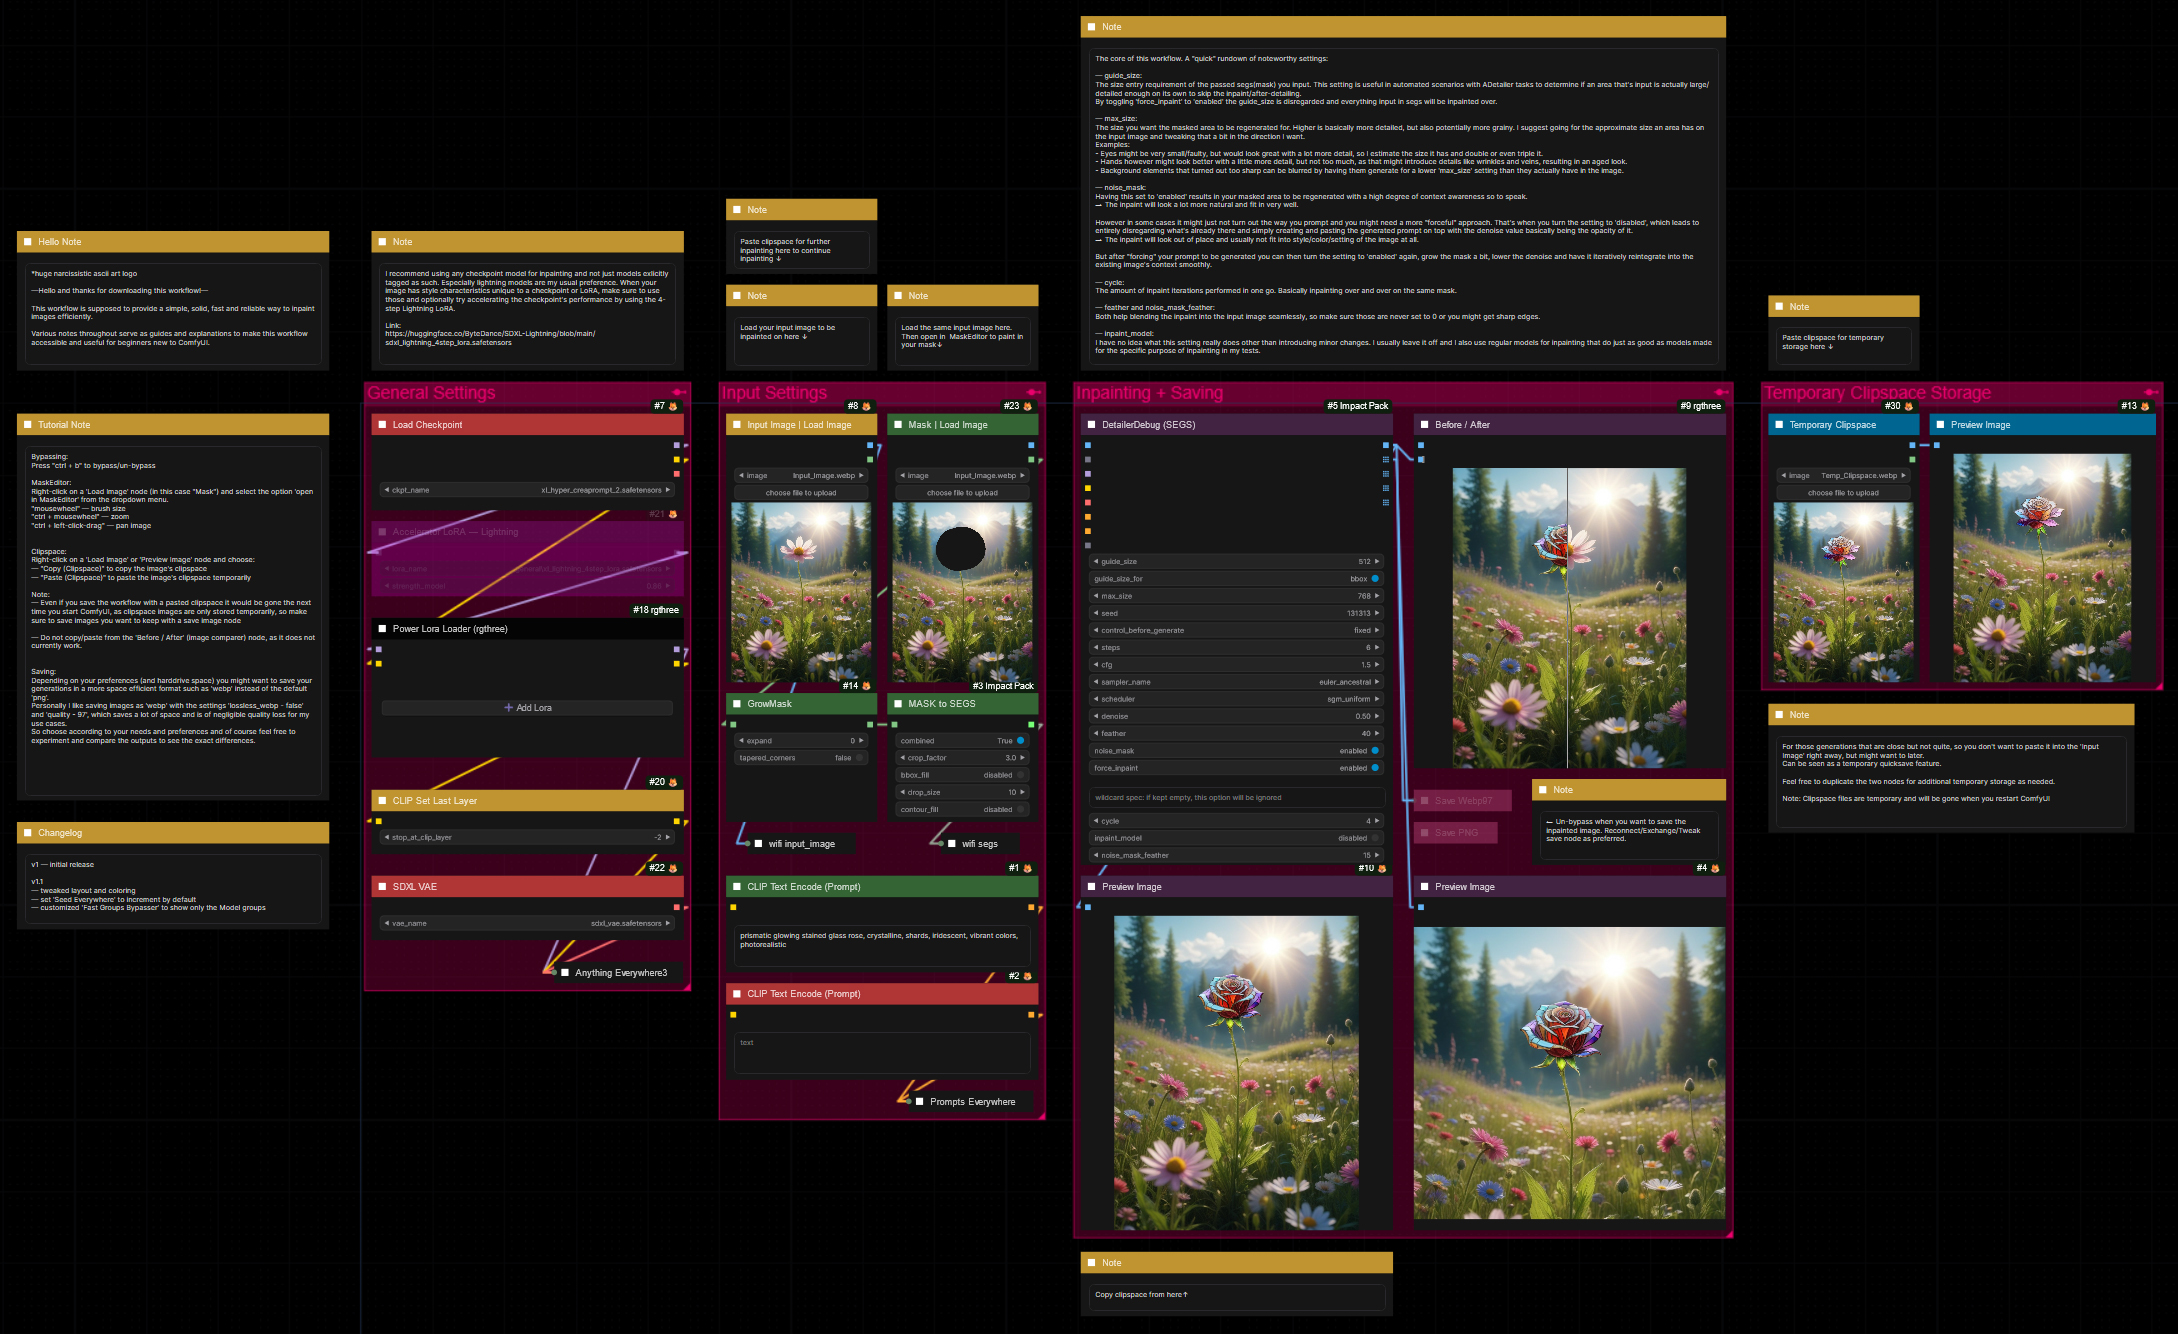
—Purpose—
This workflow provides a simple, solid and reliable way to efficiently inpaint images to perfection!
I hope this proves to be a useful tool to you!
—Features—
LoRA support
Batch Processing
Flexible Before/After Preview for any batch size and mask amount
Image Filter to cherry pick
Tutorial guide for nodes and settings in dedicated ►INFO boxes
—Common Issues—
ValueError: Width and height must be >= 0
→ Make sure you masked an area on the node named "Mask"
—Custom Nodes—
All of which can be installed through the ComfyUI-Manager
—Troubleshooting—
If nodes show up red (failing to load), check the 'Install Missing Custom Nodes' tab of the ComfyUI Manager for the missing node packs and install them.
Please check if all custom node packs load properly after installing, i.e. no
(IMPORT FAILED)messages next to any of them in the console upon ComfyUI startup.Always reload/drag'n'drop the original, downloaded workflow file into ComfyUI to reload an intact version of the workflow.
→ The last opened workflow that appears on startup shows a cached version of the workflow, "remembering" group nodes that failed due to missing nodes as failed, keeping them broken even after having everything installed correctly.
—Thanks—
The workflow would not be possible as is without these custom node packs. If you want to support the custom node creators, give them a ⭐ on their github repos! Thank you!
Feel free to ask any questions, share improvements or suggestions in the comment section!
Also let me know if you encounter any confusing points I can elaborate on and focus on improving for the next update!
Description
v1 — initial release
FAQ
Comments (4)
When ever i try to inpaint in comfy i just get a deformed mess:
In example, im trying to extend the length of a white dress, i used all the settings and models youve got but the closest i can get is a black piece of clothing that isnt blended with original at all. Any advice?
Is the cycle setting at the bottom of the detailer node on a value higher than 1 by any chance? I noticed that was still set to 4 in the uploaded file. I'm going to update it now, with a few small changes.
@redpinkretro it was 4, changed to 1, all other settings left as is - made no difference (even with v2). :(
In A1111 i load image, mask over, simple prompt "long white dress" and i get something close. comfy seems to just give me image close to what i started with or a deformed mess haha. (not limited to this workflow btw - i appreciate the sharing!)
@kayem The settings for steps, cfg and denoise have to be adjusted for each use-case of course. You also don't need to get the exact models used in the example images. Those just happened to be the models I generated the images with. Using the same models for inpainting that were used for the initial t2i generation just gives a more natural inpaint.
Try normal cfg and step values for your model. Using an accelerated model or acceleration LoRA requires adjustments that are more sensitive to error and can easily mess up the image.
I would suggest, at first, just try to have the model generate something that looks natural in txt2img and use the same settings for steps and cfg in the inpainting process.
Tweak the values for denoise depending on how much you want the masked part to change and how different the image is to what you want it to be.
Comfy has a lot of power and requires a lot more settings to be correctly input by the user than a1111, but trial and error are your best friends. It's really fun to figure things out, just keep on trying, play with some values and see what exactly changes.