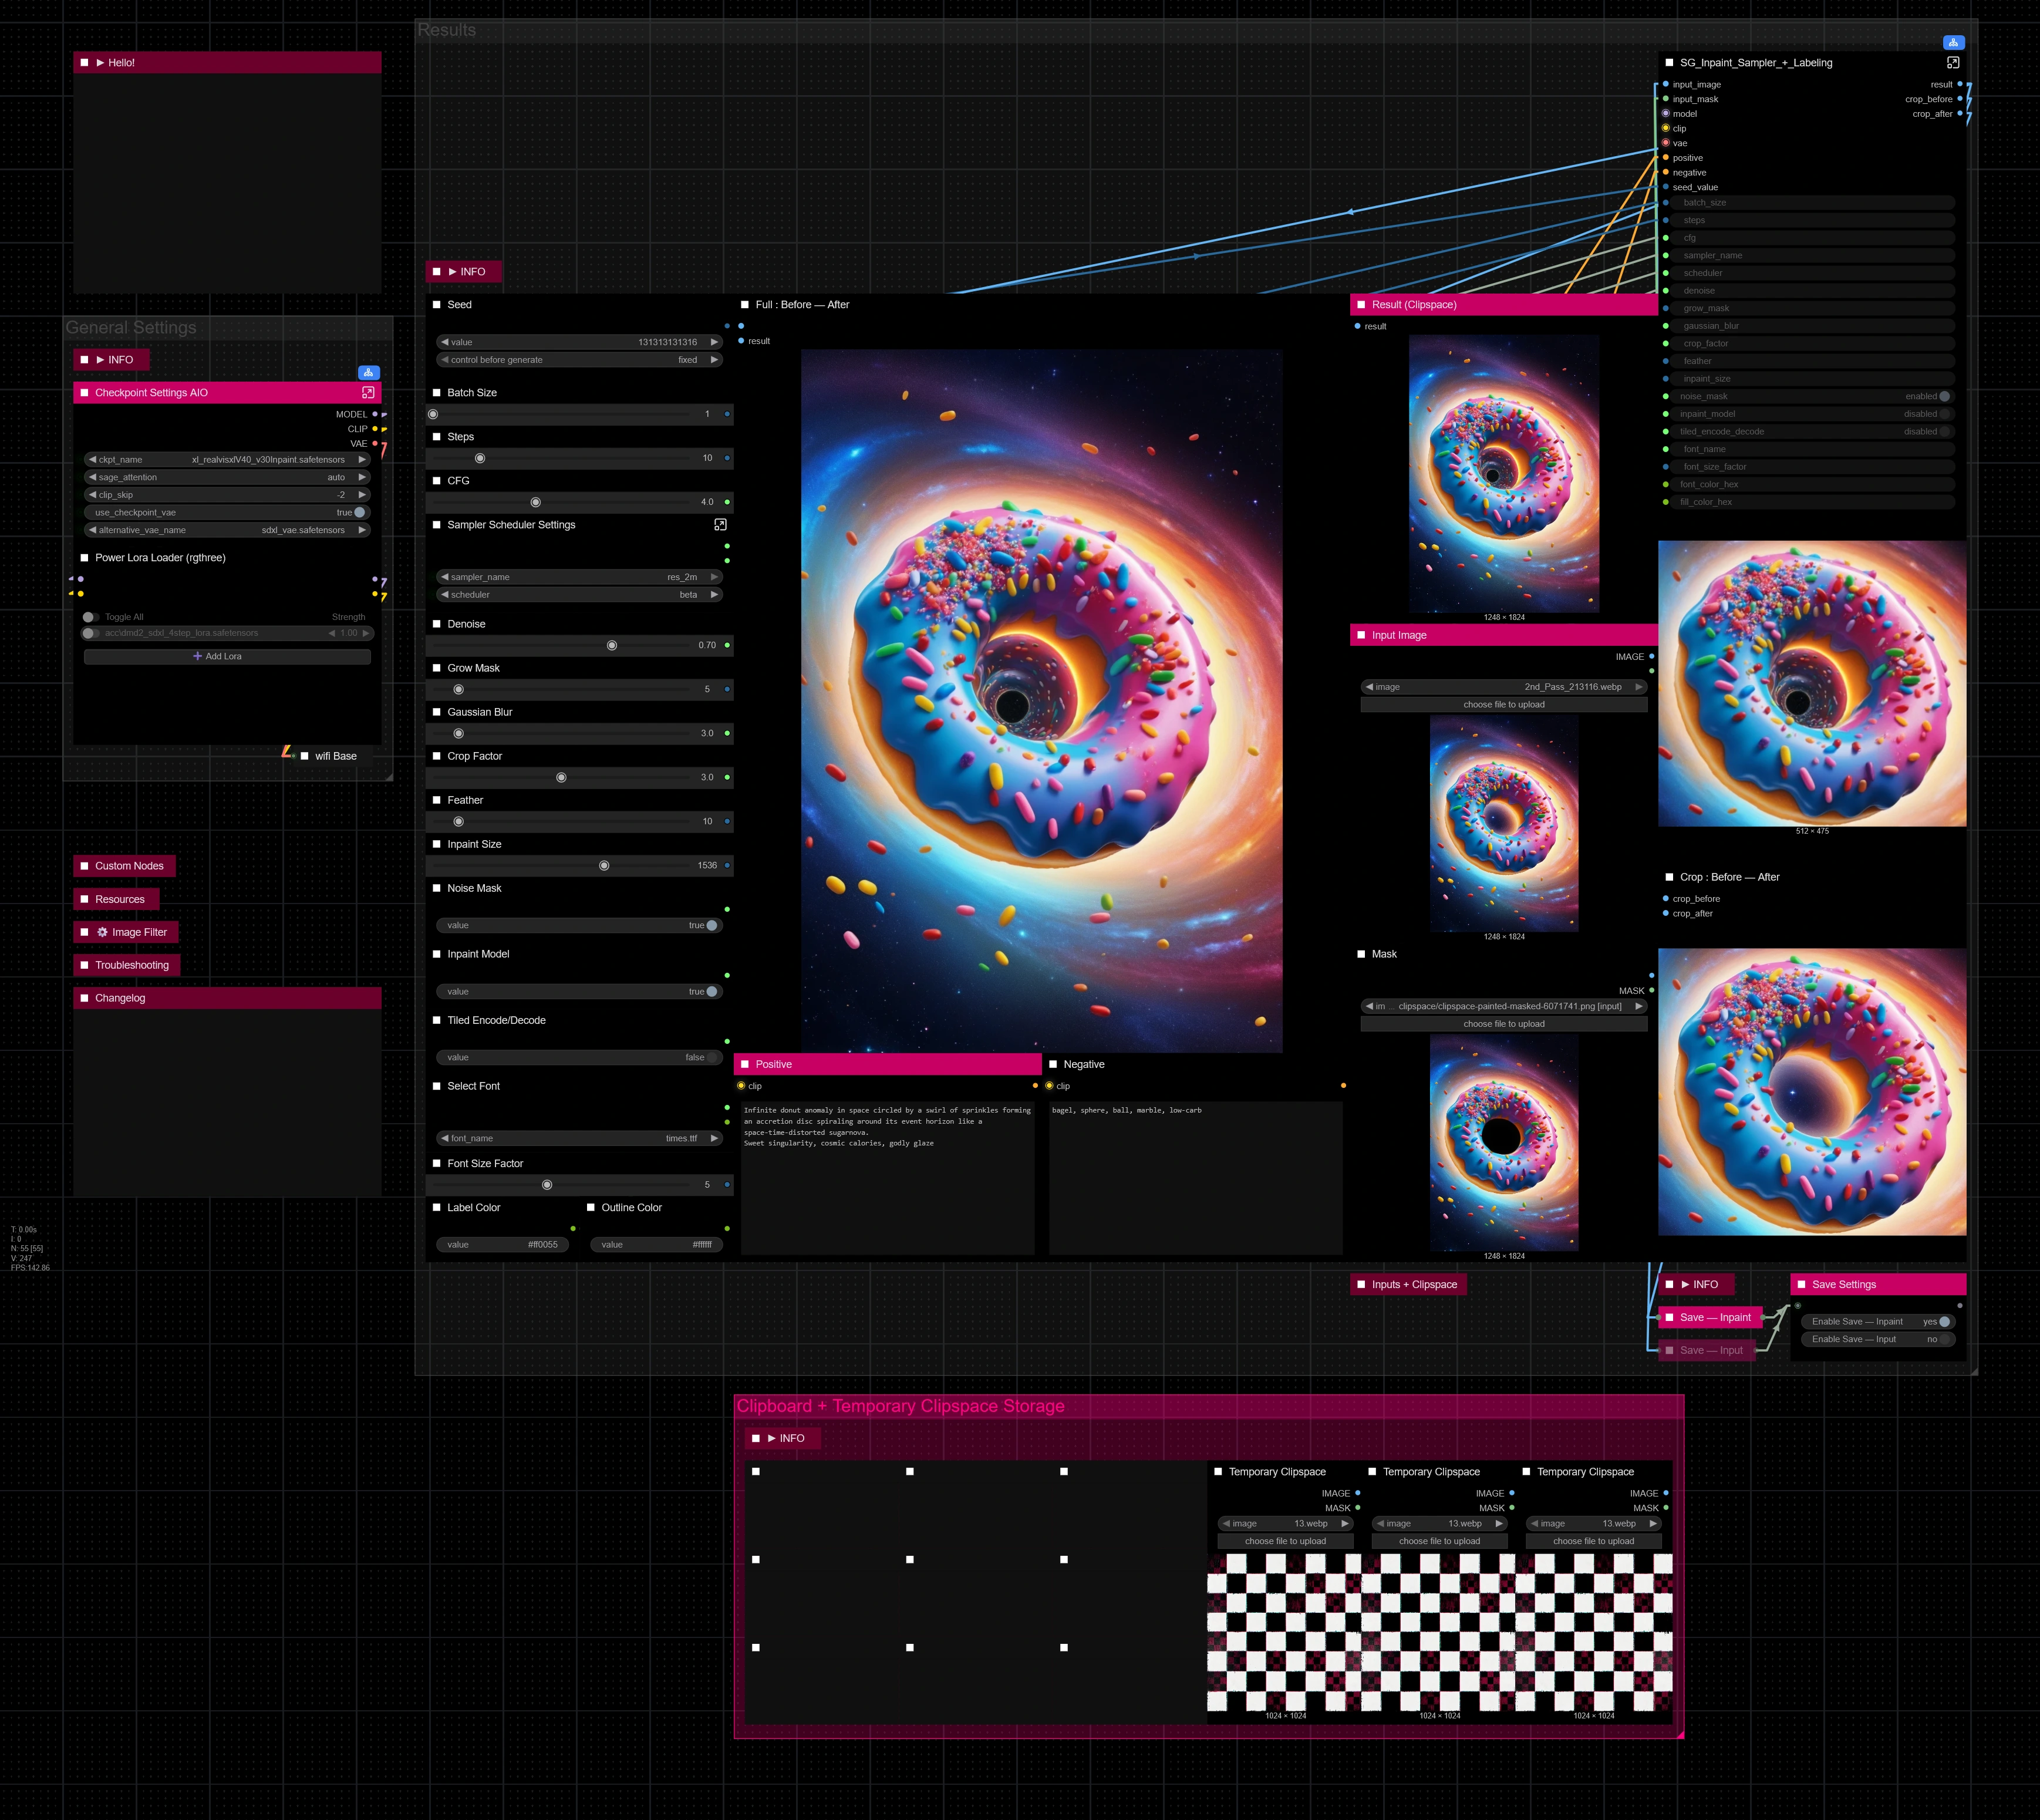
Hello there and thanks for checking out this workflow!
What's new in v12? : Fixes and SubGraphs compatible with the latest ComfyUI Updates!
—Purpose—
This workflow provides a simple, solid and reliable way to efficiently inpaint images to perfection!
I hope this proves to be a useful tool to you!
—Features—
LoRA support
Batch Processing
Flexible Before/After Preview for any batch size and mask amount
Image Filter to cherry pick
Tutorial guide for nodes and settings in dedicated ►INFO boxes
—Common Issues—
ValueError: Width and height must be >= 0
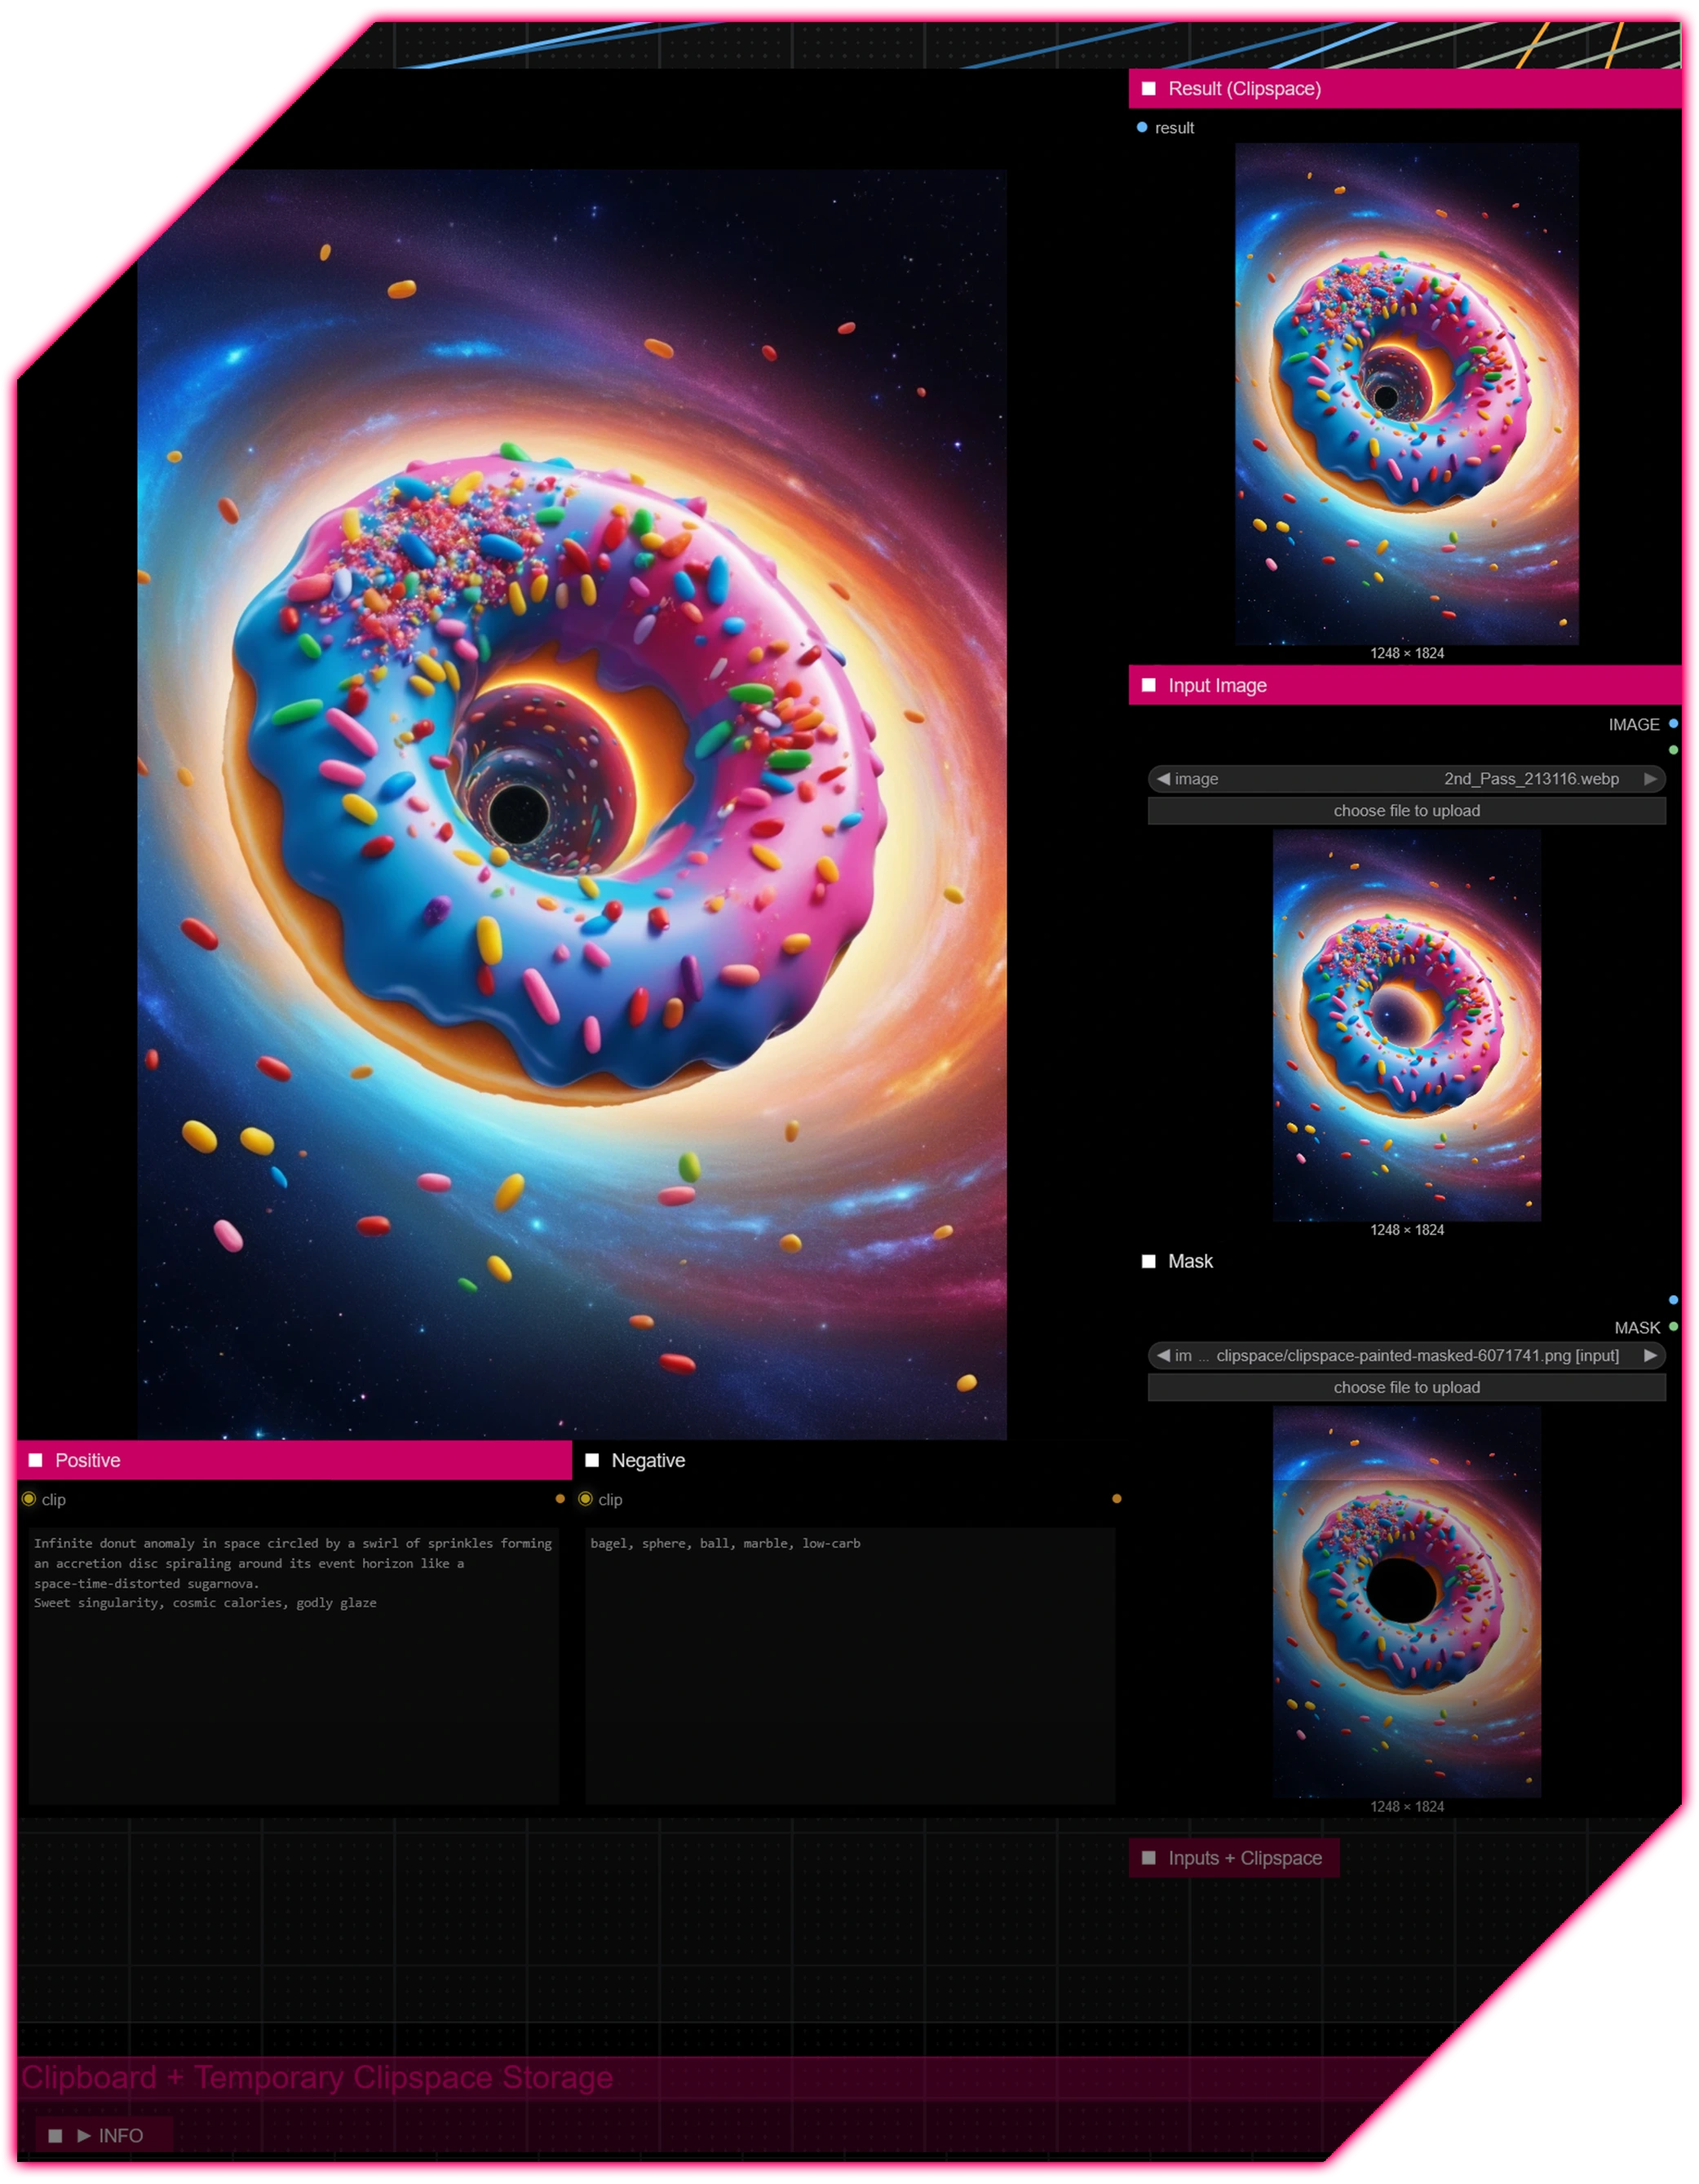
→ Make sure you masked an area on the node named "Mask"
—Custom Nodes—
All of which can be installed through the ComfyUI-Manager
—Troubleshooting—
If nodes show up red (failing to load), check the 'Install Missing Custom Nodes' tab of the ComfyUI Manager for the missing node packs and install them.
Please check if all custom node packs load properly after installing, i.e. no
(IMPORT FAILED)messages next to any of them in the console upon ComfyUI startup.Always reload/drag'n'drop the original, downloaded workflow file into ComfyUI to reload an intact version of the workflow.
→ The last opened workflow that appears on startup shows a cached version of the workflow, "remembering" group nodes that failed due to missing nodes as failed, keeping them broken even after having everything installed correctly.
—Thanks—
The workflow would not be possible as is without these custom node packs. If you want to support the custom node creators, give them a ⭐ on their github repos! Thank you!
Feel free to ask any questions, share improvements or suggestions in the comment section!
Also let me know if you encounter any confusing points I can elaborate on and focus on improving for the next update!
Description
v12
- major rework to utilize SubGraphs
- optimized loop processing
- custom node pack changes :
- added :
- ComfyUI-Crystools
- ComfyUI-Easy-Use
- removed :
- ComfyUI-Image-Saver
- ComfyUI-Inspire-Pack
v12.1
- fix for potential DifferentialDiffusion error
FAQ
Comments (19)
This workflow works like a charm for me. Straightforward and easy to use, and does exactly what I need. The first inpainting process that makes sense to me, after a couple weeks of trying. Thanks.
Glad to hear that! Thank you very much 🙌
Hey thanks for this workflow! Was wondering is there a way to get it to inpaint two elements at once so that they look alike — for example, matching earrings or eyes?
Hey there, glad you like it! 🙌🏻
Yes, there is sort of a trick to get that done, which is to mask both areas as you regularly would, but then connect the two areas with the brush size at minimum. That will generate the two areas at once, sharing the prompt and resulting in better matching.
Also make sure that Grow Mask is set to 0 for this, to keep the fine connection line fine. 👌
I'm having an issue where the "crop before/after" doesn't look like what the final output image is, the output image seems to have a transparent version of what was in the image originally as an overlay over the inpainted resulted. Is there a reason for this?
Hey there, in general the crop before/after node should show you all masked areas of the original input (A1) and upon hover a comparison to the inpainted results of those areas in (B1...B_batchsize). When generating a batch_size greater than 1 the image filter node will prompt you to select which result you want to keep (B1...B_batchsize), which will correspond to the crop before/after comparison.
Did that clarify your issue or can you provide more details?
@RedPinkRetro I'm only generating one image at time. When I'm inpainting something, like glasses or something like a hairclip, the output image seems to be left with transparent-looking artifacts(like the object is still there but transparent) that seem to be in the shape of whatever was there before(in this case the original shape of the glasses/hairclip). I was wondering which setting I should be changing to minimize this effect? The crop before/after doesn't seem to display these artifacts. I was wondering if there's something I can change in the settings that can minimize these effects?
@FlawedCreator I believe what you're describing is the result of using a too small mask respective to the feather value.
You can try increasing the grow_mask value while keeping the seed fixed and make no further changes, just to check if that impacts the effects you're describing.
Having same issue with older details being transparent on inpainted zone, just like you the crop before/after doesnt show them, have you found the fix?
@Sussilus Hey there, yes, it's most likely a settings issue. Do you see a change when you increase the grow_mask value?
@RedPinkRetro Played around with it and seems like putting grow mask 2x the Feather value mostly fixes it (sometimes still happens in borders of mask). Mask Growth 10 and Feather 5 is what I put.
Why are there two spots for input image?
used to work before beautifully, now:
'DifferentialDiffusion' object has no attribute 'apply' ?
Hey there, I just tested it on my end and could not replicate the issue, but remember running into it on some other workflow.
So I put an explicit DifferentialDiffusion node into the SubGraph that should fix it.
Can you check if v12.1 works? 🤞🏻
@RedPinkRetro I checked, Its not working now but without a message.
@jupiterloverful289 What does the console log say? Can you try the freshly loaded workflow and copy/paste me the part from "got prompt" onward? Just select a checkpoint model and vae, paint in some arbitrary mask and queue the prompt disregarding all other settings
Should be (ideally) just a couple of lines like this:
got prompt
Detailer: segment upscale for ((343, 304)) | crop region (768, 768) x 1.3338217934627752 -> (1024, 1024)
[Impact Pack] vae encoded in 0.4s
100%|████████████████████████████████████████████████████████████████████████████| 20/20 [00:05<00:00, 3.99it/s]
[Impact Pack] vae decoded in 0.3s
Prompt executed in 6.14 seconds
I'm afraid I have to ask a stupid question, as I'm quite new to image generation.
Under ‘input image’, I load the image I want to change. Under ‘mask’, I also load the image, but mask the area I want to change?
I must be too stupid, because nothing changes at all. I loaded a woman with a red scarf under ‘input image’. I did the same under ‘mask’ and masked the scarf.
Under Positive, I tried ‘green scarf’, ‘change color to green’, etc.
The result always looks like the original. I'm probably doing something fundamentally wrong.
Hey there, no worries you're almost there.
The denoise value determines how much about the masked area is being regenerated, 1.0 meaning 100%, 0.3 = 30% etc.
Also make sure that the seed is set to increment or randomize if you want to see different outcomes while keeping all other settings the same.
@RedPinkRetro Thanks. Got it. Thanks for your work