Check the version description below (bottom right) for more info and add a ❤️ to receive future updates.
Do you like what I do? Consider leaving me a tip
Hi, I'm shikasensei, also known as u/Boring_Ad_914 on Reddit. With the hype around Magnific AI, I found myself drawn to achieving similar results. Initially, I was inspired by LDWorks' work; however, due to the limitations of their initial workflow, I decided to create my own, thus Ultra Upscale was born.
Currently, my focus has shifted more to tools like Clarity Upscaler and ultimately Magnific AI. However, moving the Automatic1111 workflow to ComfyUI has not been successful because the Tiled Diffusion nodes work differently. If anyone finds a way to achieve this, please let me know and I'll be happy to update the workflow.
In relation to the previous point, I recommend using Clarity Upscaler combined with tools like Upscayl, as this achieves much better results. However, I have updated the workflow because many people use it, and because I myself use ComfyUI in my day-to-day work and find it tedious to launch Automatic1111 just to upscale an image.
Please consider the following:
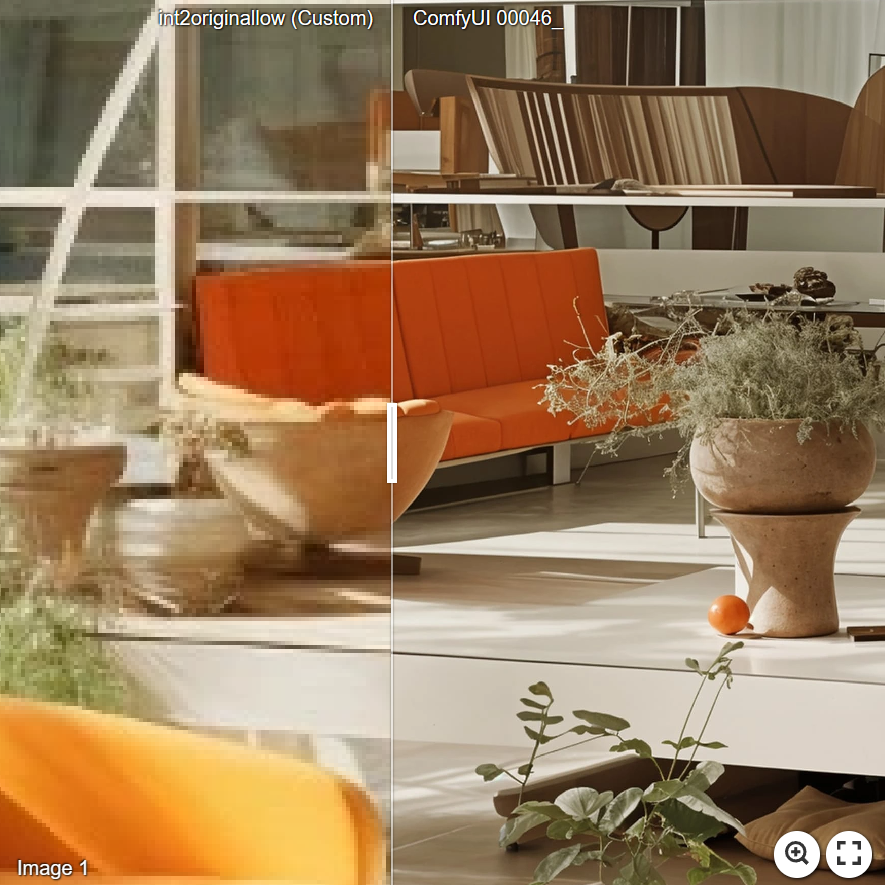
The workflow currently scales an image from 768x768 to 6144x6144. This doesn't mean it's limited to square images; rather, the workflow increases your image size by 8 times. Therefore, for larger images, it will take longer. One option would be to resize the image to 768 or 1024.
Before commenting on any issues with the workflow, ensure all necessary nodes are installed, update ComfyUI, and all nodes.
IMPORTANT: To install the missing nodes, you will have to install ComfyUI Manager. Once installed, you will have to click on "Install missing nodes" and install each node that appears.
Additional resources:
I hope you find this workflow helpful. Please let me know if you have any questions or suggestions.
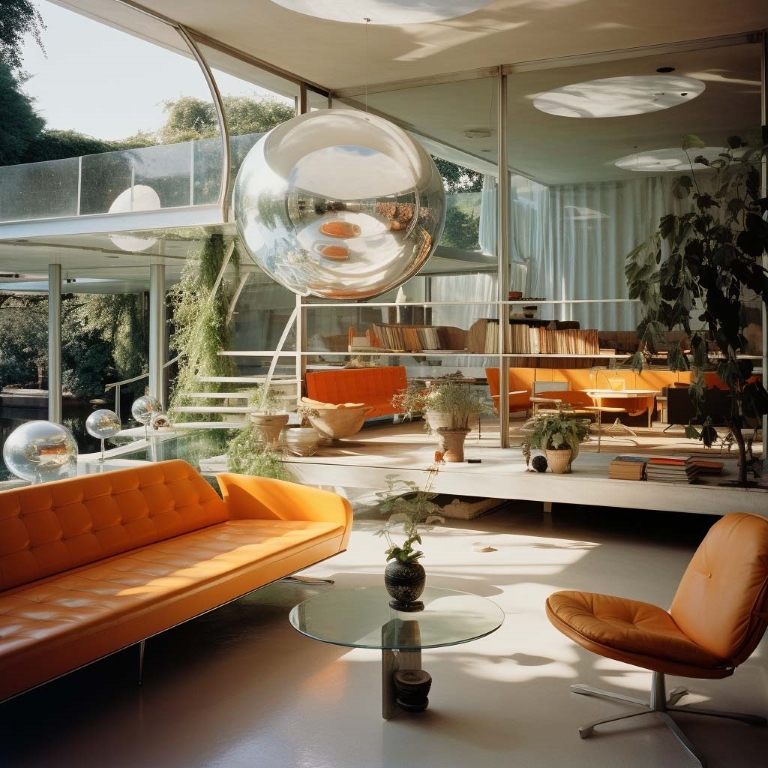
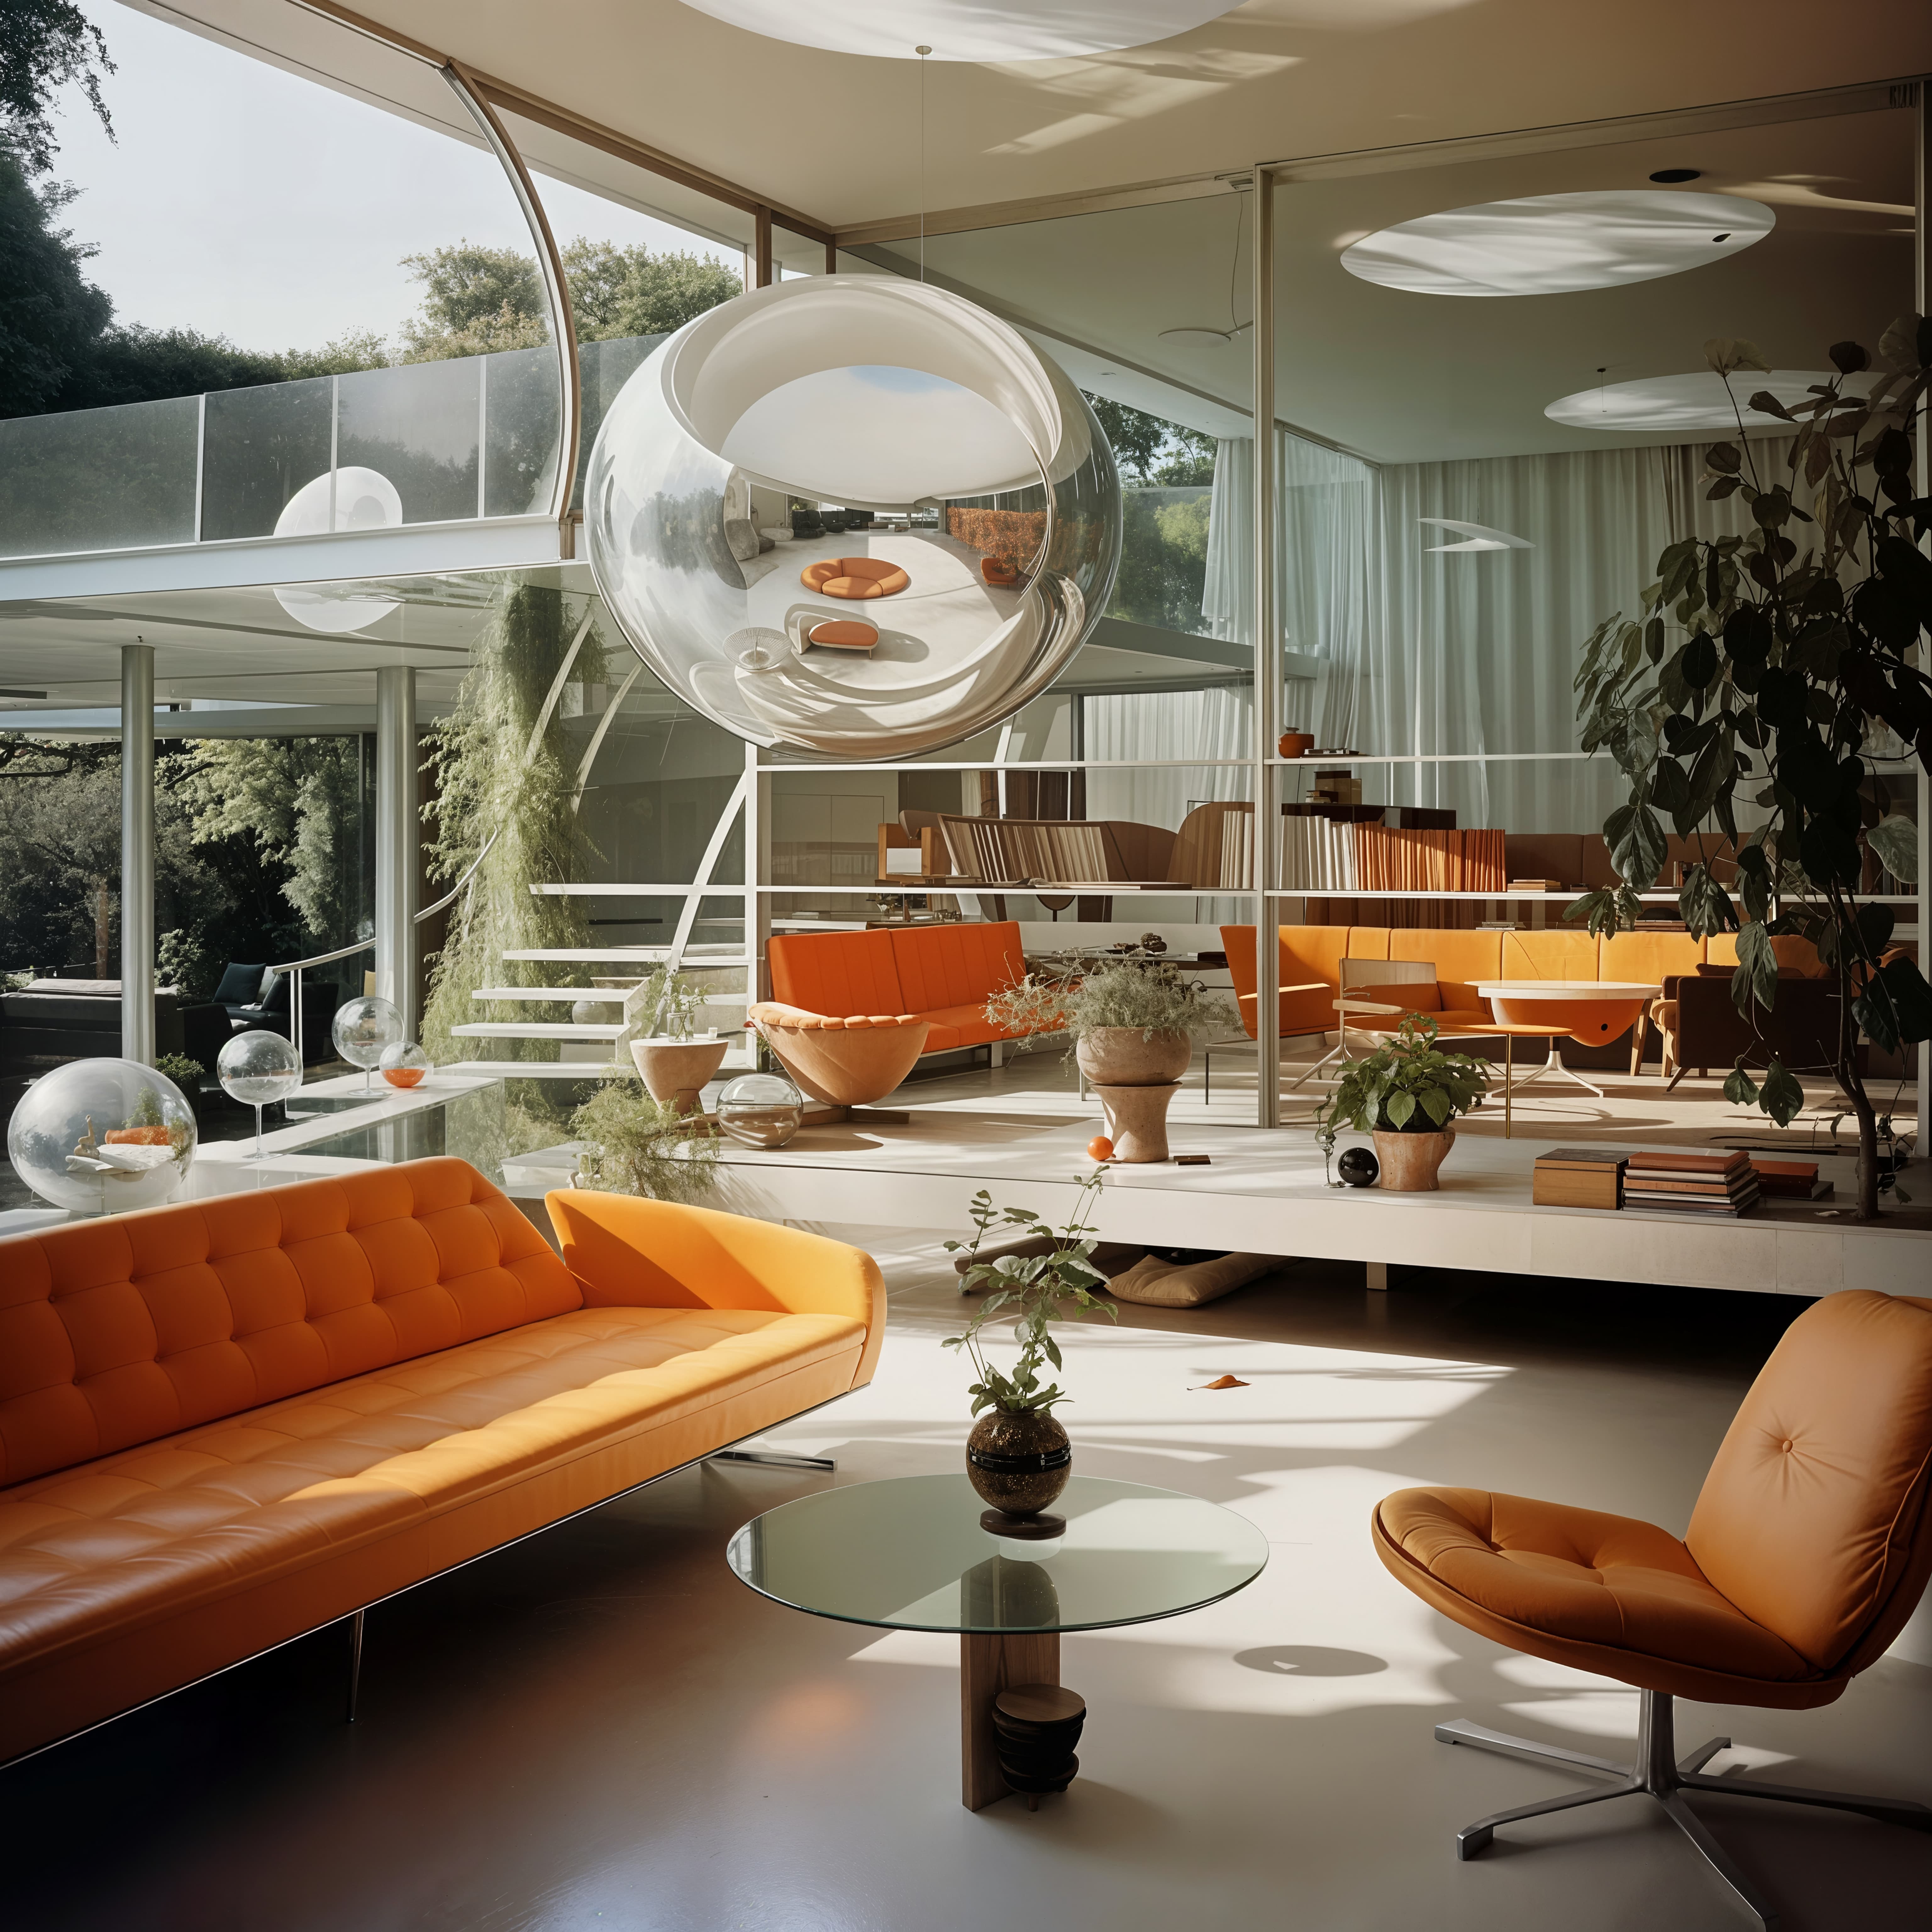
Links to examples:
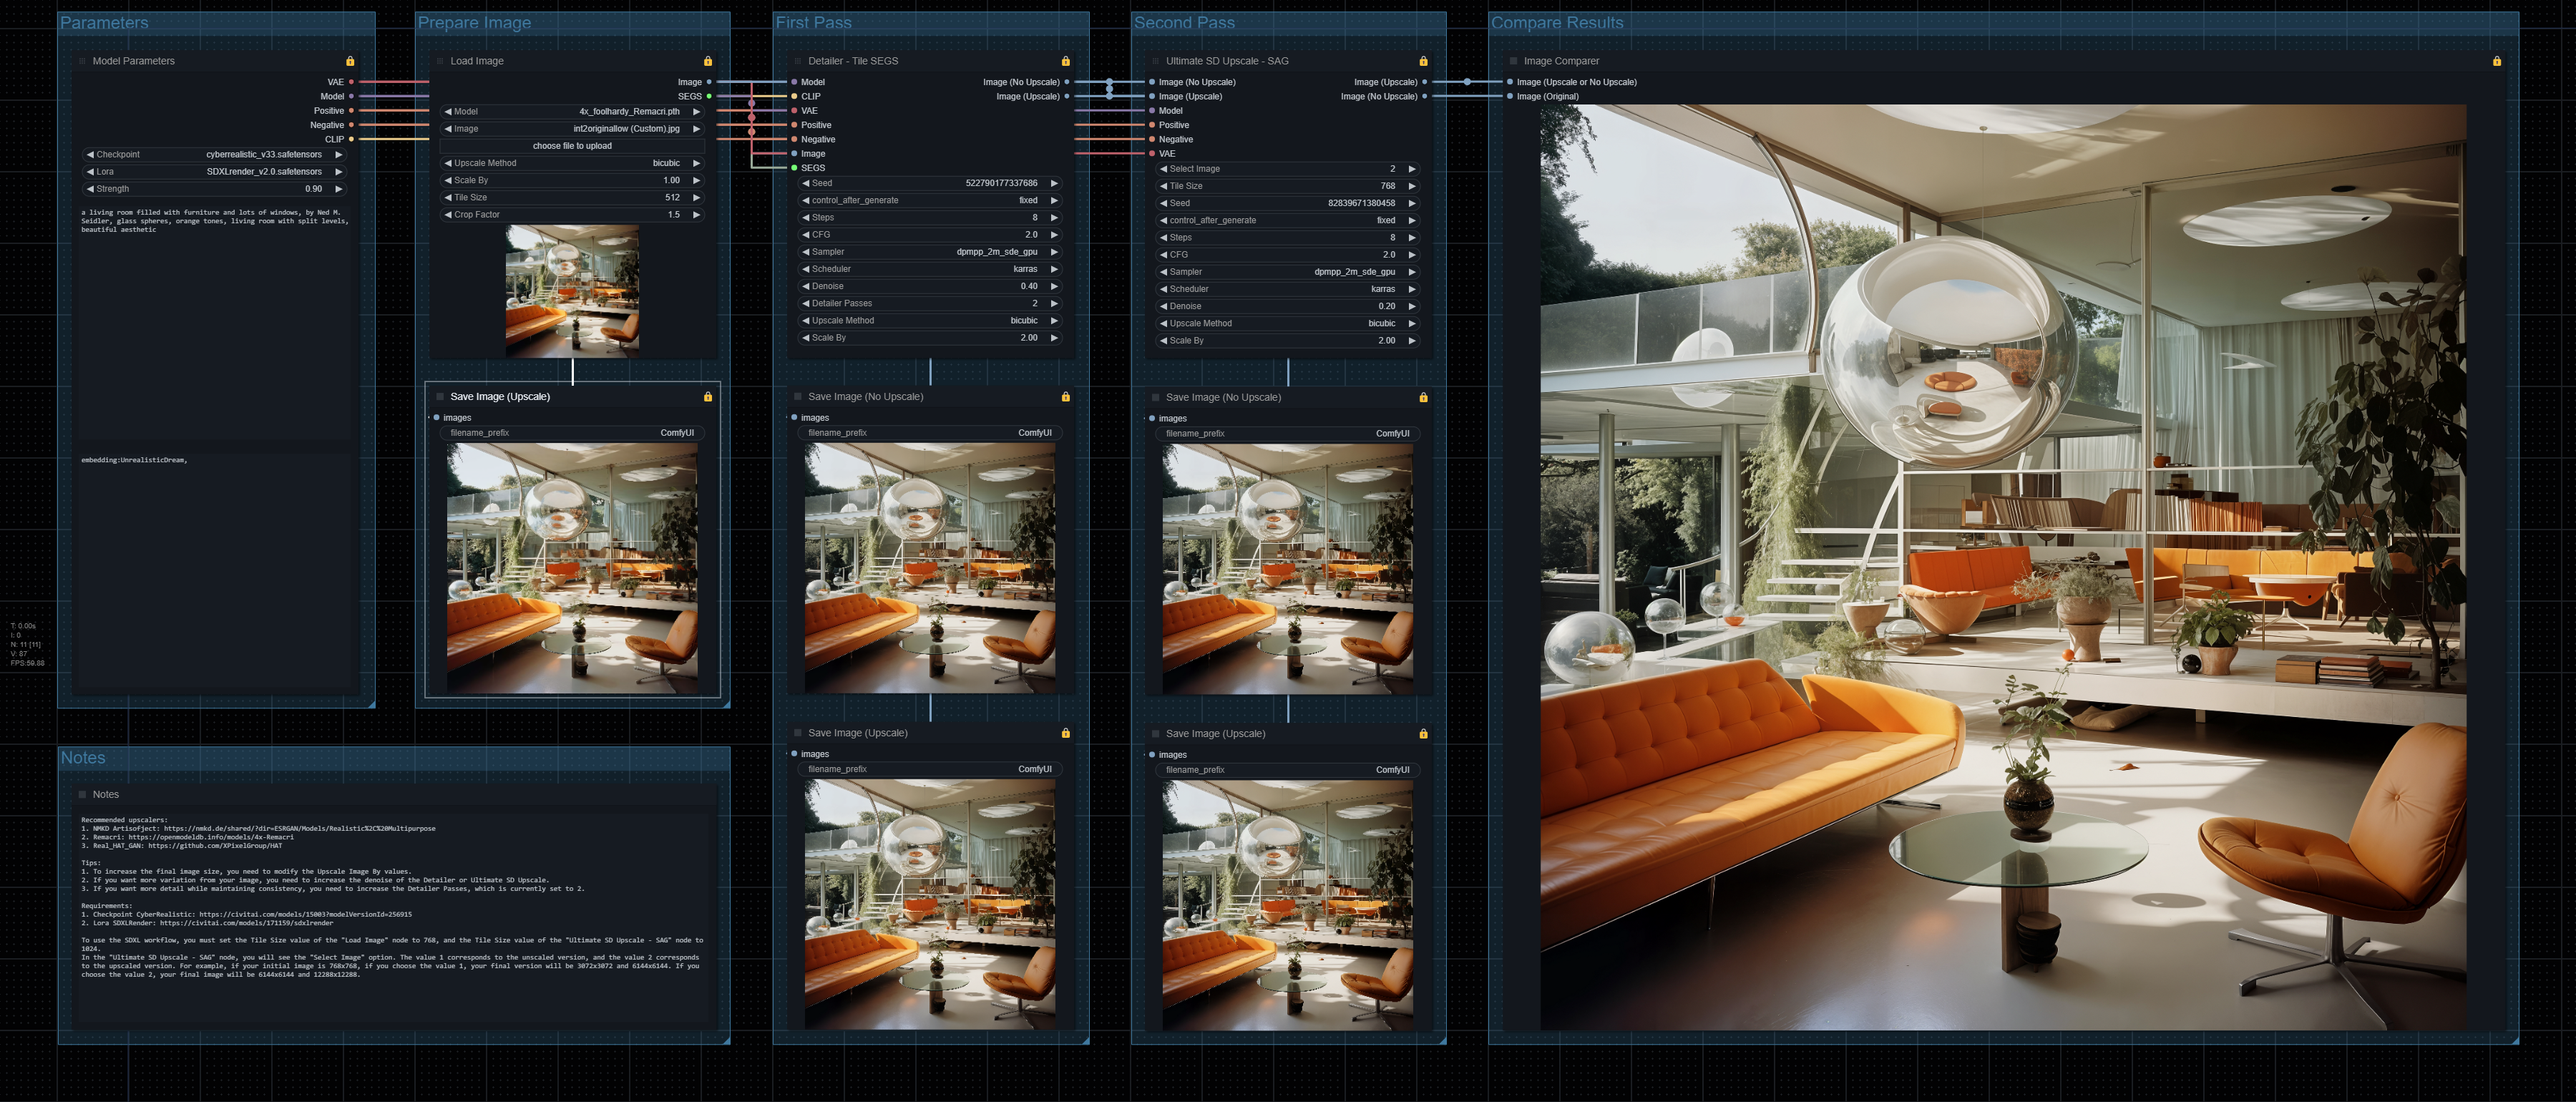
Description
Nodes have been grouped leaving only the most known parameters visible.
The Ultimate SD Upscale node has been implemented again.
There are no more problems with tiles seams!
Again, it can be upgraded to 12k and more!
FAQ
Comments (35)
Thanks Lautaro, everything becomes tremendously real, with these @wall__ai • Foto e video di Instagram LV images I tried not to scale in the first step and take the original images from Midjourney... incredible result! thank you
now I try the 2.2
I have tried several configurations in v2.2 but I can't remove the tiles, any suggestions? They are much more noticeable than in previous versions :(
As I explained in another comment, the output resolution going through the detailer and ultimate sd upscale is 6144x6144 and 12288x12288. Going above those resolutions requires using SDXL to make the tiles 1024x1024 to reduce the number of tiles.
how many sets of segment upscale does it do? mine keeps going on and on with each set last for about 5-6 mins. does it stop somewhere? this is on the first pass
The SEGS are 512x512, and are rescaled to 768x768 to add more detail. So for example in a 768x768 image that is scaled to 3072x3072, you would have a total of 36 SEGS per Detailer pass.
for an input image of 1024x1024 which values should have been changed in upscale workflow (tiling nodes etc... ) ? I am confused about it.
Hi, awsome workflow here.
But can you upload a version with non grouped nodes ?
I'd really like to see the wide picture and try to tweak things inside
@Most7029 I think you responded to the wrong comment ;) My question was about a version with the nodes not grouped together ;)
@Imagination_2_AI My mistake, to do this you just need to click on the groups and click on "convert to nodes". I prefer to keep it simple, but if you make any progress on the configuration, post it here and if it works I'll update it.
Could you tell mewhy self attention guidance was discontinued in v2.2.? I'm concerned about the advantages and disadvantages of using SAG when upscaling.
Nodes are grouped together, SAG is still used, only it is hidden.
Can you make a version that can upscale images with alpha (by upscaling the alpha mask separately and then merging it back together)? Thanks!!!
No, you can use any aspect ratio
Do you have a link to the Ultimate Upscale SAG node? RunDiffusion Manager is unable to find the correct node to install? Thanks
Hi, I tried all night , but it doesnt work , because of the Impact Pack. NOTE:'Segs & Mask' has been renamed to 'ImpactSegsAndMask.' Please replace the node with the new name. - doesnt work replacing either
Did you make sure to update your version of ComfyUI and the nodes? I'm using it right now and I haven't had any problems. If you don't know how to update, just open ComfyUI Manager and click on "Update All"
@shikasensei hi, I tried everything , got everything latest but it doesnt do it , Im new to this . through manager it doesnt update though. I downloaded all content custom nodes 10x, 10x different versions from new to old. it doesnt wanna load this :(( always same error
@purpurlilablau574 I was having an issue where the node ImpactPack was not loading, some error about cv2, I fixed it by downgrading these python package, according to their github wiki (https://github.com/ltdrdata/ComfyUI-Impact-Pack/blob/Main/troubleshooting/TROUBLESHOOTING.md#an-issue-has-occurred-about-cv2)
-m pip install -U opencv-python==4.6.0.66 opencv-python-headless==4.6.0.66
@d4rk4ng3l00731 Hey really appreciate your help! I ended up installing windows updates, git and a different comfyUI version and then the manager. Through manager I could install everything now! thank you!!! cant wait to try this Model :)
this works great, but it stops at the second pass. I don't get any errors or anything, it just stops after the detailer :/
I'm having an issue where it on the SEGS step where it starts inserting the subject of my prompt into the various tiles. So, if I have a human subject posed in front of a city skyline for example, the subject will start appearing in the sky, overlaid on buildings, etc. How do I resolve for this? Just lowering the denoise value?
You can't use such a high denoise, at most I would set it to 0.4, note that in the Detailer node there is an option that says Detailer Passes use that if you want to process the mosaics several times.
Error occurred when executing DetailerForEachDebugPipe: type object 'VAEEncode' has no attribute 'vae_encode_crop_pixels'
I keep getting this error.
Got the same issue, did you manage to figure it out by any chance? :)
Some great results with the tool, good job!
Sometimes I have problem where the tile intersection is visible - resulting in an intersecting stripes of slightly darker values. Any ideas what's causing this/ how to solve it?
Is there an SDXL/SC version coming?
I've been noticing lately that I think something has changed with the Make Tile SEGS node, so I'm investigating it. Not SDXL, but I'm trying some things with SC.
I have noticed that the visibility of the tiles depends a lot on the model used, so I recommend using Cyber Realistic, some have said that it has worked better with Analog Madness.
Got all the pieces installed and it "working", however, it seems like it' taking forever, running the detailer over and over thousands of times. I eventually quit it thinking something must be wrong. I'm using the setting defaults to start. Any ideas? It's on the First Pass Group where it's getting stuck.
The Detailer has been malfunctioning all day for me, so I'm working on it to see if I can find a solution.
Ah, ok thanks! Eventually it seems to finish but it's taking hours and gives odd results. Looking forward to your fix, thanks for the prompt reply.
@shikasensei ah, thanks for the prompt reply. Just wanted to know if I was doing something wrong or not.
When loading the node "Ultimate Sd Upscale - SAG" is red and I"ve got a message: "When loading the graph, the following node types were not found:
Width/Height Literal (In group node 'workflow/58')
workflow/58Remove from workflow
Nodes that have failed to load will show as red on the graph." Comfyui and all nodes are updated