tldr: get 1girl bent over with your favorite model, then use Z-image to make it REAL!
ps: if you notice any problems with the workflow, please let me know so I can fix them.
Z-Image Turbo is an absolutely incredible text2img model. The realism and maturity of its outputs is something that can be harnessed natively to create images from a prompt BUT also refining images created with other models. The trick is using it as a refine pass at low denoise. This keeps the structure while adding natural texture, depth, and lighting.
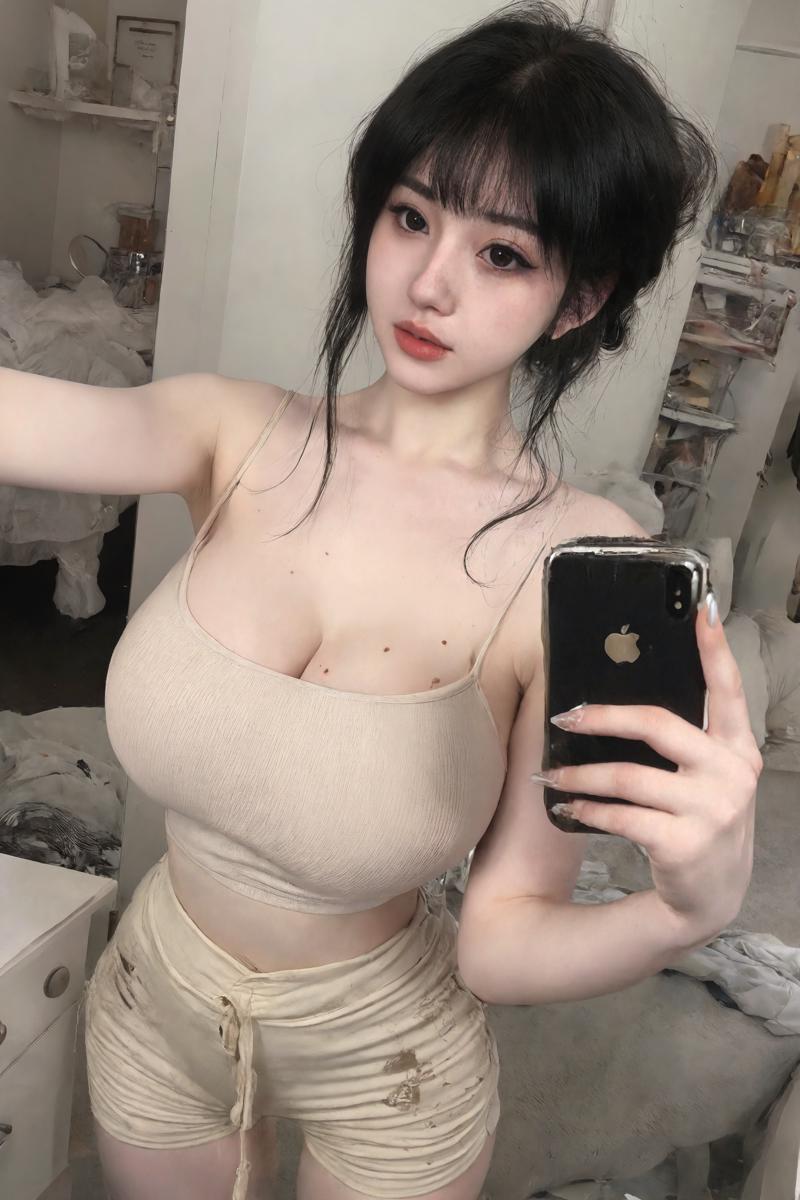
For example. Here's an image I made with an SDXL model:
And here's the same image with a Z-noise img2img. Notice how her face is cleaned up and the background looks considerably less 'noisy' and more consistent. It also sharpened and tidied up the appearance of the phone in her hand.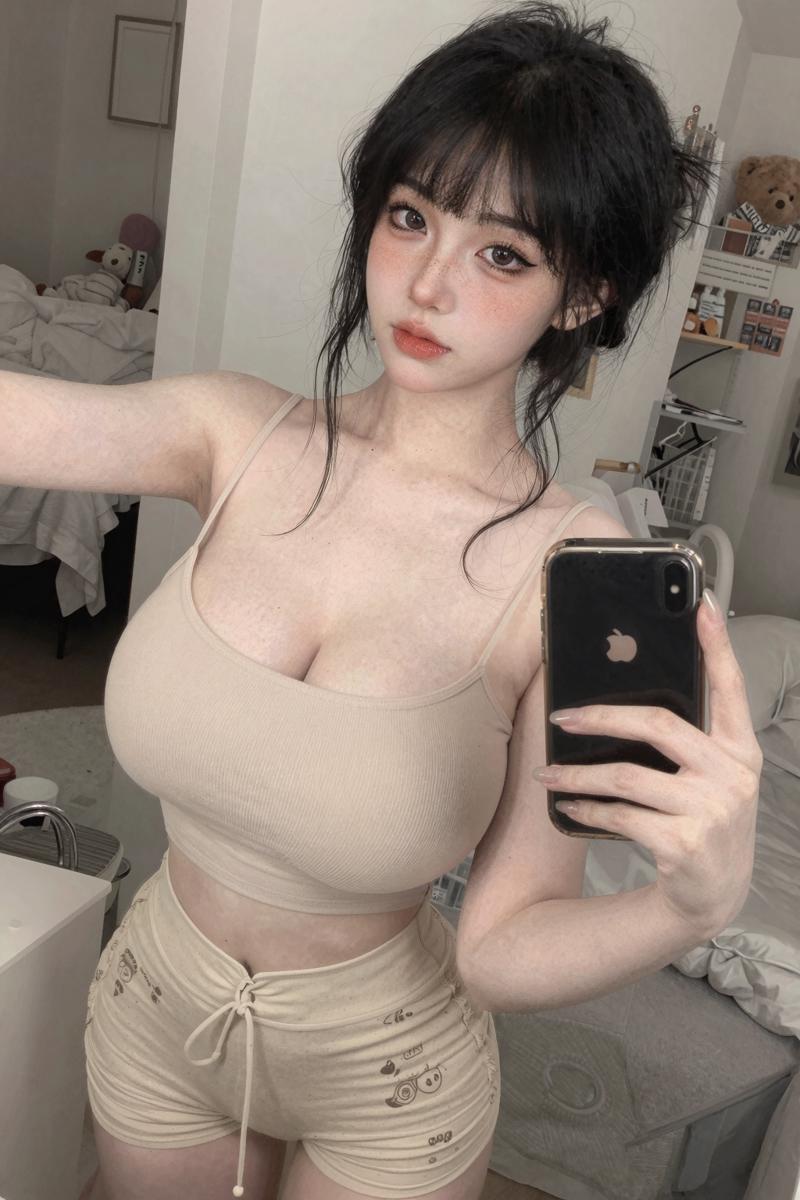
Z-Image Turbo has strong detail synthesis. At low noise levels it acts like a realism polish instead of a full redraw. You get pores, hair strands, cloth texture, micro-shadows, and more grounded lighting while keeping the same pose, face, and design.
How to Get it Working with NSFW Content
This is originally why I wanted to try out img2img with Z Image.
The only problem is, Z image doesn't know what a penis is. Or a vagina. At all. It butchers them. SO, the simplest solution my small brain can think of is just to mask out those naughty bits and have the rest of the image denoised. It seems to work well from my experiments.
For instance, here's a super lazy image I made, no face refine, just base image at 1216x832.
The image was created using Illustrij, an Illustrious model. I only used one LoRA (for Korean girls) and didn't really touch the image because I wanted to keep it kinda semi-real and plastic to show you how incredible Z image is.
The genitals need to be masked and that mask inverted so the rest of the image can be denoised with Z image.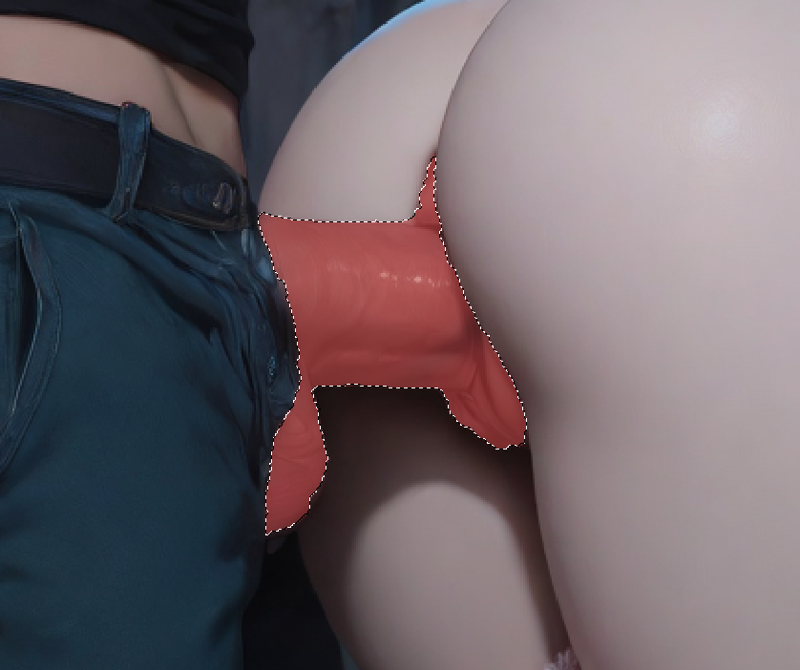
So once you invert the mask (in ComfyUI's mask editor), your Load Image node should look like this:
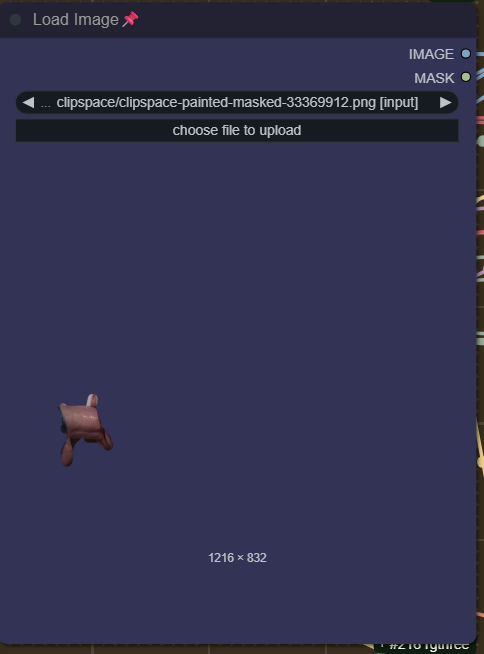
Then you can run your img2img.
This is the result I got from a 0.55 denoise. I added some details to her face and other small things, but the idea is the same:

Another example.
Before (generated with Nova Asian, one of my favorite models):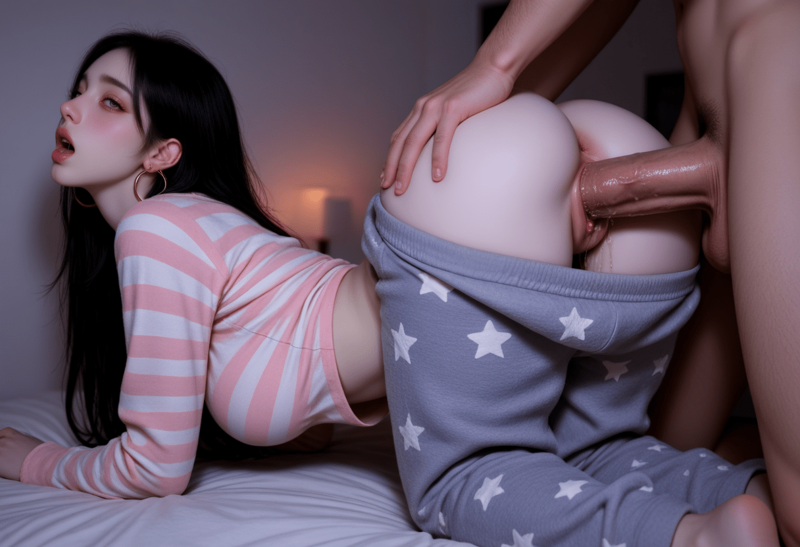
After (with Z image img2img):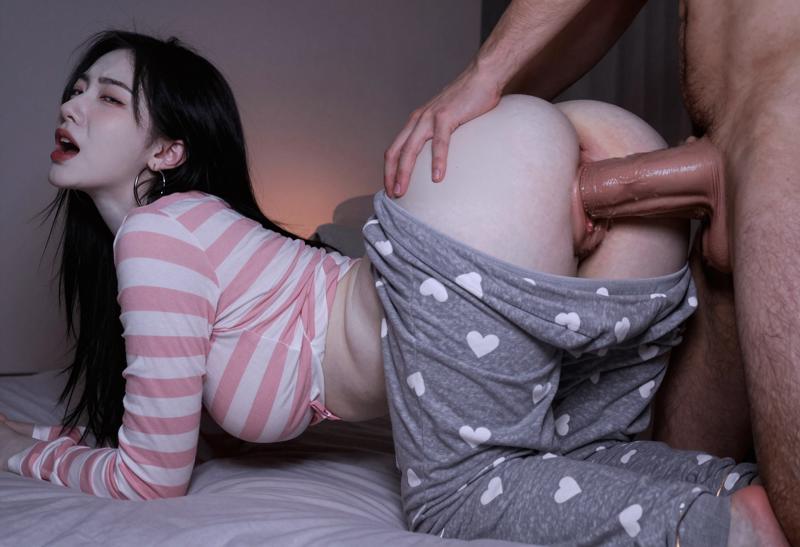
You can see a little bump on the guy's penis. This may be part of my prompt causing a problem, not sure, sometimes you get small little artifacts. If you absolutely can't get rid of little things like that, you can just manually heal/edit it out in Photoshop or a similar program.
OH and I just noticed, if you look near her feet you can see gold rings. That's because I left 'gold hoop earrings' in the prompt even though Z image should see that she has them on her ears. Just something to keep in mind as you toy with your denoise/prompts.
IMPORTANT: a shitty mask will result in shitty continuity between the genitals and the immediate surrounding content. I'm not the best at masking, but TAKE YOUR TIME making a super clean mask. You'll be glad you did.
Ideal Input
Semi-realistic portraits
Anime images with decent shading
Stylized art that already has some depth
Mildly photoreal renders from other models
If the base image is flat or heavily stylized, expect a lighter realism effect.
Denoise
Anywhere from 0.1 up to 0.65.
Of course we would like to get to 1.00 denoise as much as possible, but that obviously breaks structure and the original image style. This is a setting that needs a lot of toying with.
⚠️ If you are seeing a lot of noise/grain, don't forget to play around with the ModelSamplingAuraFlow. It has a strong affect on image composition. ⚠️
Sampler
I personally use euler/simple. If you know of a different/better sampler/scheduler combo, go for it. Res_multistep looks interesting.
Steps
9-20
This is totally up to you. I usually do 12 and the results are fantastic. Anything beyond that range seems not to add much and takes way longer.
CFG
1-3
Because we're doing a relatively low denoise img2img pass, you shouldn't be afraid to pump up the CFG a little bit. Aspects of the image won't become nearly as 'overbaked' as if we were doing a regular 1.00 denoise txt2img.
Workflow (regular img2img and img2img masked included as an attachment)
This is the current workflow I made for img2img with Z-image. It uses an AIO checkpoint of Z Image which can be found here (you can use the regular Z image model with separate clip/vae if you want of course, just redo the node connections):
https://huggingface.co/SeeSee21/Z-Image-Turbo-AIO/tree/main
Look through the workflow fully before you start. There's a main image gen part, FaceDetailer, HandDetailer, an optional SkinDetailer, Upscaler, and Save Image. Sorry for all the custom nodes, you can use other workflows if you want, I just created this myself over time and it works really well.
Paste your image in the Load Image node
Set prompt, parameters, etc.
Change denoise in the KSampler to whatever you want (start low, like 0.40)
Run it.
Toy with the prompt and CFG until you're happy.
It can be finicky so just be patient and learn to understand how the process works.
Custom Nodes You Need (not all of them necessarily)
ComfyUI Impact Pack
For the Detailers
ComfyUI-Custom-Scripts
Optional, has a nice 'Play Sound' node when the workflow finishes
rgthree-comfy
For the awesome LoRA loader
ComfyUI_essentials
For some math calc nodes
ComfyUI Impact Subpack
For the UltralyticsDetectorProvider node (critical for face/hand detailer)
Omar92's Quality of Life Suite:V2
The only pack I found that has an important Integer-to-Float node
comfyui_image_metadata_extension
Optional, just adds extra metadata so you can easily drag-n-drop your images into CivitAI with full (or mostly full) metadata pre-filling
ComfyUI-KJNodes
For keeping everything organized with GetNode and SetNode. You can try the workflow without this, but you'll have to reconnect everything and will end up with spaghetti noodles.
Tips
As I stated before, don't be afraid to play with the CFG, especially to highlight some key features that may be muted by default in Z Image. I often use CFG 2 or 3 with a weighted tag (she has very pale skin:1.2) to push super white skin. This is just an example.
This CFG playground can also work well for the FaceDetailer node.
You can transfer your initial prompt to the img2img workflow. It will probably need to be modified and this is something you will have to toy with. All my images are based off danbooru tags, so I usually look at a test render and see where there are artifacts from Z Image trying to figure out my prompt. Then I remove certain parts of the prompt or rewrite them in natural language. You could also take your image and/or prompt and plug it into an LLM to have it create a strong, natural language prompt that Z image would understand better.
From my understanding, it's better to start with an image you've already finished and upscaled. If you start with a low-res image, then do img2img, then upscale fiercely, you will notice some small problems like banding (which I have definitely encountered). img2img necessarily means you are kinda 'blending' two image styles, with the models having mostly very different understanding and implementation of shadows, lighting, color palettes, etc etc. So it's a good idea to check over the final image for imperfections that could otherwise have been fixed with a well-thought-out generation pipeline.
Before/After Expectations
Low-denoise Turbo won't replace composition or anatomy. What it does is give your existing image a natural finish, like running it through a realism filter that actually understands depth and texture.
You keep the same character. You keep the same design.
You just get a cleaner, sharper, more believable version.
Questions, comments, concerns?
If you have any questions or thoughts regarding this workflow or more generally, feel free to post a comment.
Btw, I do not consider myself an expert in any of this, I've just found this strategy works well. It's not intended to be final or perfect.
Description
No more spaghetti noodles. Everything has been reorganized with GetNode and SetNode from ComfyUI-KJNodes. Hope that helps in understanding where things go and are connected.
FAQ
Comments (25)
Where did you find a yolov12 face detector model? The newest version I've been able to find is yolov9c.
Thanks for the workflow!
you are GOD !!!!!!
i tried it with Q8_GGUF, it works but not perfectly, also with flat colour images not working for me, dont know what i am doing wrong , brother please share that girl with iphone image with workflow data embeded, please it would help me a lot .
I’ll post it when I get back from holidays :)
@SeoulSeeker thanks
@TaiLong here's that image you asked for. should have everything you need:
https://civitai.com/images/115876408
@SeoulSeeker thanks for it
Good trick I will test it,, ZIT is really good model. now I will use semi-realistic models for NSFW if my outputs are good. It's disappointing that after years the models we have now still struggle to make realistic NSFW, they're good for solo 1 person posing but for actual sex scene is difficulty. Wan 2.2 14b with Loras is the best I ever tested to gen sex scene from scratch.
ur such a g bro, love you
having an issue with seed vr2
what kind of issue? it would help if you posted your logs or provided some more detail
SyntaxError: Unexpected non-whitespace character after JSON at position 4 (line 1 column 5)
@edenmaster1988 try and identify the file that error's coming from. then paste the offending line into ChatGPT and ask it to diagnose. if that doesn't work, reinstall SeedVR2 cleanly
UltralyticsDetectorProvider和包含这个文件的ComfyUI Impact Subpack,以上两个文件因兼容性被禁用(comfyui桌面版)所以FaceDetailer和HandDetailer显示红框,我该如何解决这个问题呢?
UltralyticsDetectorProvider and the ComfyUI Impact Subpack that contains this file are disabled due to compatibility issues (ComfyUI desktop version), so FaceDetailer and HandDetailer show red boxes. How can I solve this problem?
Use portable ComfyUI
So, which ones do Lora use instead?
Sorry, I don't understand your question. Can you clarify?
@SeoulSeeker Maybe I'm a newbie to this workflow, which lora should I choose when I use it?
@SeoulSeeker https://image.dooo.ng/t/2026/03/25/69c3679967f05.webp
I opened it with runinghub and found that there is no lora.
You shouldn't need a lora just to run img2img semi-realism to realism
@SeoulSeeker https://postimg.cc/kRSPSYt6
Why is the runtime error reported?
# ComfyUI Error Report
## Error Details
- Node ID: 216
- Node Type: Power Lora Loader (rgthree)
- Exception Type: TypeError
- Exception Message: RgthreePowerLoraLoader.load_loras() missing 2 required positional arguments: 'lora_name_2' and 'lora_name_3'
## Stack Trace
```
File "/workspace/ComfyUI/execution.py", line 1837, in execute
output_data, output_ui, has_subgraph, has_pending_tasks = await get_output_data(prompt_id, unique_id, obj, input_data_all, execution_block_cb=execution_block_cb, pre_execute_cb=pre_execute_cb, v3_data=v3_data)
File "/workspace/ComfyUI/execution.py", line 658, in get_output_data
return_values = await asyncmap_node_over_list(prompt_id, unique_id, obj, input_data_all, obj.FUNCTION, allow_interrupt=True, execution_block_cb=execution_block_cb, pre_execute_cb=pre_execute_cb, v3_data=v3_data)
File "/workspace/ComfyUI/execution.py", line 632, in asyncmap_node_over_list
await process_inputs(input_dict, i)
File "/workspace/ComfyUI/execution.py", line 620, in process_inputs
result = f(**inputs)
```
## Logs
```
[object Object]
```
## Attached Workflow
Please make sure that workflow does not contain any sensitive information such as API keys or passwords.
```
Workflow too large. Please manually upload the workflow from local file system.
```
## Additional Context
(Please add any additional context or steps to reproduce the error here)
@YYYHHHTTT try the workflow without loras, they aren't really necessary
@SeoulSeeker Okay, I'll give it a try