


Although this is not a real inpaint, But the results are no different.
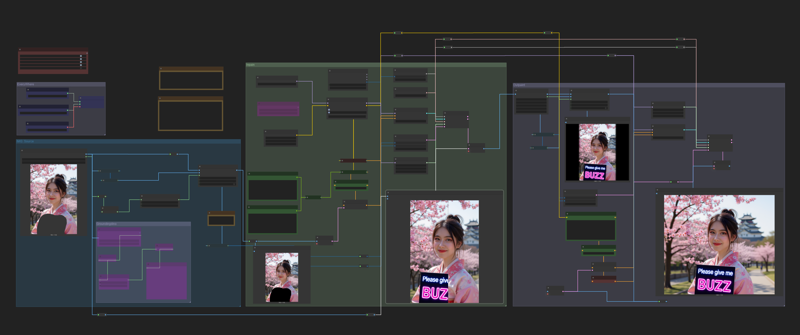
Download and test this workflow. You can do inpaint by marking image or prompt for edit by default Kontext behavior.
Now, in version 2
I have added an outpaint feature. It may not always work if there are too many obvious black areas in the rest of the image. However, it works well and I encourage you to give this workflow a try.
Description
FAQ
Comments (8)
thanks for share, but can not work on low vram computer. could you make this for low vram ?
Big Thanks
Sure i will update for you. However you can easily fix this yourself by changing the model from Kontext fp8_scaled to Kontext GGUF. Look at node Load Dffision. Remove this node and replace it with Node Unet Loader to load the GGUF model.
Download model from below this link, depens that you think is suitable for your VRAM
https://huggingface.co/QuantStack/FLUX.1-Kontext-dev-GGUF/tree/main
this works amazingly well,
unfortunately couldn't make the outpaint work, the transition is mostly too hard and obvious, feathering doesn't help with too obvious transition.
Outpainting may not be perfect, but from this example image of workflow I was able to do it and it wasn't too bad. There are many factors that can cause different results for each person, such as Prompt, Noise-Seed, Step, or Latent Image size.
tinnapop_ton I tried few different prompts with the same image as input after padding the image
outpaint the missing parts, outpaint gray regions on image and some similar prompts
it's acceptable for non-humanoid photos but cannot stitch ppl seamlessly.
thnx for the reply
it was working perfectly until yesterday comfyui update ... it became very very slow .. and sometimes my laptop crash .. it was working perfectly well for 1 week ago ... no idea what happened...
There are three reasons I can think of right now:
1. Latent size: If it's too large, Flux Context will be slow.
2. Number of steps.
3. Check if your model is Flux Context FP8.