

Update:
I have had very good results with the new Lightx2v LoRA (https://huggingface.co/Kijai/WanVideo_comfy/blob/main/Wan21_T2V_14B_lightx2v_cfg_step_distill_lora_rank32.safetensors) when used with this workflow. You can read more about this LoRA and its origins here (https://civarchive.com/models/1585622/self-forcing-causvid-accvid-lora-massive-speed-up-for-wan21-made-by-kijai). That writeup suggests a complex workflow is needed to use this new tool, but in my experience it works very well without the added nodes. To use it, you only need to do three things:
Add the LoRA to the provided LoRA loader node in the Settings area.
Change CFG to 1.0.
Change steps to a value anywhere from 4 to 20. I've been using 10 steps and my results have been very good.
Using this LoRA did not change my VRAM use at all and the video was produced MUCH faster than normal. It's so fast, it's easy to extend the transition time from 3 seconds up to 5 seconds to get a full 5 seconds of new material in the video and the result was still much faster than before.
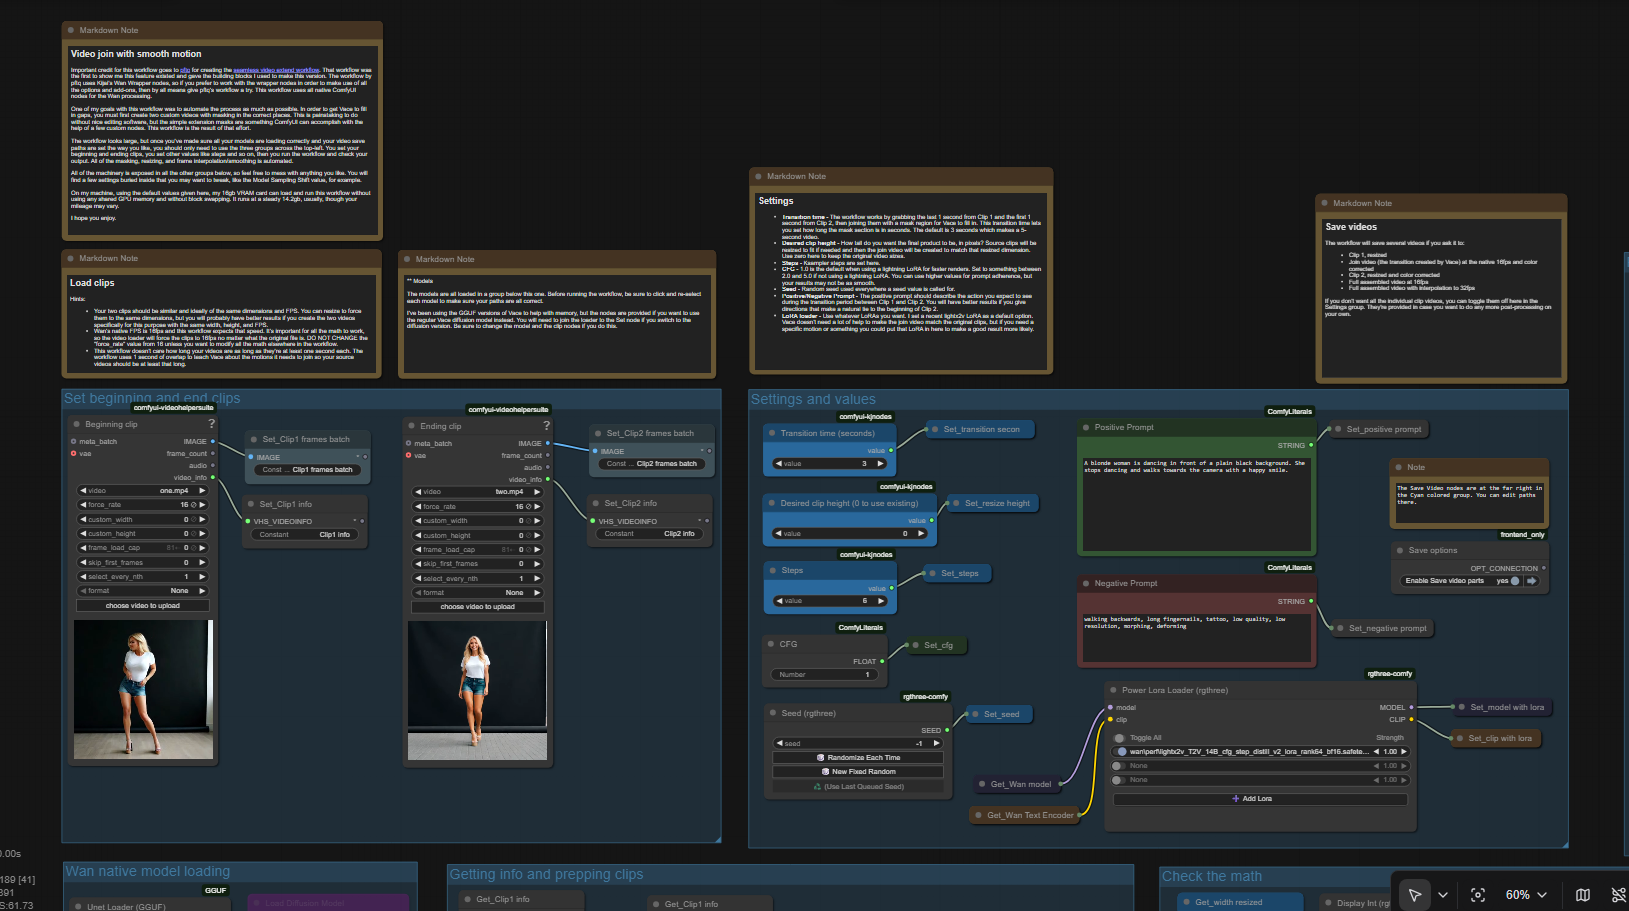
This workflow uses Wan with Vace to seamlessly join two video clips with a transition video that smoothly incorporates the motion on either side of the transition. The result is a 3-part video that runs without the jarring motion changes that you get by doing a simple "extend this video from the last frame".
Important credit for this workflow goes to pftq for creating the seamless video extend workflow. That workflow was the first to show me this feature existed and gave the building blocks I used to make this version. The workflow by pftq uses Kijai's Wan Wrapper nodes, so if you prefer to work with the wrapper nodes in order to make use of all the options and add-ons, then by all means give pftq's workflow a try. This workflow uses all native ComfyUI nodes for the Wan processing.
One of my goals with this workflow was to automate the process as much as possible. In order to get Vace to fill in gaps, you must first create two custom videos with masking in the correct places. This is painstaking to do without nice editing software, but the simple extension masks are something ComfyUI can accomplish with the help of a few custom nodes. This workflow is the result of that effort.
The workflow looks large, but once you've made sure all your models are loading correctly and your video save paths are set the way you like, you should only need to use the three groups across the top-left. You set your beginning and ending clips, you set other values like steps and so on, then you run the workflow and check your output. All of the masking, resizing, and frame interpolation/smoothing is automated.
All of the machinery is exposed and I hope it's tidy enough to follow without too many crazy node connectors, so feel free to mess with anything you like. You will find a few settings buried inside that you may want to tweak, like the Model Sampling Shift value, for example.
On my machine, using the default values given here, my 16gb VRAM card can load and run this workflow without using any shared GPU memory and without block swapping. It runs at a steady 14.2gb, usually, though your mileage may vary.
I hope you enjoy.
Description
Replaced old custom nodes that no longer install with latest versions of ComfyUI.
FAQ
Comments (2)
i need understand how use 24fps videos instead of 16, cause i tried to replace all 16 in the workflow but the output is strange it's lagging
I just did a test with the .json for the workflow straight from the download. I reviewed the math and remembered (because I had forgotten about this) that I don't ever set a 16fps rate anywhere, I based everything on the loaded frame rate of the source clip.
In the video upload widgets for begin and end clips, there is a field for "force_rate". That defaults to zero, which means to just use whatever frame rate is reported by the video. You can type "24" into that box and the system will use a 24fps rate for all the math. If you look in the "check the math" group with a bunch of display boxes, you will see the number of frames the workflow is going to use for everything, so you can verify it. The workflow is designed to use a 1-second overlap to carry the motion through at the beginning and end, so your "overlap" frames should be one second of frames, which is 24 if you set that force_rate value.
I ran the workflow this way using the videos in my screen shots, and it worked and gave me a smooth result.
The only challenge you may have is in convincing wan 2.1 Vace to give you a 24fps output. If the output of Vace is 16fps motion, the action in the middle will look like it's at a different speed from the beginning and end. If you can solve that part, you should be able to use this workflow just by setting that value as I said above.