


Nunchaku Multi_input+Lora
Now includes two separate workflows:
------Kontext_gguf&safetensors__Multi_input&Lora.json
------Kontext_nunchaku_Multi_input&Lora.json
Anyone Installed mit-han-lab/ComfyUI-nunchaku but can't get it workin' right? Look here!
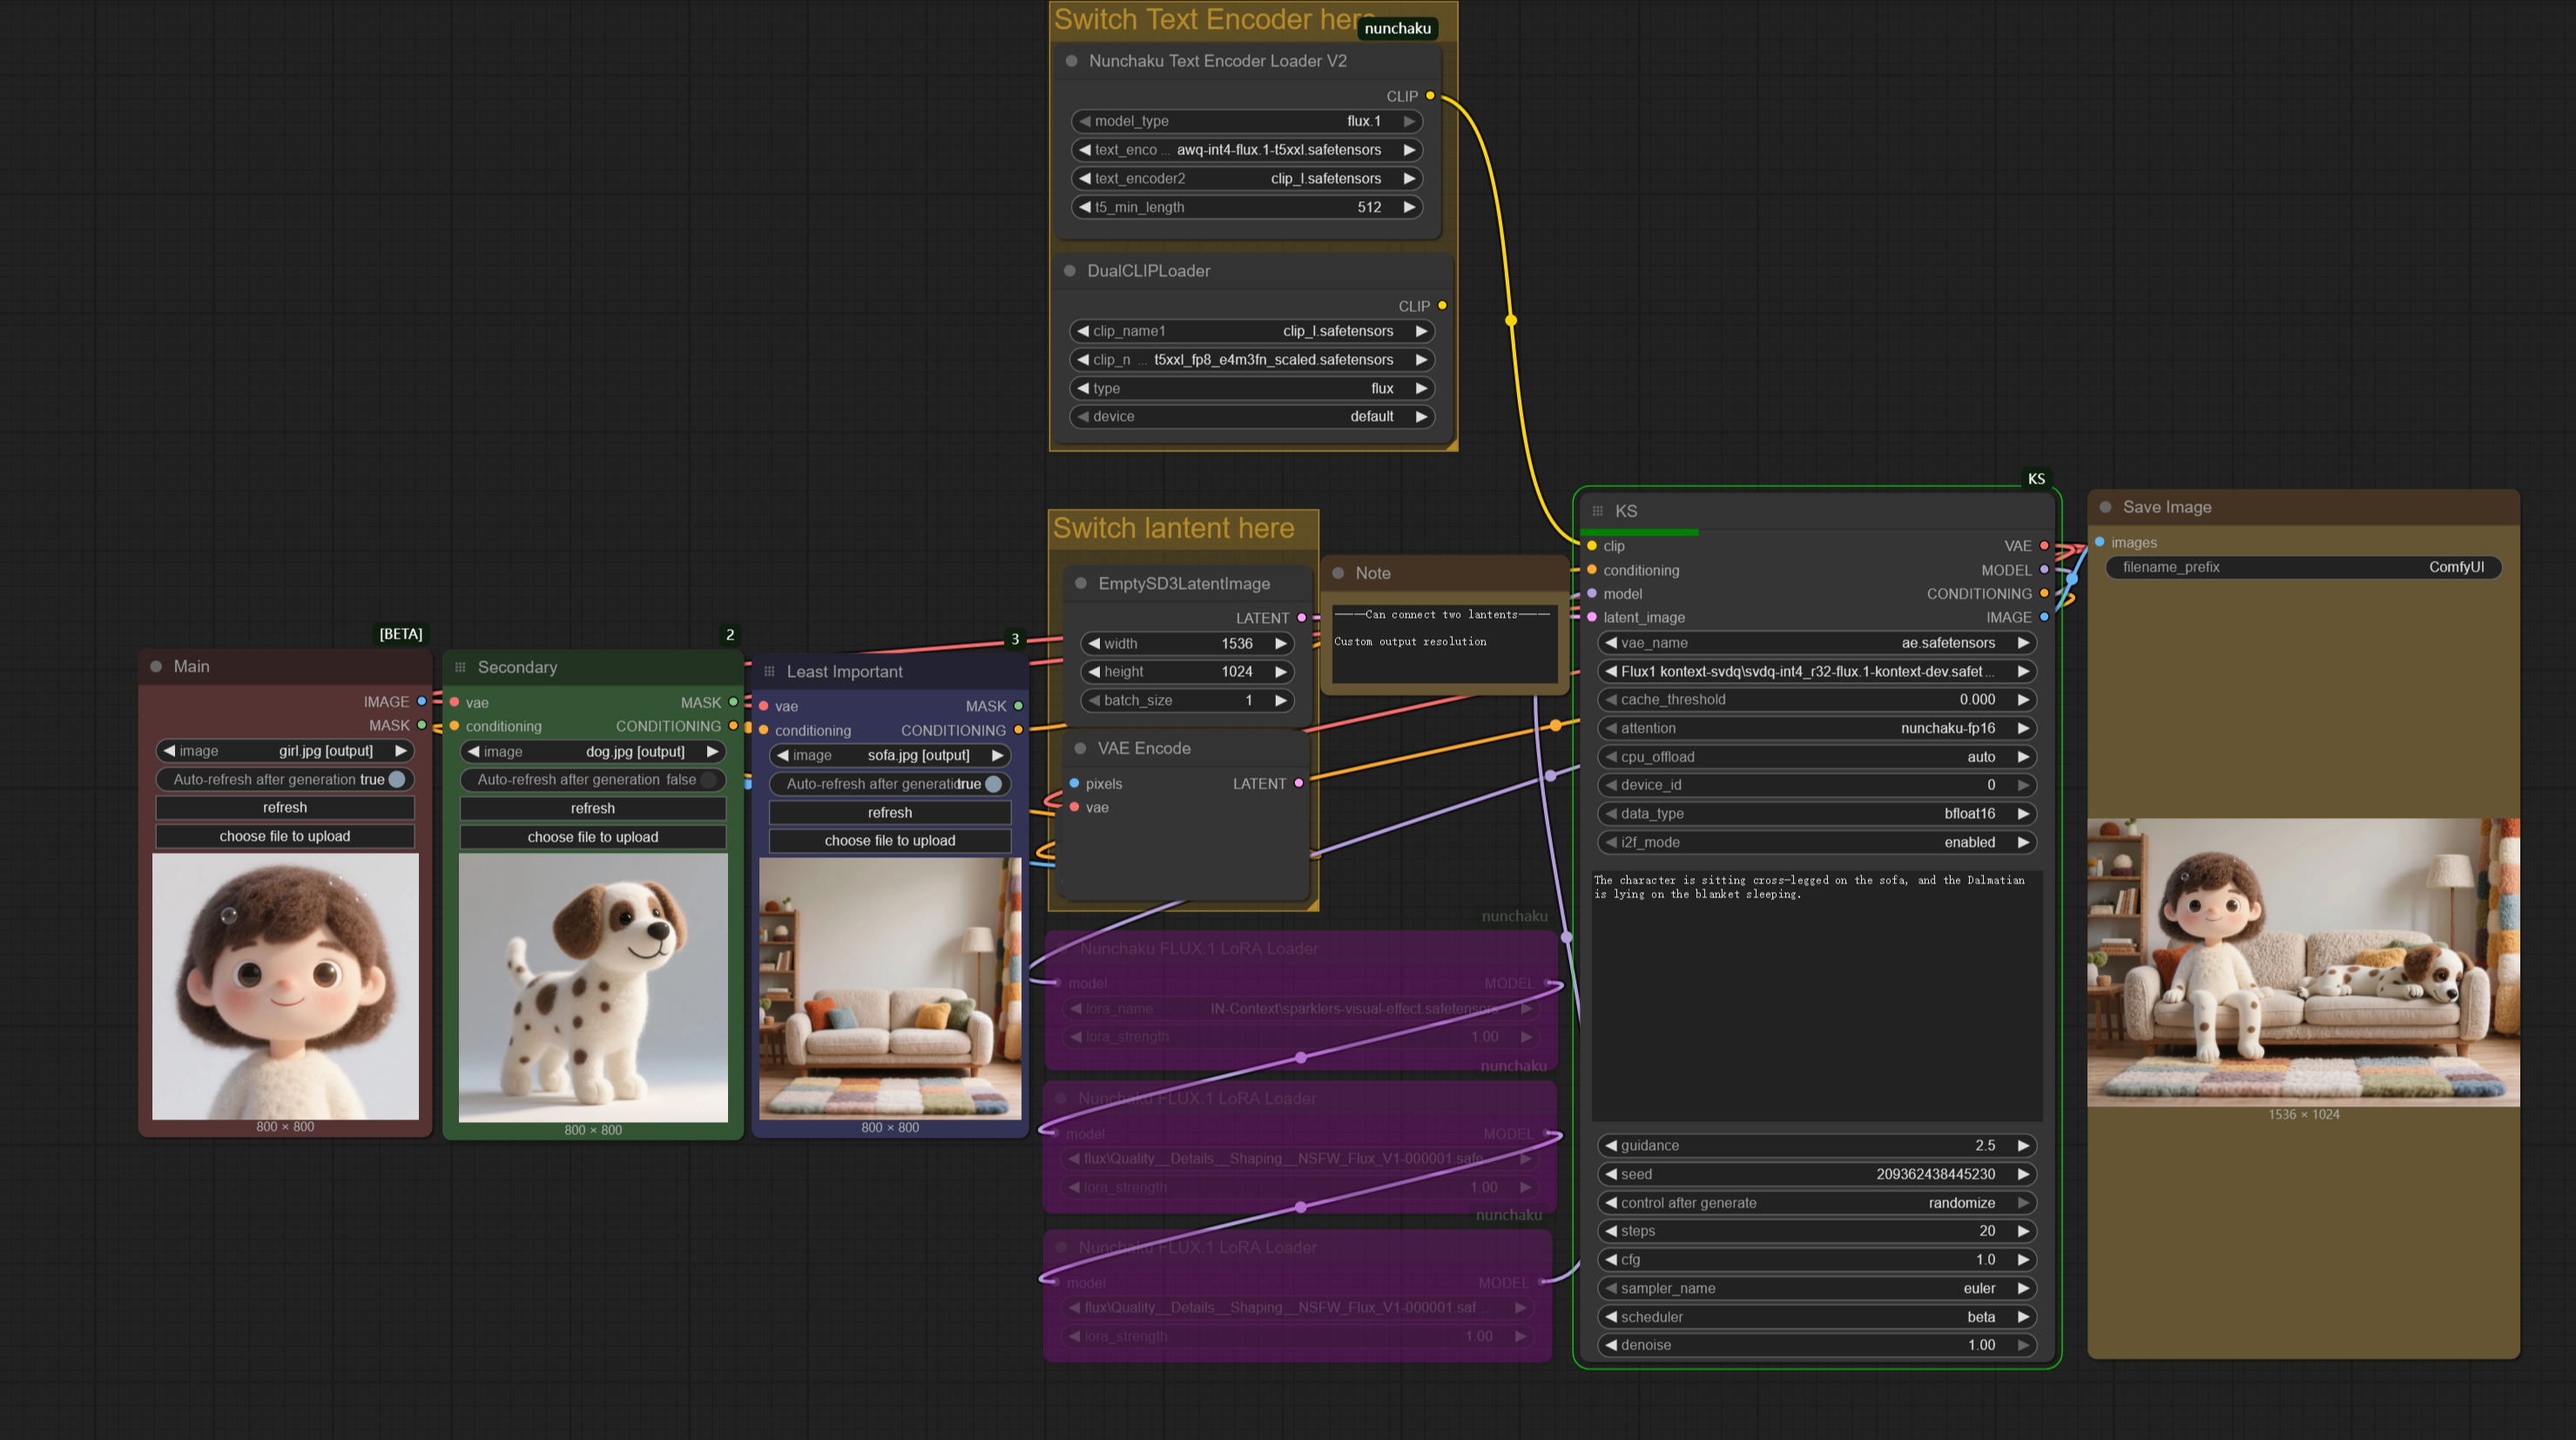
so I really took my time setting up this workflow this time around. For anyone who's used the official nodes but doesn't know how to use multiple image inputs, or how to customize the generation resolution, or how to switch to the nunchuka-textencoder model… this streamlined workflow is perfect for you!
The image generation time using nunchak's int4 model is now, like, one-fourth of what it used to be for me, and with very little loss in quality. I honestly don't even want to use gguf anymore.
Nuchaku Checkpoint:
https://huggingface.co/mit-han-lab/nunchaku-flux.1-kontext-dev/tree/main
aqw-int4-flux.1-t5xxl (Optional):
https://huggingface.co/mit-han-lab/nunchaku-t5/tree/main
Nunchaku comfyui node:
https://github.com/mit-han-lab/ComfyUI-nunchaku
ComfyUI-nunchaku Installation Guide (windows):
1.In the address bar of the ComfyUI_windows_portable directory, type cmd and press enter. Then, enter the following commands to check your torch and python versions:
"python_embeded\python.exe""python_embeded\python.exe -m pip list"
For example, mine shows python 3.12 and torch 2.5.1+cu124.
2.You can install the nunchaku node (ComfyUI-nunchaku v0.3.3) using ComfyUI-Manager, or manually by typing cmd in the address bar of the ComfyUI_windows_portable\ComfyUI\custom_nodes directory and then running git clone https://github.com/mit-han-lab/ComfyUI-nunchaku.git.
3.Download the nunchaku whl file that corresponds to your versions from: https://github.com/mit-han-lab/nunchaku/releases. I already checked the version info in step 1, so I'll download nunchaku-0.3.1+torch2.5-cp312-cp312-win_amd64.whl. Afterdownloading, place the whl file in the ComfyUI_windows_portable directory, and then install it using "python_embeded\python.exe -m pip install nunchaku-0.3.1+torch2.5-cp312-cp312-win_amd64.whl".
4.After installing, don't forget to update ComfyUI to the latest version and restart. Also, remember to place the downloaded nunchaku model in the diffusion_models folder. For Nvidia 40-series cards and below, choose int4; for 50-series, you can choose FP4.
5.I found that python 3.11-based ComfyUI didn't work properly in my tests, but i'm not completely sure about that.
gguf+Lora
Got questions like 'Is there too much going on in the workflow?' or 'Are the hardware requirements too steep?' or 'Where do I even download the models?' or 'Does the output keep ignoring my input image?
This workflow is actually made for beginners. You seriously just need this single workflow file, and that's it. And honestly, I barely did anything on it; I just took the official ComfyUI workflow, tweaked it a little, and added support for gguf and Lora.
How to Use:
1. Drag the workflow or example image into ComfyUI, and install any missing nodes.
2. Download the model, place it in the diffusion_models folder, then update ComfyUI and restart.
Checkpoint:
https://huggingface.co/bullerwins/FLUX.1-Kontext-dev-GGUF/tree/main
Guide:
https://docs.bfl.ai/guides/prompting_guide_kontext_i2i
https://docs.comfy.org/tutorials/flux/flux-1-kontext-dev
https://comfyui-wiki.com/en/tutorial/advanced/image/flux/flux-1-kontext
Here's what Flux1 Kontext can do right now, and I can't even list it all, but these are the main things:
1. Change image style / Style transfer.
2. Add or remove objects in the image.
3. Make characters perform different actions (like turning around) or change their expressions while keeping their look consistent.
4. Combine multiple characters and scenes.
5. Virtual try-on for models. (I haven't gotten this to work in my tests yet. It worked, but I'm not happy with the results. ~The good news is that it is open source and free)
so if you're selling clothes, check this out for model try-ons: if you don't specify a particular model, just give it the images of the clothes, and let Kontext generate the model for you. You'll actually get much better results that way!
Description
FAQ
Comments (39)
workflowKS node?
What you need is a beginner's tutorial. Try searching ‘How to use ComfyUI-Manager to install missing nodes and update ComfyUI’.
Rename the node from "workflowKS" to "KS". Save the workflow. reload the workflow, don't simply refresh it.
The node was renamed and is giving an error for this reason.
@Takethis16 THANK YOU!!!
@Takethis16 Does not seem to work for me. I renamed the node, saved, clicked X to close the workflow, reloaded it from the workflow panel but it is still showing the node as missing.
@Lolel Maybe try dragging the workflow into ComfyUI again?
@Lolel just go workflow, open and select the workflow you just saved.
need to learn what "Nunchaku" is.
@Takethis16 can`t solve...the same
Cant solve this one. Tried renaming to KS as suggested, it made me even download a node "NAG", but still nothing
@SamLiu not really. the missing nodes have to show up in missing nodes to seek a begginers tutorial.
@engagehostiles659 Double-check that you've successfully installed the Nunchaku nodes. Then, try dragging the workflow into ComfyUI again. OR, right-click on the KS node and select “convert to node.” >refresh
In my case, I tried renaming "workflowKS" to "KS," but it still indicated that the nodes could not be found. However, upon closer investigation, I discovered an error in the console log showing that the nunchaku custom node was not installed correctly. So, I carefully reread the installation instructions and installed the correct wheel file, which resolved all the issues, and the workflow began to operate normally. If you are still unable to resolve the problem, I believe the first step is to confirm that your nunchaku custom node are installed correctly.
P.S. Translated with the help of an LLM, so please excuse any errors in the English.
If you search for KS in the Nodes Library tab on the left of the screen, you should be able to find it. You just have to switch over your connectors.
something is wrong with this node; I've tried to change the "Node name for S&R" to KS, workflow>KS, nothing. I even copied the name from a newly added KS node - the new one worked, the workflow one - nope. So I just recabled everything to the new node and it clicked.
I have Python 3.10.6, and comfyui shows pytorch version: 2.7.1+cu128 when it boots, i'm on windows so i tried to install nunchaku-0.3.2.dev20250630+torch2.7-cp310-cp310-win_amd64.whl , but i get "ERROR: nunchaku-0.3.2.dev20250630+torch2.9-cp310-cp310-linux_x86_64.whl is not a supported wheel on this platform."
linux_x86_64.whl? linux or win?
Make sure that you download the correct wheel for your OS, it can easily happen that you accidentally copy&pasted the wrong link. The error message clearly states that you tried to install the wheel intended for use with Linux. Also don't install the nightly/dev version of Nunchaku. 0.3.1 is recommended for use with Comfy. Give this one a try: https://huggingface.co/mit-han-lab/nunchaku/blob/main/nunchaku-0.3.1%2Btorch2.7-cp310-cp310-win_amd64.whl
pip installed the linux file? maybe.
@Silvicultor I ended up using "pip install torch==2.6 torchvision==0.21 torchaudio==2.6" like the github guide says, then used "nunchaku-0.2.0+torch2.6-cp310-cp310-win_amd64.whl" and it works, great wf indeed!
Got this to work after a bit of messing about. Thank you so much for such a comprehensive workflow.
Thanks to you! Your kind words really fuel my work.
very nice, but hard to instal
Can this be done without the nunchaku???
Made a few adjustments, so feel free to download it again.
how can i download Quality__Details__Shaping__NSFW_Flux__V1-0000001 ?
I love this Workflow thanks.
All I get is loop error when trying your workflow?
Nunchaku is a dependencies nightmare, so make sure you have the right version to match your python and torch versions (follow OP's installation instructions, above)
can it do NSFW?
如何下载 Quality__Details__Shaping__NSFW_Flux__V1-0000001?
I have encountered this problem, can anyone help me please?
Prompt outputs failed validation: FluxGuidance: - Required input is missing: conditioning
Make sure ComfyUI is updated to the latest version. When you're using it, remember to bypass any image input nodes you're not actually using. That's the only solution I can think of. I have no idea about your workflow, though. Maybe you could record your process and upload it to Reddit or YouTube? I'm sure someone there would be able to help you out.
i have the same error
It seems I found the problem through GEMINI. It told me that I need to unpack it, meaning breaking these composite nodes into native ones, and then it can run normally.