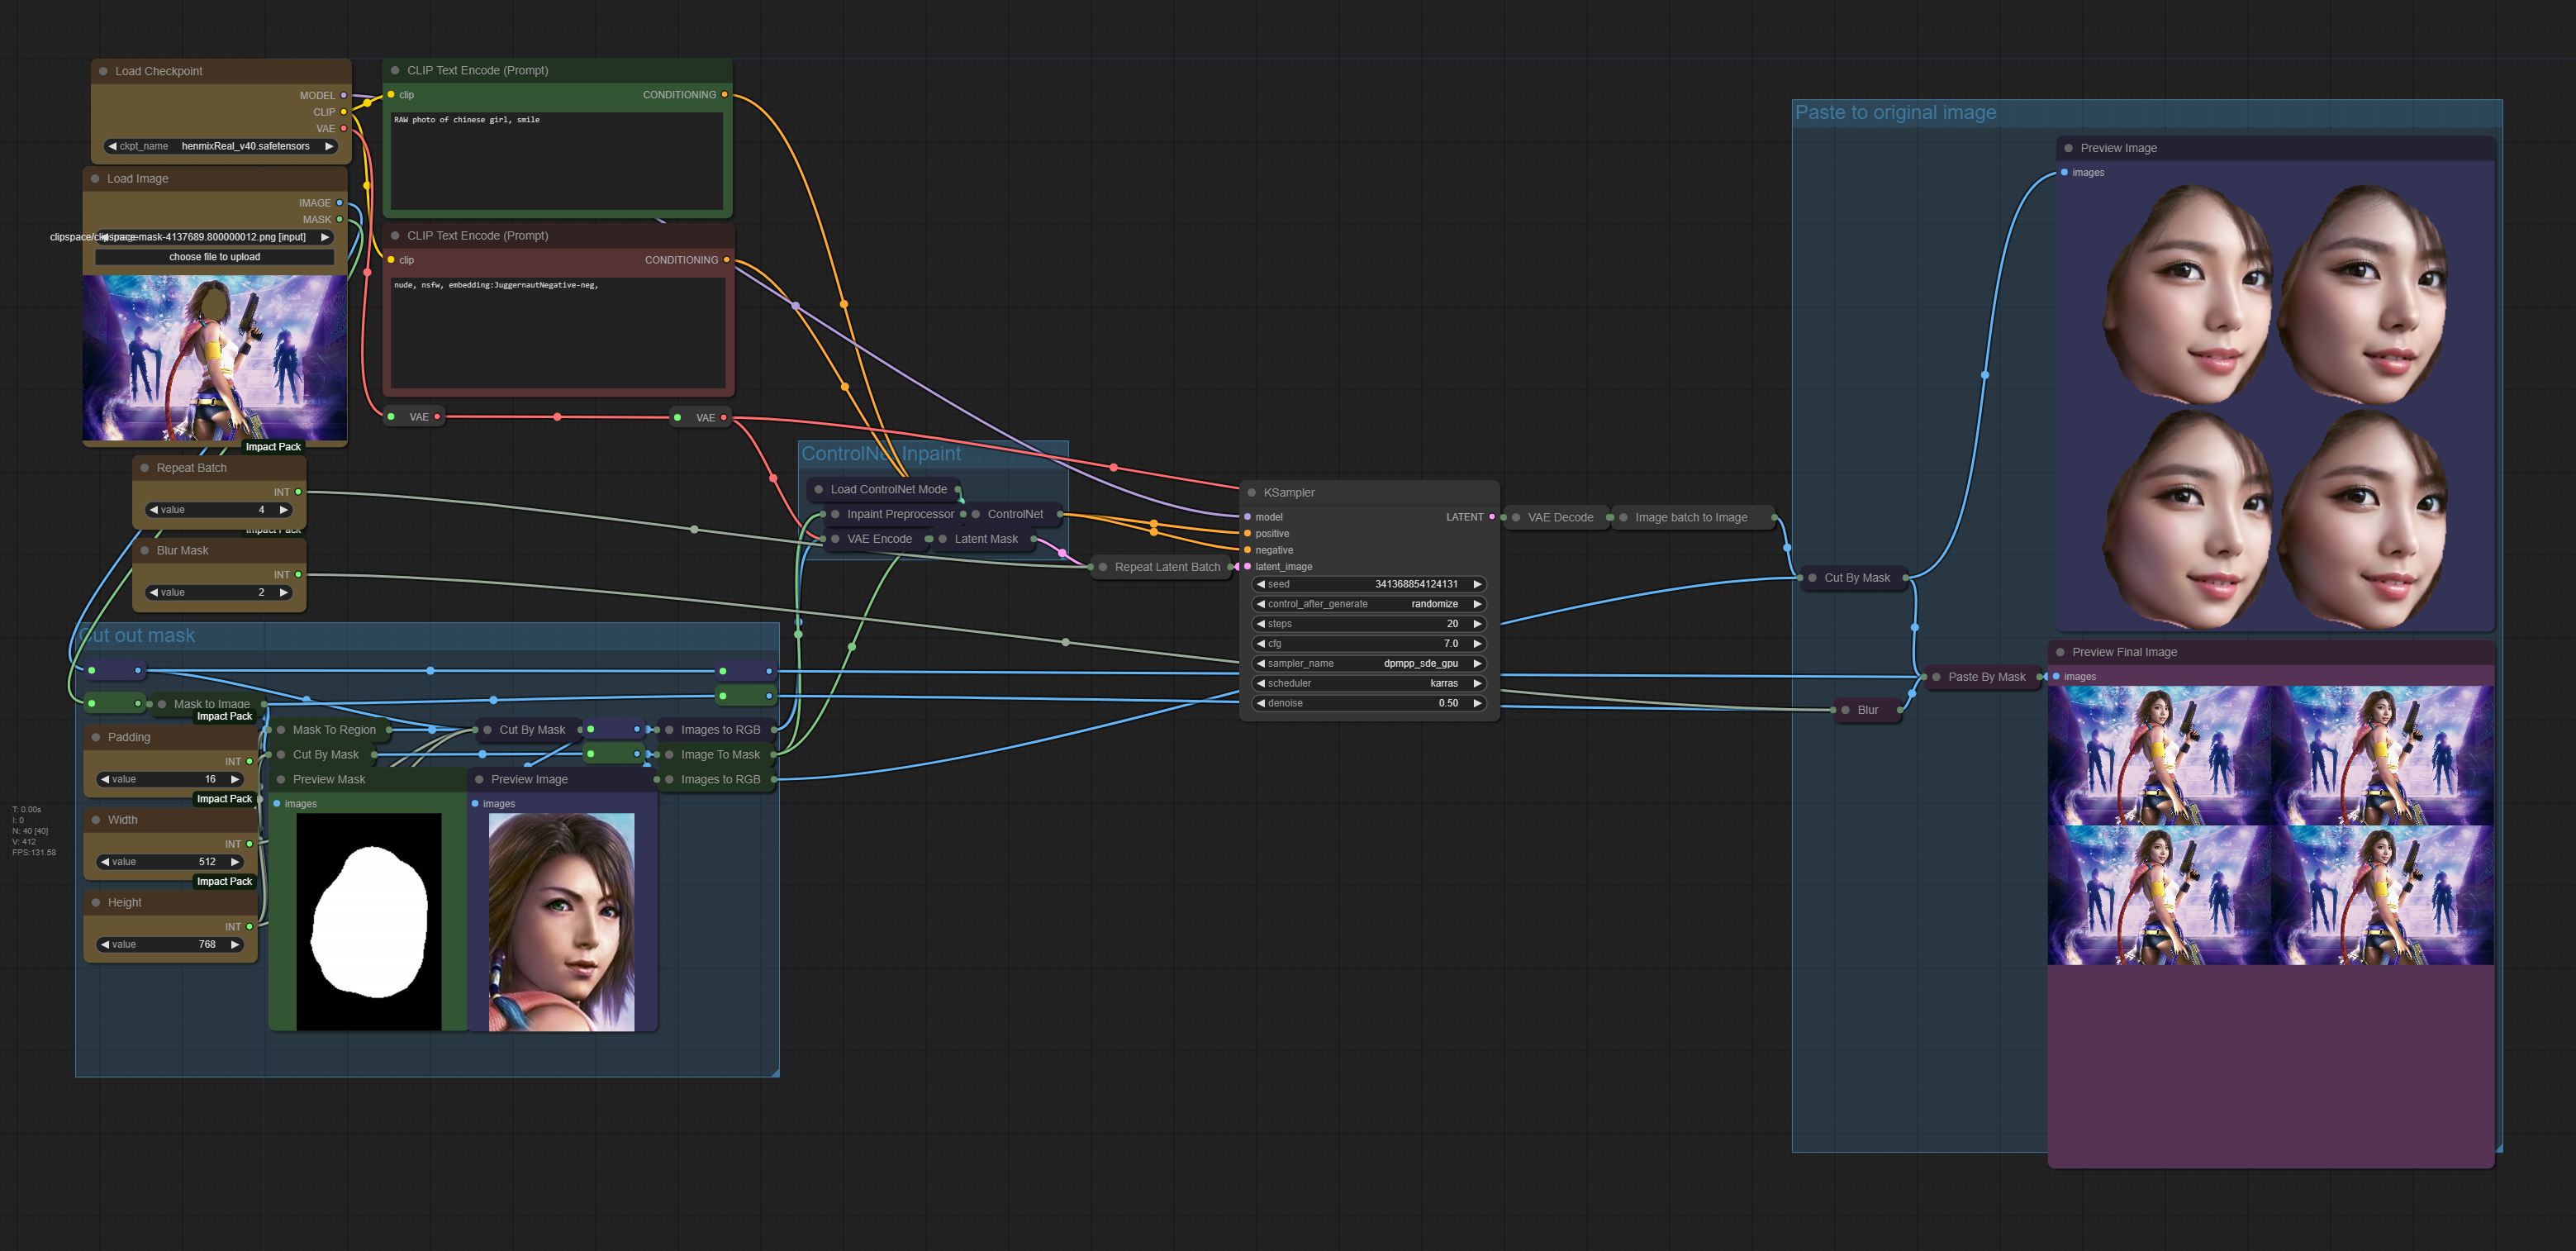
Showing an example of how to inpaint at full resolution.
Using masquerade nodes to cut and paste the image.
The width and height setting are for the mask you want to inpaint.
Padding is how much of the surrounding image you want included.
Note that image to RGB node is important to ensure that the alpha channel isn't passed into the rest of the workflow.
If the pasted image is coming out weird, it could be that your (width or height) + padding is bigger than your source image. Change your width to height ratio to match your original image or use less padding or use a smaller mask.
Description
FAQ
Comments (3)
I think this is exactly what I was looking for.
Perhaps a simple upscale to the padding before inpainting and downscale before pasting back to the original. Or is this too hard?
Nevertheless, I vote for this workflow as the most useful one since the beginning of comfy.
Thank you Sir!
One more question,
Why should the padding match the original image, inpaint is looking only the cropped image and painting only the mask, no?
So if the original image is 1024x768 and the padding is, say, 730x800 why would this be a problem?
Ohhh, good idea on the upscale then paint then downscale. YMMV on that and depends on what you are in painting.
To clarify on the part about the sizing, I’ve noticed some bugs with masquerade nodes if the ratio doesn’t match the original image’s dimensions and the mask + padding is large enough to exceed those dimensions.
You can see that happening with an image of 512x768 and having an inpaint mask of 512x512. If your mask is huge, it doesn’t calculate the mask correctly.
When I try to run this comfy highlights the "load controlnet mode" node red, meaning I can't use it. Any ideas?