


DISCLAIMER
I only know this works for manual installation and forks.
I run AMD so I can't use the desktop variant of Comfyui.
So my version would be considered Comfyui portable
This workflow model is an attempt to give someone who is directly coming from A1111 to Comfyui a similar setup as what they would be used to, with a few extras.
This is just for the Text to Image section of A1111, nothing else.
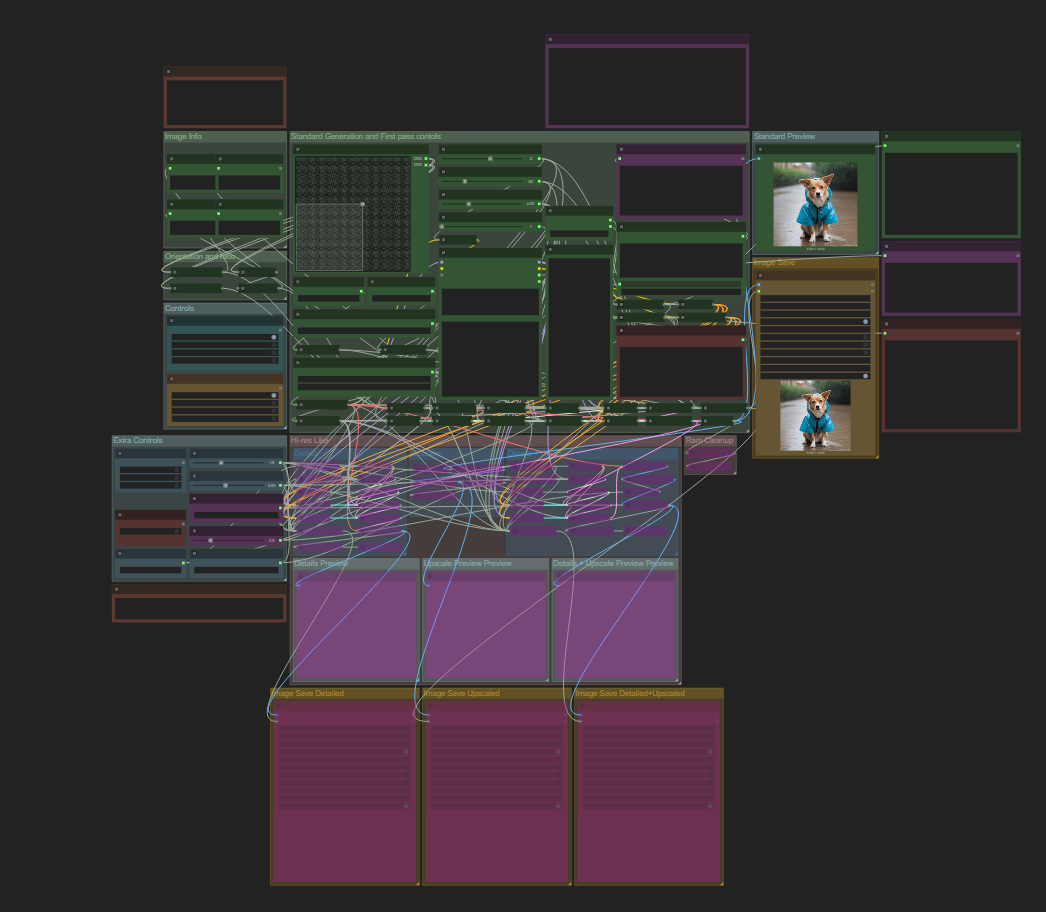
Workflow includes
Resolution 2D picker that will attempt to snap the output to 8 different ratios.
Wildcard support
Slides for Steps, CFG, CLIP stop, and batch size
Controls for various options Such as Upscaler and a function like the hi-res option avalible in A1111
Ram Cleaning (both vram and system)
This is the workflow I came up with overtime, taking inspiration from other workflows I have used or seen. It's by no means perfect or the best.
Please read the notes included inside the work flow, and feel free to comment and ask questions on this post about the workflow, I'm constantly trying to improve.
Installing the Workflow JSON
1. Drag the .json file into your Comfyui installation.
2. You'll likely see errors about missing custom nodes, Comfyui will prompt you to install them.
Accept and proceed.
3. If missing node errors persist after relaunch:
Click Manager at the top of the UI.
Select Install Missing Custom Nodes to retry installation.
This workflow includes the Comfyui-styles_csv_loader extension, which allows you to import prompt styles from a styles.csv file—perfect for users coming from A1111.
To Use:
Click the Style Loader node in the workflow
Choose from your saved styles. That's it, the workflow handles the rest.
How to Move Styles from A1111 to Comfyui
1. Locate styles.csv in A1111
Open your A1111 folder.
Look for styles.csv in the root, the same place where webui-user.bat is.
2. Copy the File to Comfyui
Paste styles.csv into the root directory of your Comfyui install, where Comfyui.bat is.
3. Restart Comfyui (optional)
This step assumes you already had Comfyui running, if so you need to restart it so it can load your styles.
If you don't have a styles.csv or don't want to migrate yours the work flow does require one, I've included a blank styles.csv with the upload for you to grab if you wish.
If you already have models from A1111 or another setup—checkpoints, LoRAs, VAEs, or upscalers you don’t need to download them all over again. Comfyui supports custom paths through extra_model_paths.yaml.
How to Set It Up:
1. Find or Create the File
If using Comfyui Portable, rename the example:
extra_model_paths.yaml.example → extra_model_paths.yaml
If using Comfyui Desktop (installer version), create or edit:
%APPDATA%\Comfyui\extra_model_paths.yaml
2. Edit the File to Point to Your Existing Models using Notepad. Here’s an example, if your A1111 models live in C:/A1111/models/:
yaml
Comfyui:
is_default: true
base_path: c:/A1111/models
checkpoints: Stable-diffusion/
loras: Lora/
vae: VAE/
upscale_models: ESRGAN/
clip_vision: CLIP-Vision/
controlnet: ControlNet/
3. Restart Comfyui Your existing models should now appear in the node dropdowns as if they were local.
This section below is if you have a Lora loader asyncio error, I had to fix this myself because Im using a Comfyui fork," Comfyui-zluda".
If you come across the Lora Loader "(LoraManager) asyncio.run() cannot be called from a running event loop" error after trying to load a lora.
Follow these steps:
1. Install the required packages inside Comfyui's embedded environment
Navigate to Comfyui\venv\Scripts
type cmd into the file explorer bar to open a terminal there, then run both:
python -m pip install nest_asyncio
python -m pip install asyncio
2. Patch your main.py for nested async compatibility In your Comfyui install folder:
Locate main.py, right-click → Open in Notepad.
Add the following at the top:
import nest_asyncio
nest_asyncio.apply()
3. Then save and close the file, Hit control+s to quick save.
This change patches the event loop so that Comfyui can handle async operations (like LoRA loading) without throwing runtime errors.
Description
Changed some things around, and used a split sampler to maybe reduce render times a little. The styles included is blank, so there won't be issues.