English is not good!英语不好警告!
注意:当使用多个角色+其他LoRA时,单次放大可能无法获得较好的效果。最好像我工作流一样 在放大完后再添加一个K采样生成一次。(可以是你原来的模型(应该?) 我是用的别的模型。如果生成或者放大出现报错 大概率是分辨率设置的问题 需要设置成64的倍数。
我在这里分享的所有图片都是原图,你可以拖入到你的comfyui查看tag以及其他信息。
tips:When using multiple LoRA models and generating multiple characters, a single upscaling pass may not yield optimal results. It's best to follow a workflow like mine: perform upscaling first, then connect a K-sampler for the final generation.
If there is an error message, it should be due to the resolution setting issue. The resolution needs to be set to a multiple of 64.
All the pictures I'm sharing here are the original ones. You can drag them into your comfyui to view the tags and other information.
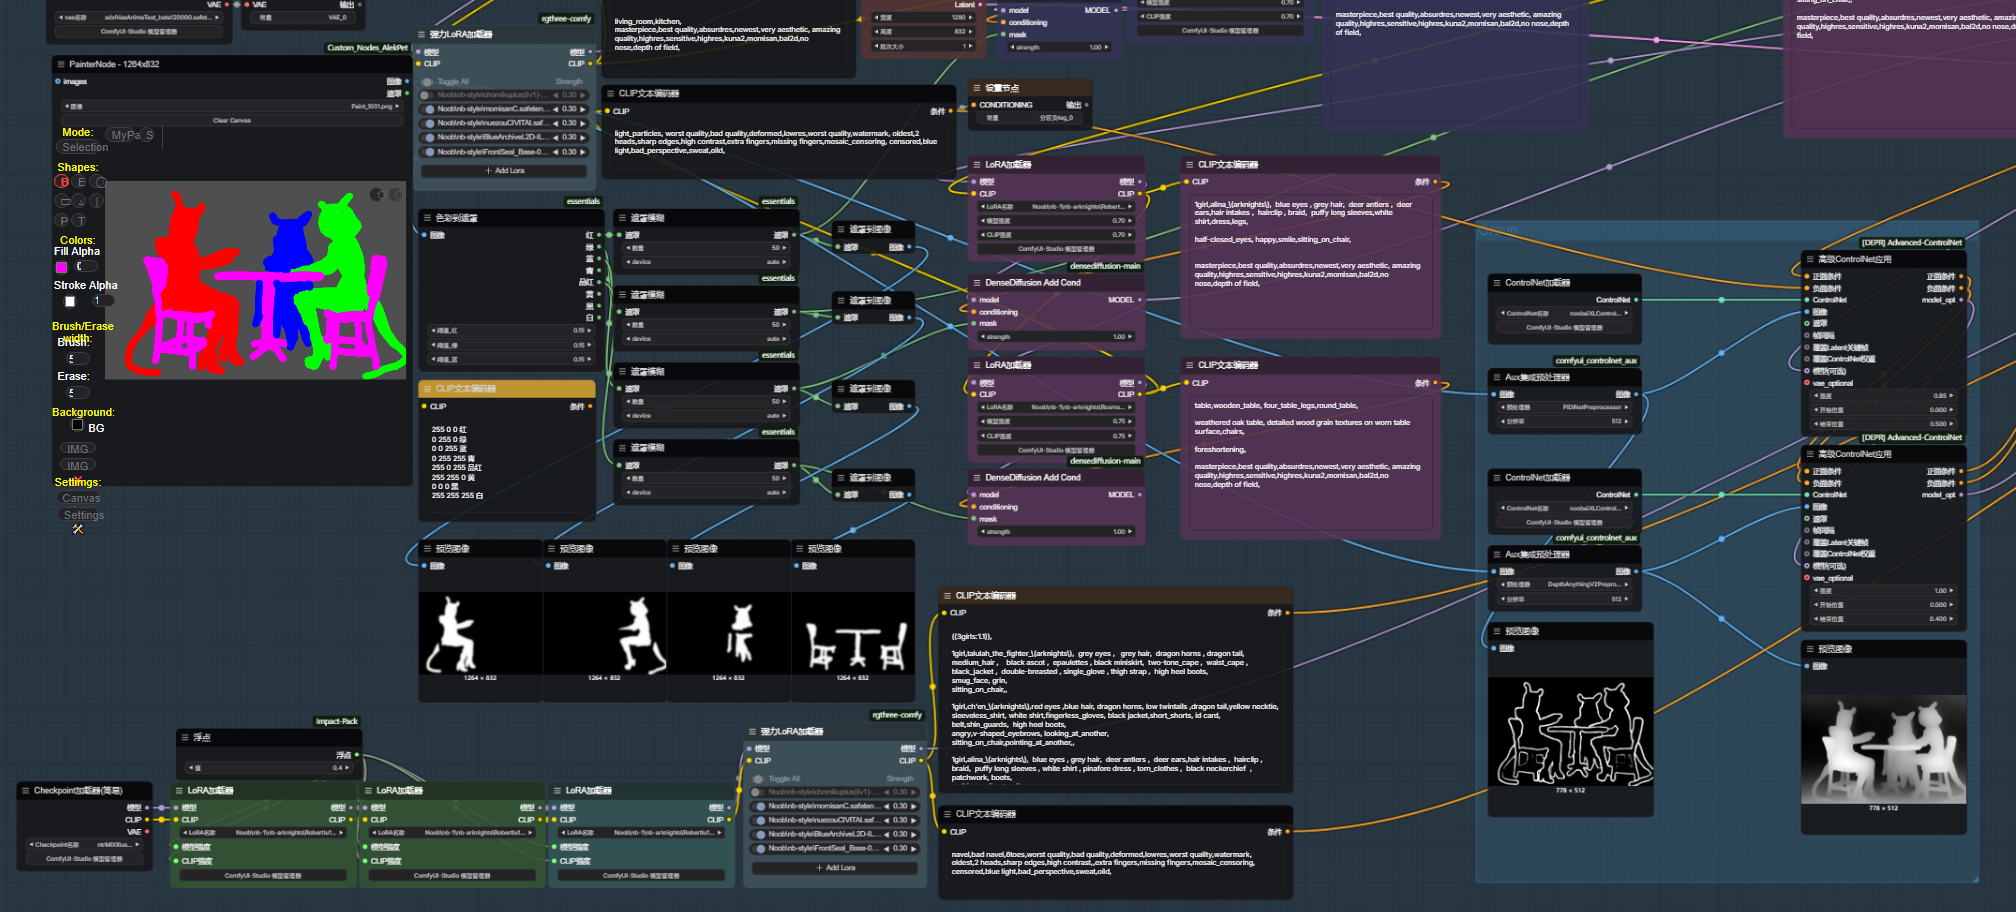
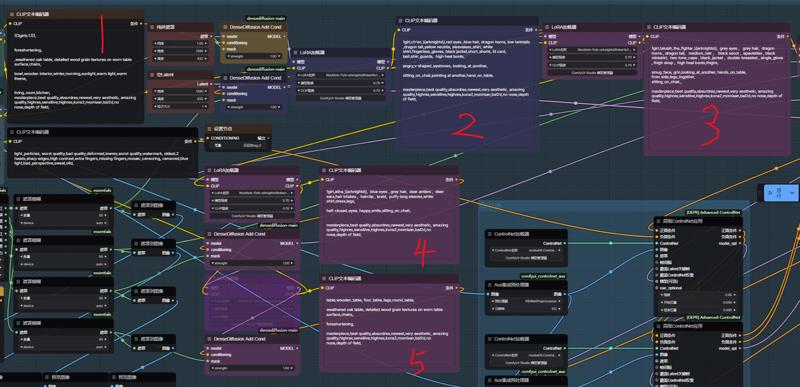
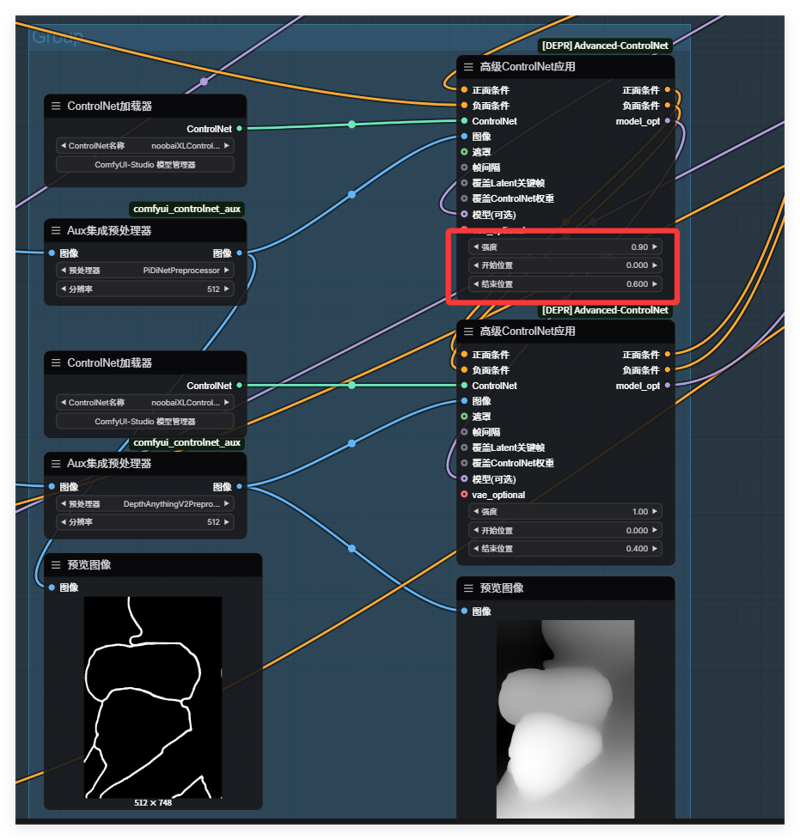
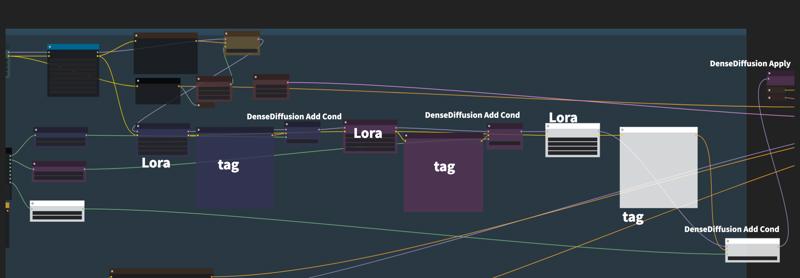
2.0 更新:默认区域增加到4个 可根据自身使用需求继续增加或关闭。根据使用体验在流程里添加了CN的深度跟tile节点来稳定构图。
2.0 Update: Default rendering zones have been extended to four units, with scalability for customization or deactivation per operational requirements.
Through empirical optimization, ControlNet Depth and Tile have been embedded within the processing chain to maintain correct image upscaling operations.
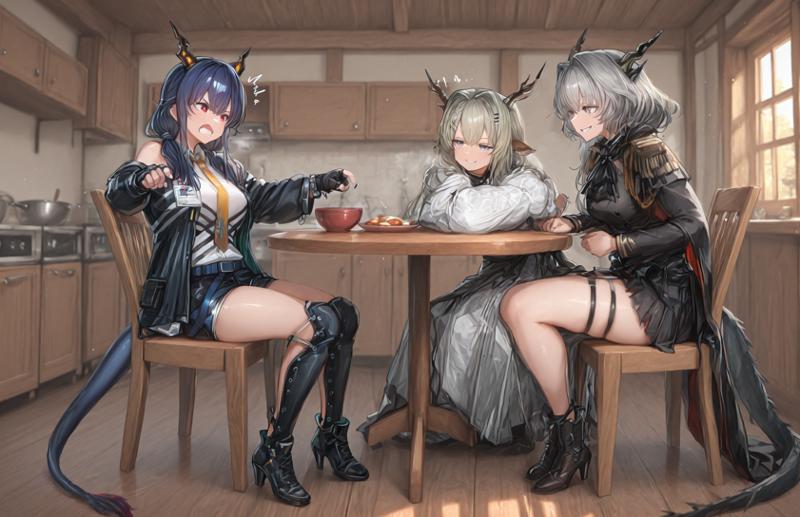
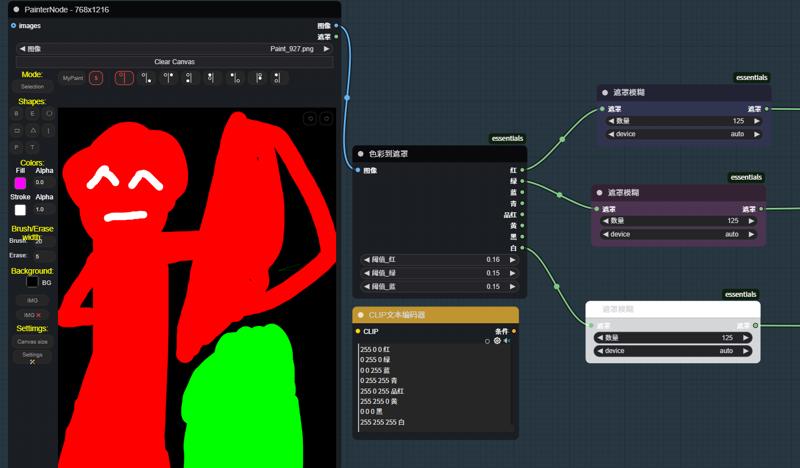
 1:第一个区域用来写大概的构图tag ,例如这张图 需要明确主体:3girls 场景:living_room,kitchen,wooden interior,winter,morning,sunlight 。 如果有需求还可以添加上视角tag。
1: The first area is used to write the general composition tags. For example, in this picture, the main subject needs to be clearly identified: 3 girls. The scene: living room, kitchen, wooden interior, winter, morning, sunlight. If necessary, perspective tags can also be added,like from above,from below.
2 3 4处的框,在前面的lora节点添加进你想要生成的人物角色lora。框里的内容就是你生成的角色触发词以及你想要的动作内容。
The boxes at 2, 3, and 4, add the character lora you want to create to the previous lora node. The content inside the boxes is the trigger words for the character you generate and the actions you desire.
5:这里我选择辅助场景生成,用粉色的遮罩画出桌椅,所以框里面的tag就写桌椅就行了。
5: Here, I choose to assist in scene generation. I use a pink mask to draw the table and chairs, so the tags inside the frame can simply be written as "table and chair". 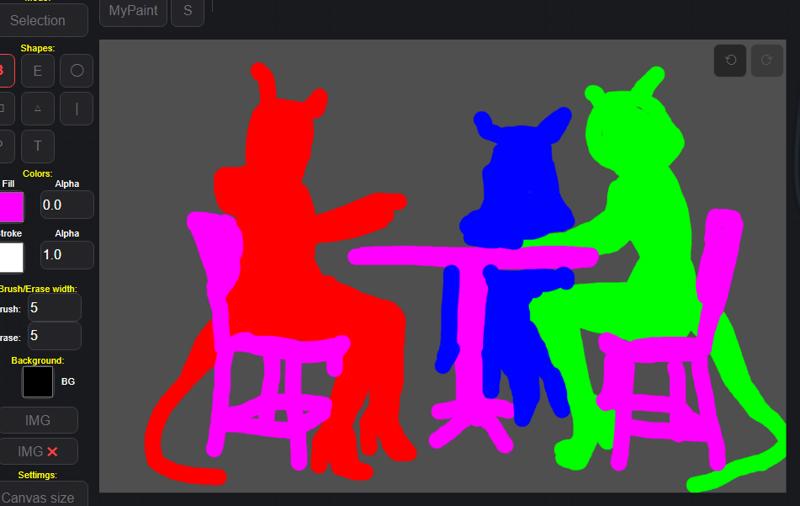
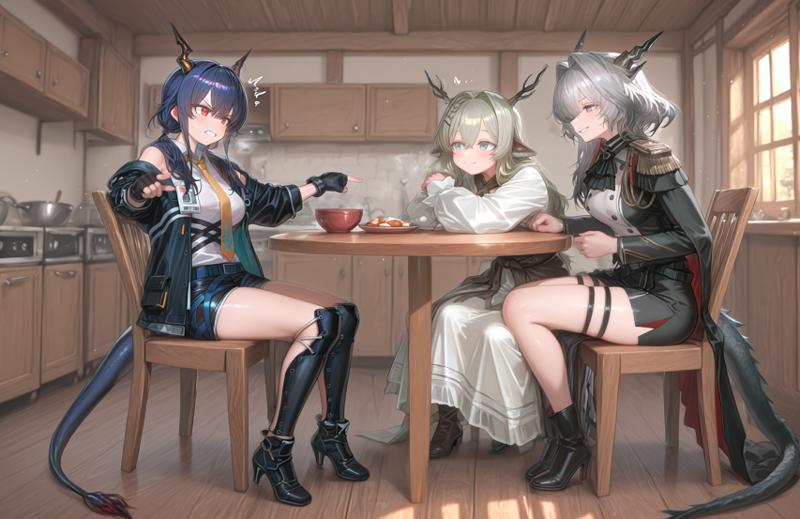
经过生成我们得到了最后的图像 看起来不太行对吧... 是的 这时候我们就要用到局部重绘了。
After the generation process, we obtained the final image. It doesn't look good, does it... Yes, at this point, we need to use local redrawing.
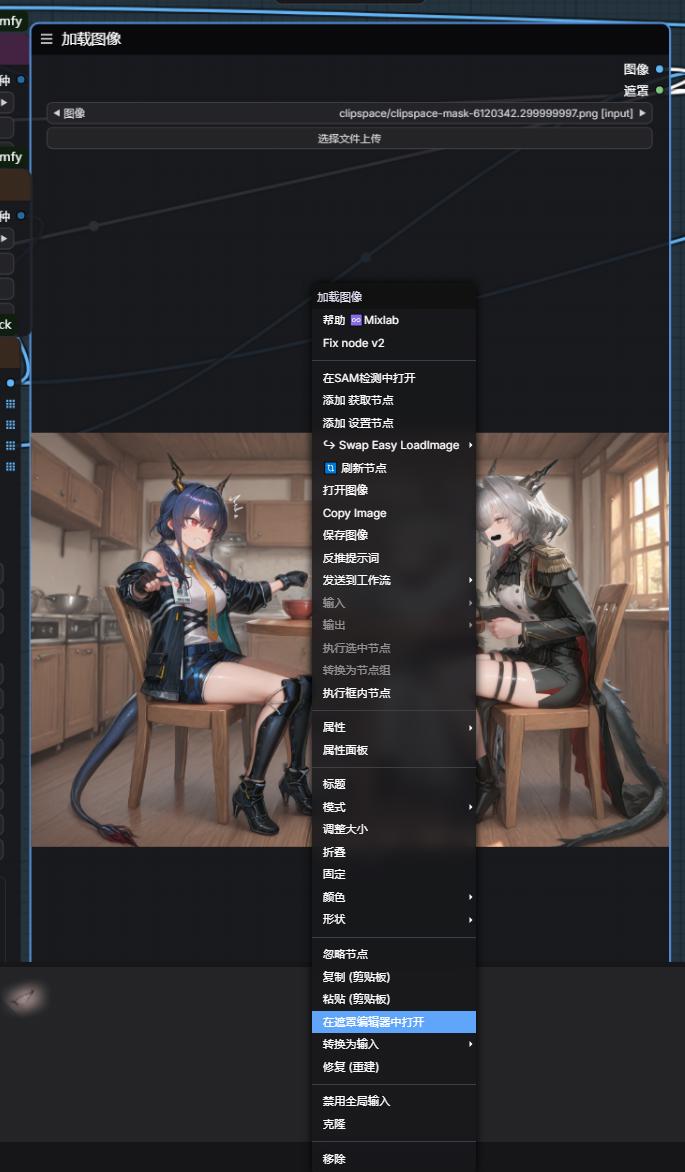
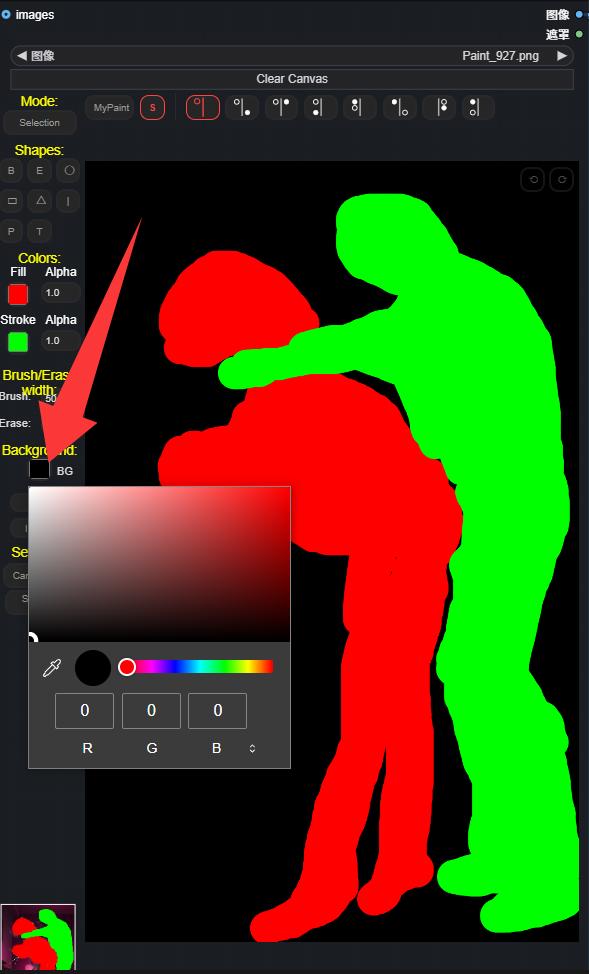
 通过右键加载图像 打开遮罩编辑器 在里面对你需要修改的地方进行涂抹,像这种情况就是三个角色了。当然,你也可以涂抹你的场景进行重绘修改。
Load the image via the right-click menu, then open the mask editor. Within it, make your modifications to the areas you need to change, such as in this case, there are three characters. Of course, you can also paint over your scene to re-draw and modify it.
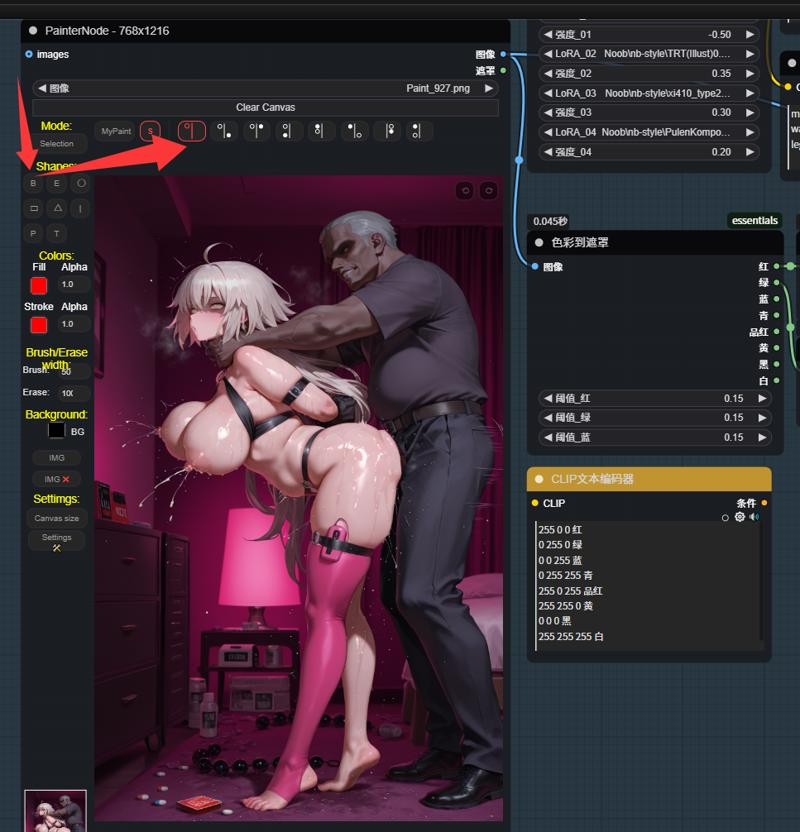
 哦对了,生成图片的时候ControlNet不一定要全部开启,一切以辅助出图效果为准,毕竟开的多生成速度会变慢。
Oh, by the way, when generating images, ControlNet doesn't necessarily need to be fully enabled. It's enough to use it to assist in achieving the desired image effect. After all, if it's enabled too much, the generation speed will slow down.
最后,关于多角色底图的选择。像这张图我是先用上面说的主体跟场景跑了没使用3个角色lora的底图,再用它来垫在下面描出的角色遮罩。所以实在没灵感想法还是把它交给ai去生成吧,
Finally, regarding the selection of the multi-character background image. For this image, I first used the main subject and scene as described earlier without using the 3-character Lora background image. Then, I used it to lay underneath and draw the character mask. So, if I really don't have any ideas, I'll just leave it to the AI to generate it.
 -----
-----
更新一下经验分享:
Update the experience sharing :
 线稿这里的值不能给太高,要不然就会变成这样......
The value of this line drawing cannot be set too high; otherwise, it will turn out like this...
 还有如果分区多角色 但是只有单角色 可以尝试在框里写上多个女孩 并用,,隔断 ,这东西对提示词还是太敏感了,需要动动脑写的比较符合才能出来好的效果。
Also, if there are multiple characters in a zone but only a single character is present, you can try writing multiple girls in the box and using commas to separate them. This method is still too sensitive to the prompt words and requires some thinking to write in a way that produces a good result.
1.0:
添加方式如下:
Adding method:
参考/Related article:https://www.bilibili.com/video/BV1TK21Y8EuL/?spm_id_from=333.1007.top_right_bar_window_history.content.click
Description
请看2.0
Please look at 2.0
FAQ
Comments (18)
大佬试过attention couple吗,和这种方法相比哪个更适合多人构图?
看你自己选择。你不想手动画遮罩区域对交互的需求没那么强,就可以用那种或者另外的用方框、渐变式的遮罩来划分。
我虽然演示用的是多角色,但这个工作流实质还是区域的细化控制生成——简称指哪打哪。手动画遮罩只要你节点给的多,你甚至可以单独给一个人的 手臂 大腿 躯干 头 面部 眼睛 嘴巴 眉毛 来做遮罩细分控制它的动作位置。我下面有很多示例图 你可以自己看看。
how many vram need for this workflow?
II'm 8g.
你好请教一下,请问你使用的comfyUI版本是多少?我使用的v0.3.33 在运行到KSampler (Efficient) 时提示:AttributeError: module 'comfy.model_base' has no attribute 'convert_tensor' 麻烦有空的时候指教一下谢谢
我0.3.27 好久没更新了 。K采样的问题 你可以自己重新搭一搭 换散装采样器或者普通的K采样 不是效率试一试, 我还没遇见过这种问题我也不太清楚。
@Kakitsu 感谢回复
Hello, I'm new to comfyui and I'm very interested in your workflow. Having tried your workflow on my own, I didn't succeed, and therefore I would like to know if you have a clean workflow. And that's exactly what I'm failing at. I draw, enter as indicated in the manual, and nothing happens except the black image that is generated for a couple of seconds. Any idea what I might be doing wrong? thanks for the answer!
This workflow might indeed be a bit complicated for novice users. But even with your explanation, I still can't determine where the problem lies. All the images I uploaded here are the original ones. Maybe you can download them and drag them into your ComfyUI to view the tag text and various parameters of that image to analyze the problem.
Is this workflow meant for NoobAI only? I tried both your workflow and a remake I made from scratch for Ilustrious, and in both cases I got awful results after several hours of adjustments.
Turning ControlNet off improved the quality but gave me inaccurate results.
Actually, my model is IL. According to what you said, turning off ControlNet improves the quality. It should be that there is something wrong with your draft drawings or the parameters given by ControlNet. The pictures I uploaded here are the original ones. You can check the workflow and refer to them. Also, the accuracy of the description of the tags is very important.
Thanks for this, amazing stuff!
For anyone wondering: you can make this work with illustrious. I downloaded canny, depth and tile controlnets for illustrious and replaced them in the workflow. Requires a bit of tweaking to get decent results: I can even recommend running the workflow without the controlnets and only use the densed diffusion, that's already a game changer for combining characters/loras at specific locations!
Mileage may vary depending on base model, for the more specific stylistic base models I get very anime-looking characters that don't really match. This seems to happen already at the densed-diffusion stage, if anyone has solutions for that I'm all ears!
I'm also using illustrious, could you post the updates workflow?
真的好棒呀!
请问提示词框要用对应的颜色去绘制草稿吗?比如说陈是蓝色的,那么得在蓝色专用的提示词框里写入提示词并用蓝色画笔描绘草稿,
还有我也是8G显存,为什么使用此工作流有时会卡住不动呢,这点令我有点困扰,不知道是哪里出了问题
大佬,提示Aux集成预处理器
An error happened while trying to locate the file on the Hub and we cannot find the requested fies in the localcache. Please check your connection and try
again or make sure your Internet connection is on.,这个是缺了什么吗/(ㄒoㄒ)/~~