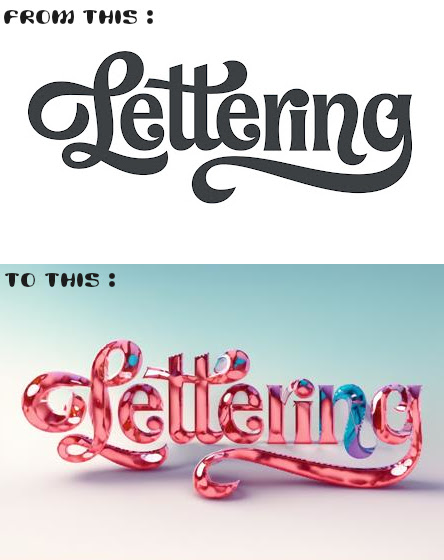

use it with controlnet
preprocessor: invert
model: depth
or use a simple canny
ControlNet Configurations:
Method 1: Txt2img with ControlNetEnable: Set to "Yes" to activate ControlNet functionality.
Pixel Perfect: Set to "Yes" for precise rendering.
Preprocessor: Use "invert" to ensure the foreground (text) appears correctly.
Model: Select the desired ControlNet model (e.g., control_xxxxx_depth).
Prompt: Input a description of the desired visual effect.
Image Size: Ensure the aspect ratio matches the text image (e.g., Width: 768, Height: 512).
Stable Diffusion Checkpoint: Choose a checkpoint for generating the effect.
Enable: Activate ControlNet for multiple units.
Preprocessor: Use "invert" to adjust the background's appearance.
Model: Choose the ControlNet model for controlling the background.
Control Weight: Adjust to balance the effects of both units.
Ending Control Step: Optionally reduce to introduce more variations.
Enable: Activate ControlNet for the background image.
Preprocessor: Utilize "depth_zoe" for extracting depth information.
Model: Select the ControlNet model for the background.
Control Weight: Adjust to control the influence of the background.
Ending Control Step: Optionally reduce for varied text-background blending.
These configurations allow for precise control over the ControlNet functionality, enabling manipulation of text and background elements to generate diverse text effect images using Stable Diffusion techniques.
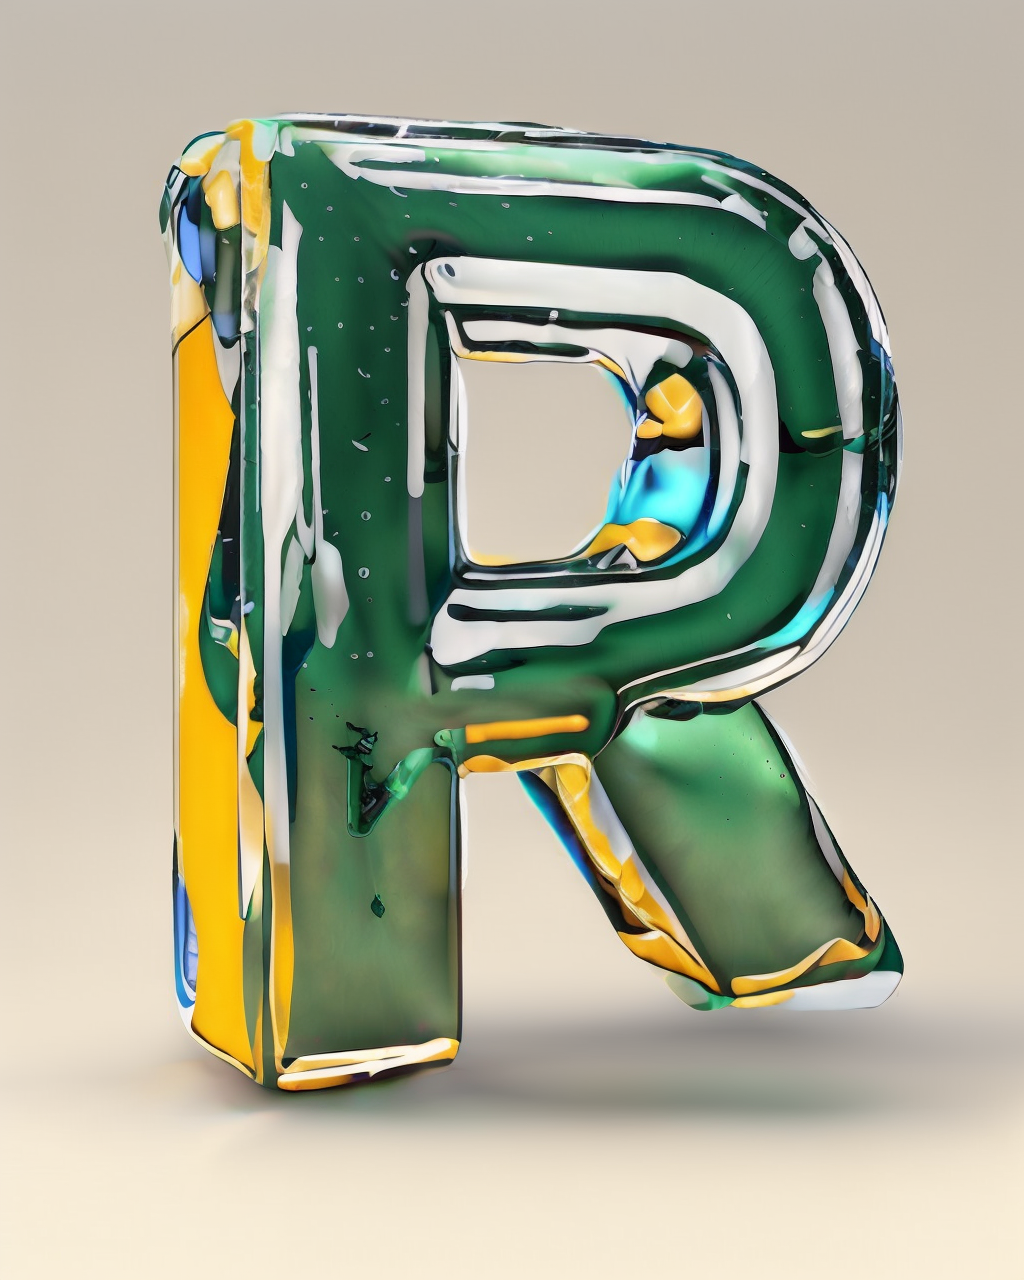
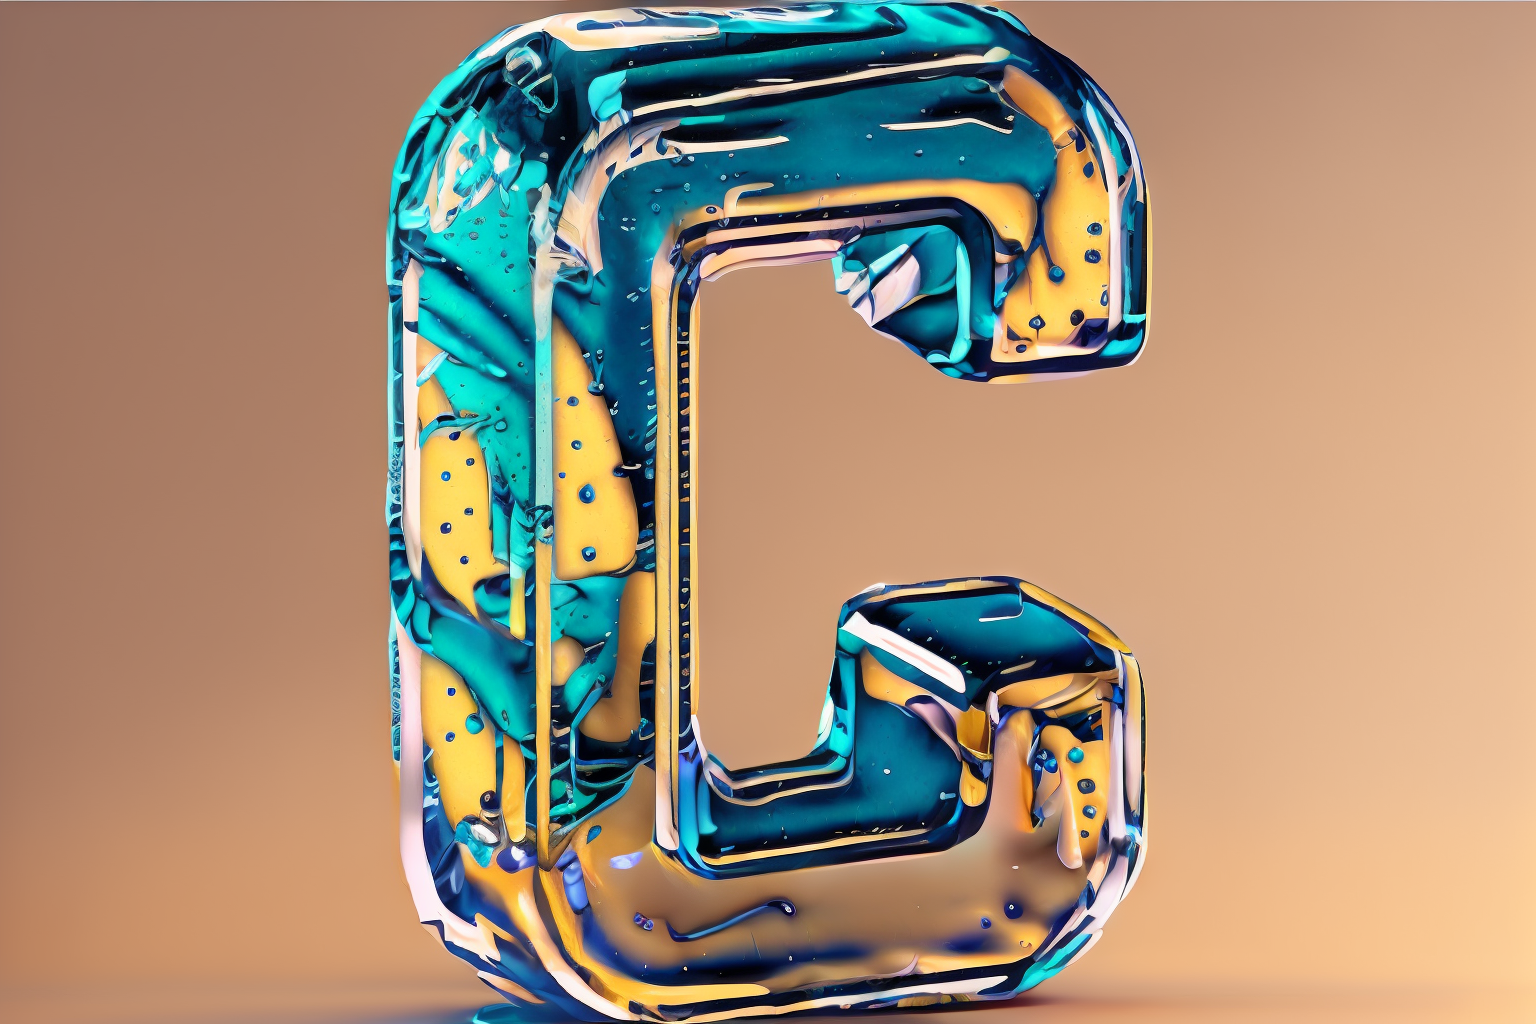
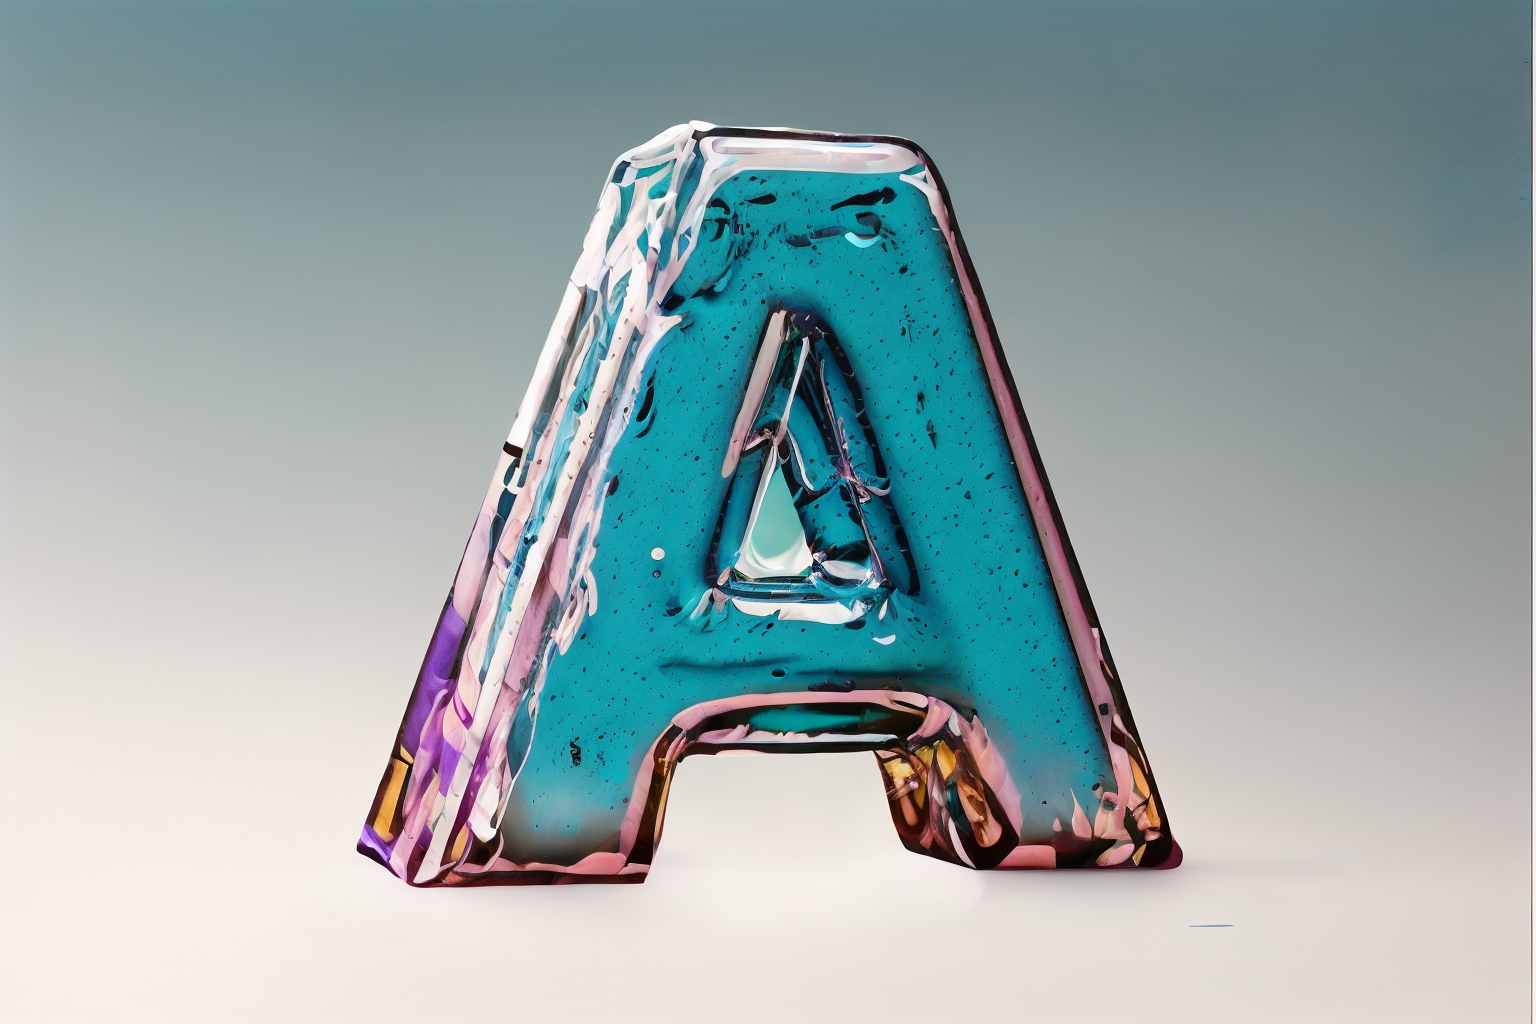
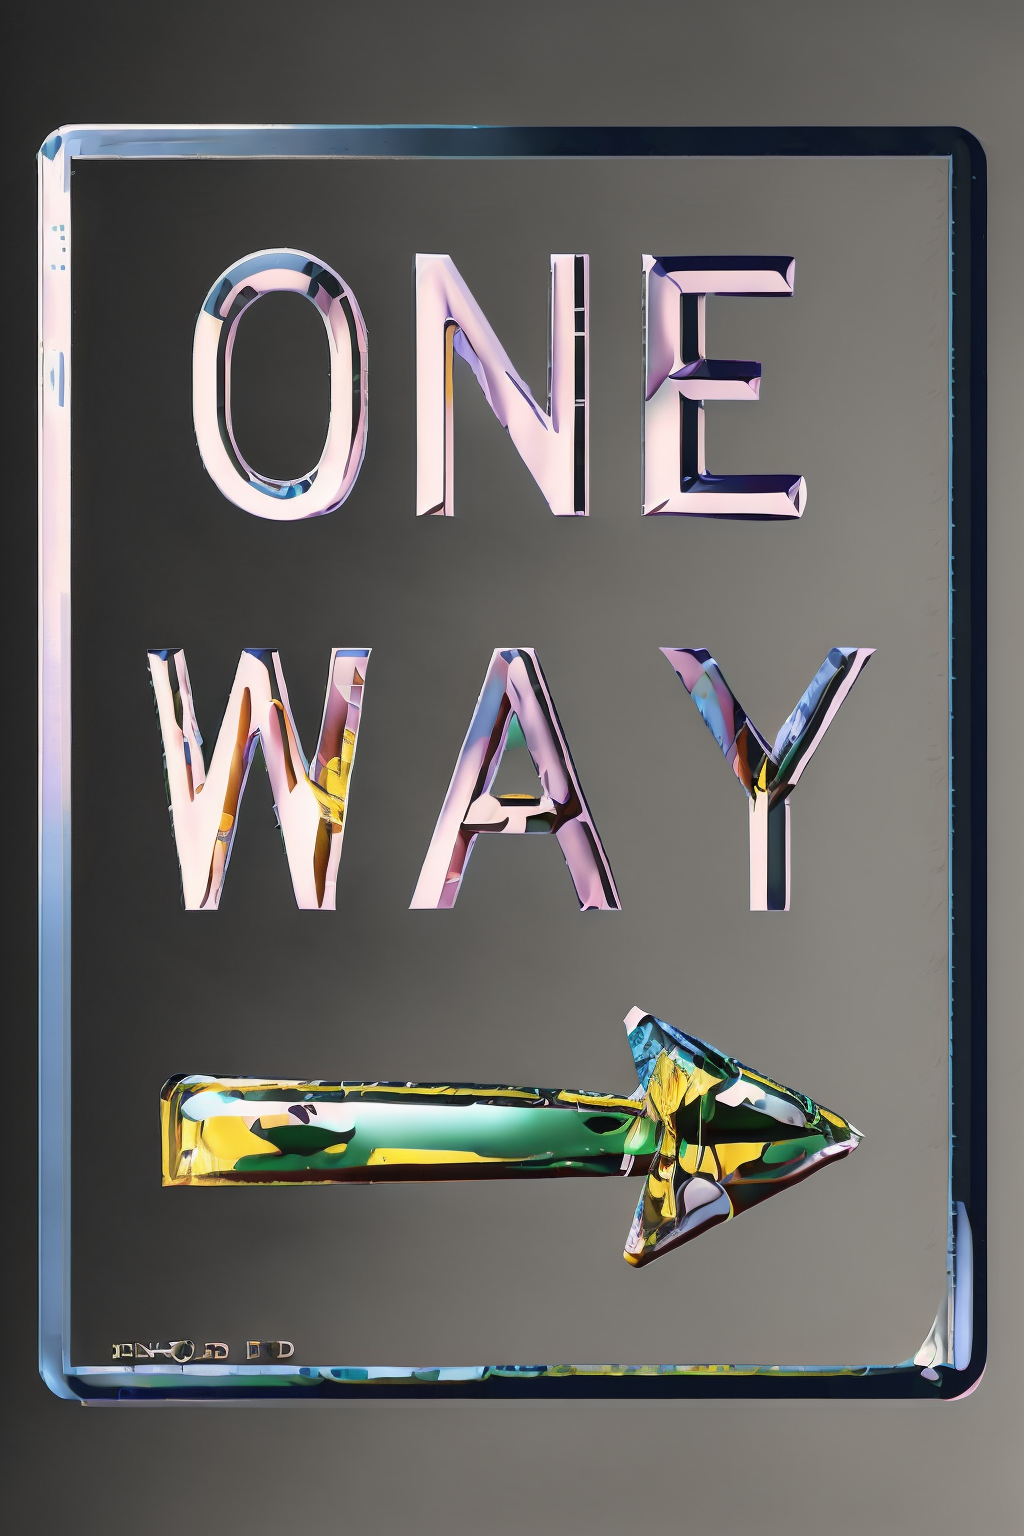
Description
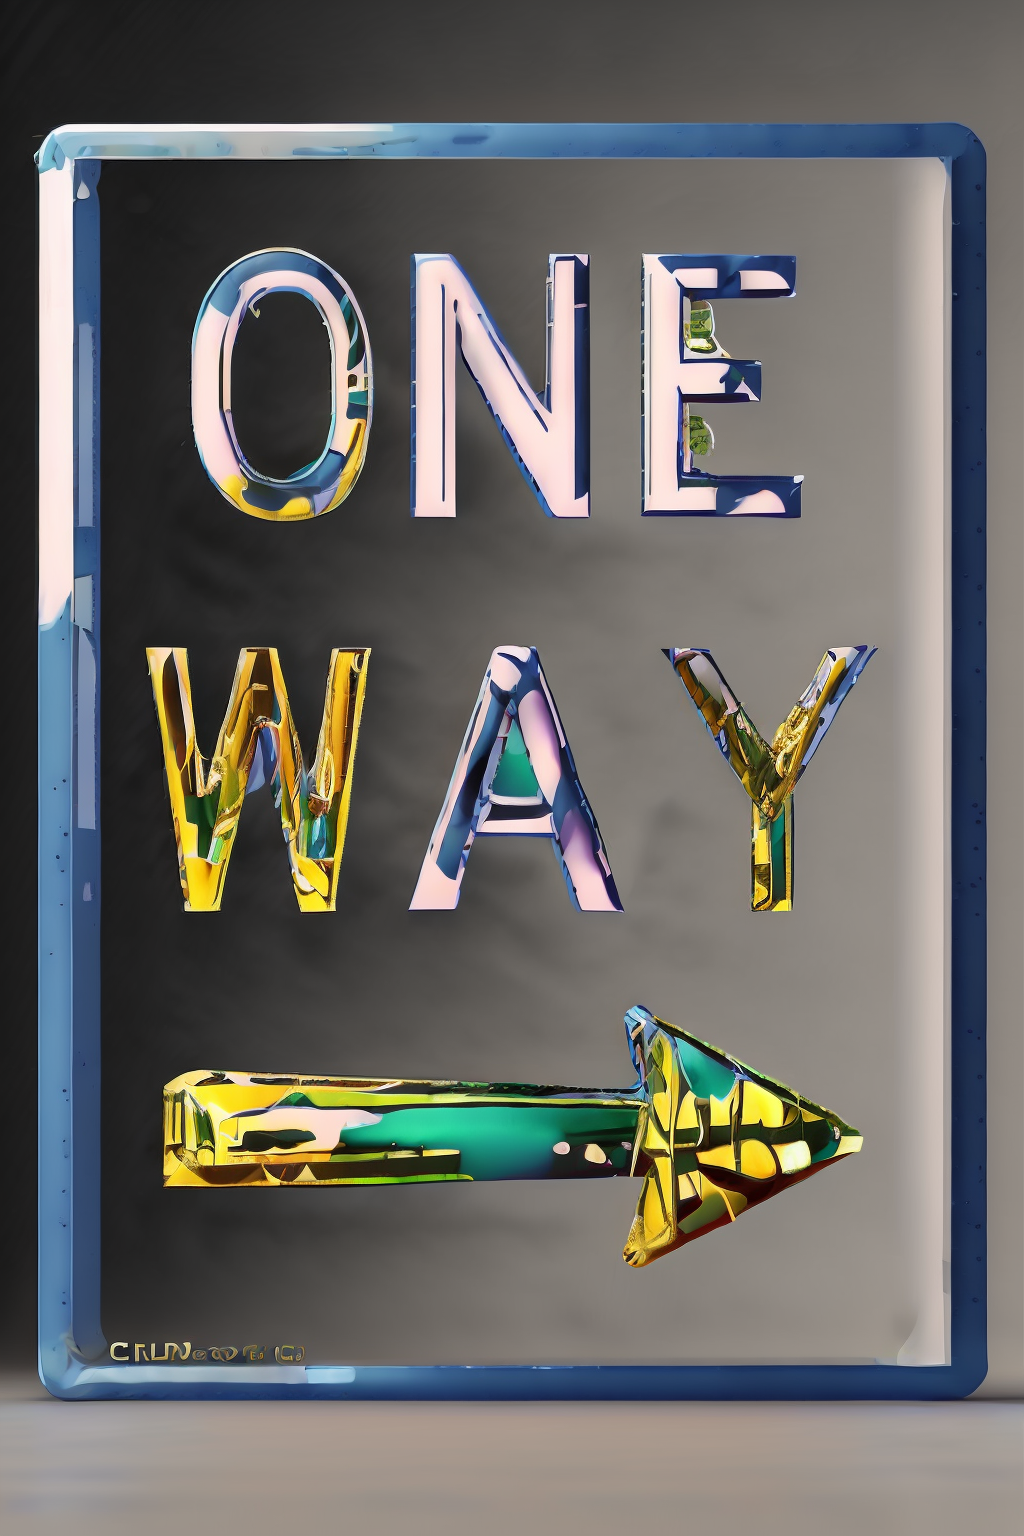
best with controlnet text method : preprocessor: invert model: depth
FAQ
Comments (12)
Trying to wrap my head around how you're supposed to use this and get legible text..
Are you img2img-ing an image of text with the use of the controlnet settings (which is what i've seen others do in the past) and the lora
or are you outright prompting the entire thing in txt2img?
Only text2img + ControlNet. Preprocessor : invert. Model : depth. 🙌😊 Use the Lora between 0.75~1
Ciro is correct. I do this all the time. You just need to start with an image of black text on white or vice-versa. I call it a "mask". You use Txt2Img with ControlNet. Drop your mask image on the ControlNet file window. Invert if it's black on white. Use the depth model. Prompt what you want the letters to look like or be made out of. The Img2Img technique is old. It's what we did before ControlNet. This is much better and more flexible.
you have no idea how much this got me excited, thank you so much
Thank you very much!
maybe this is good, i don't know. never got it to work. we need more guidance/instructions.
preprocessor: invert
model: depth or canny
ControlNet Configurations:
Method 1: Txt2img with ControlNet
Enable: Set to "Yes" to activate ControlNet functionality.
Pixel Perfect: Set to "Yes" for precise rendering.
Preprocessor: Use "invert" to ensure the foreground (text) appears correctly.
Model: Select the desired ControlNet model (e.g., control_xxxxx_depth).
Prompt: Input a description of the desired visual effect.
Image Size: Ensure the aspect ratio matches the text image (e.g., Width: 768, Height: 512).
Stable Diffusion Checkpoint: Choose a checkpoint for generating the effect.
Method 2: Multiple ControlNet
Enable: Activate ControlNet for multiple units.
Preprocessor: Use "invert" to adjust the background's appearance.
Model: Choose the ControlNet model for controlling the background.
Control Weight: Adjust to balance the effects of both units.
Ending Control Step: Optionally reduce to introduce more variations.
Method 3: Use a Stock Image as Background
Enable: Activate ControlNet for the background image.
Preprocessor: Utilize "depth_zoe" for extracting depth information.
Model: Select the ControlNet model for the background.
Control Weight: Adjust to control the influence of the background.
Ending Control Step: Optionally reduce for varied text-background blending.
A Video showing how to setup the right control net settings. Including the fine tuning of everything would be helpful.
Yes I get good looking letters, but no I never got my desired word.
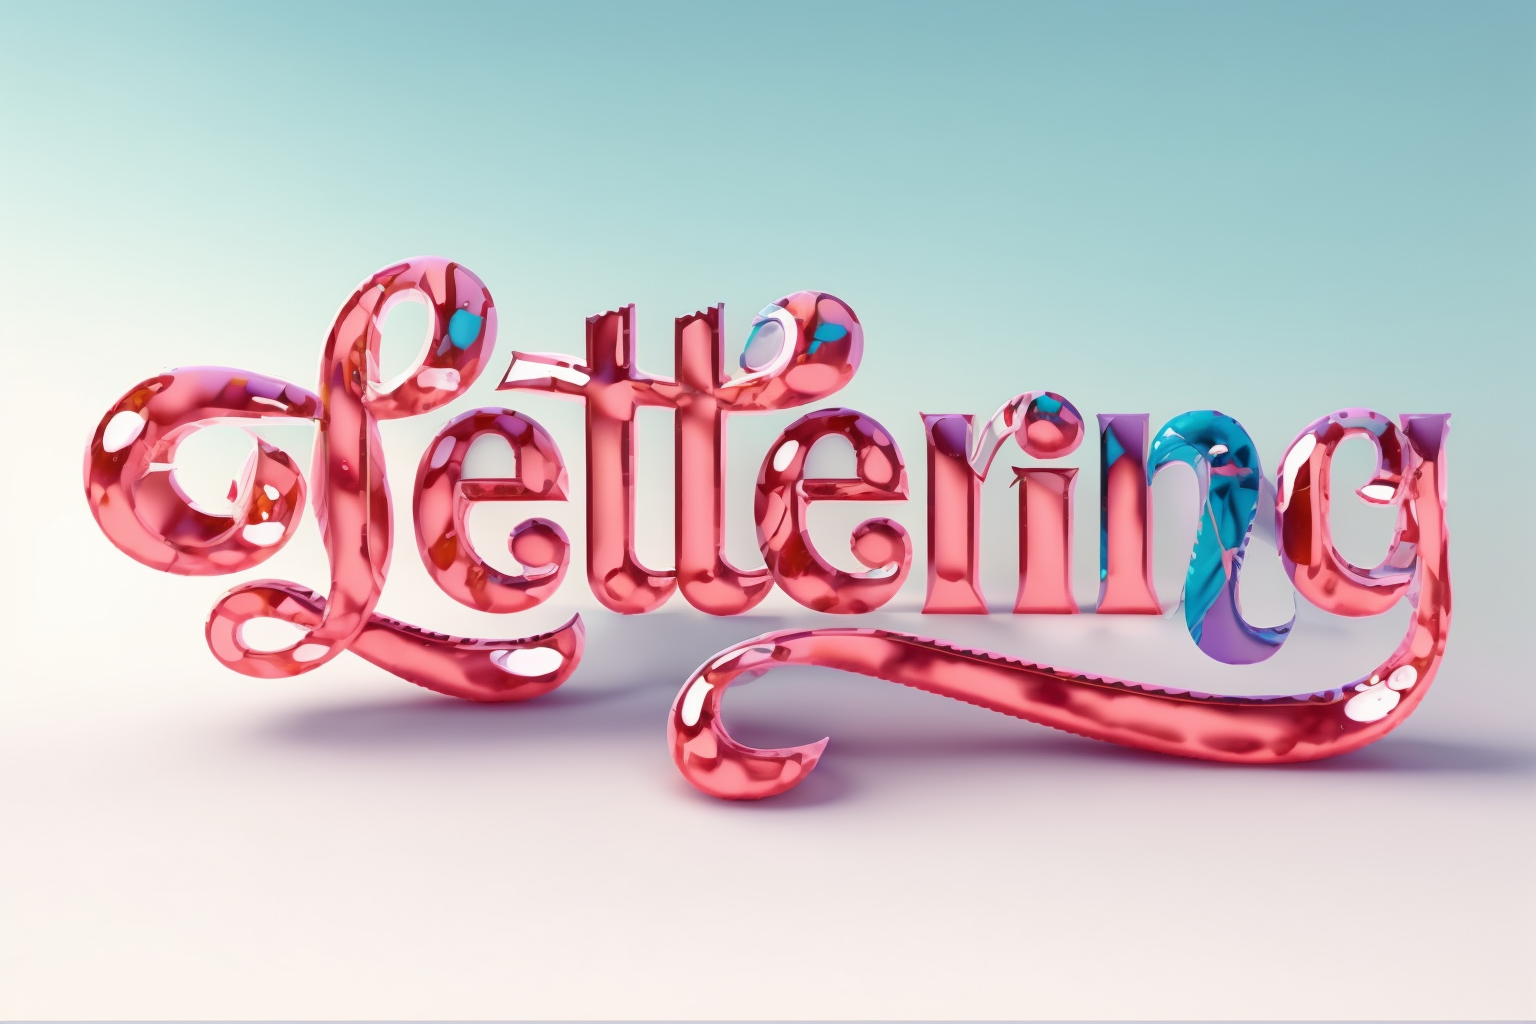
I even tried your "Lettering" Image to create a similar output.
To help Ciro, here the Settings I used to finally get a useable result.
Btw. It took me hours to test out the right Settings, so leaving a like is appreciated.
SD-Checkpoint: RadiantVibes Version 4
TXT2IMG Prompt: glossy glass style letters, 3d_lettering <lora:3d_lettering:0.75>
Sampling Method: Euler a
Sampling Steps: 20
CFG Scale: 10
Image Size: 1x1 (800x800)
ControlNet: Version 1.1.430
Enable: Yes
PixelPerfect: Yes
ControlType: All
PreProcessor: invert (from white bg & black line)
Model: control_v11f1p_sd15_depth
Control Mode: balanced
Resize Mode: Crop and Resize
That's it all other Settings remained untouched or just the default values of Automatic1111
With this Settings I was able to Render the hello writing from apple into the 3D Space.
@mrlufus I'll make a video, maybe it's a simple solution
What about the checkpoint?
use a good base model sd1.5 or https://civitai.com/models/945366/sd15-hk
Details
Files
Available On (1 platform)
Same model published on other platforms. May have additional downloads or version variants.