
About this tutorial
A lot of people asking the same questions, that's why I decided to make a general tutorial, that will work with any of my "frames" Loras. So what is it and why do you may need them, and how make gifs with them?
The frames Lora represent a bunch of frames that supposedly follow one another like a frames from video/animation. They should be somewhat coherent and consistent, that prevent the flickering, that you'll obviously get if try to split a real video into frames and then process them through img2img. My way still get flickering, but much less, and with much much more flexible results, because you can control "the base" of the image. At least that is my experience.
Setup
Model
So, for starters we will need to download any nsfw model, for example, here is my favorites:
(recomended) My DGPD model
*Basically any nsfw model should do, but sometimes it needs more or less weight of the Lora.
Loras
Then you'll need to download (or train) "frames" Lora. For example here is mine:
Character Lora
Some of my models is flexible enough to be mixed with other Loras, for example - character Loras. But because lots of people are struggling with the frames set - lastly I started to make them overfitting. Which is why it may cause artifacts if used with other Loras. If you want to use character Lora - use it after the base is done, when upscaling/finetuning the image. Just add to the prompt stuff, that will descibe your character - like hair, body type - etc.
Prompting
The frames set could be received in following order:
We make "raw" image with needed frame set (2x2/3x3 for now);
Finetuning with img2img;
Making a gif;
Profit!
"Raw" image
For example I'll use my POV bj Lora, and PerfectDeliberate model. I'll show how to use it on 2x2frame set. Here is my prompt parameters:
{Prompt:<lora:DDpovbj_1ot:0.75>
Negative prompt: 3d, sepia, painting, cartoons, sketch, (worst quality:2), (low quality:2), (normal quality:2), lowres, bad anatomy, bad hands, normal quality, (monochrome), ((grayscale)), (ugly:2.0), badhandv4, BBN, easynegative, poor quality
Steps: 25, Sampler: DPM++ 2M Karras, CFG scale: 7, Seed: 3329762245, Size: 512x512, Model hash: 6ac5833494, Model: perfectdeliberate_v20, Clip skip: 2}
!!!NO VAE!!! Some of the people had problems with vae. Don't know why. Just choose "none" in preferences.
Size have to (let me stress it out, it's not "should be" - IT'S HAVE TO) be exact 512x512 for 2x2frames set. For the 3x3frames set use 768x768 resolution - no more, no less.
Here is what I get:
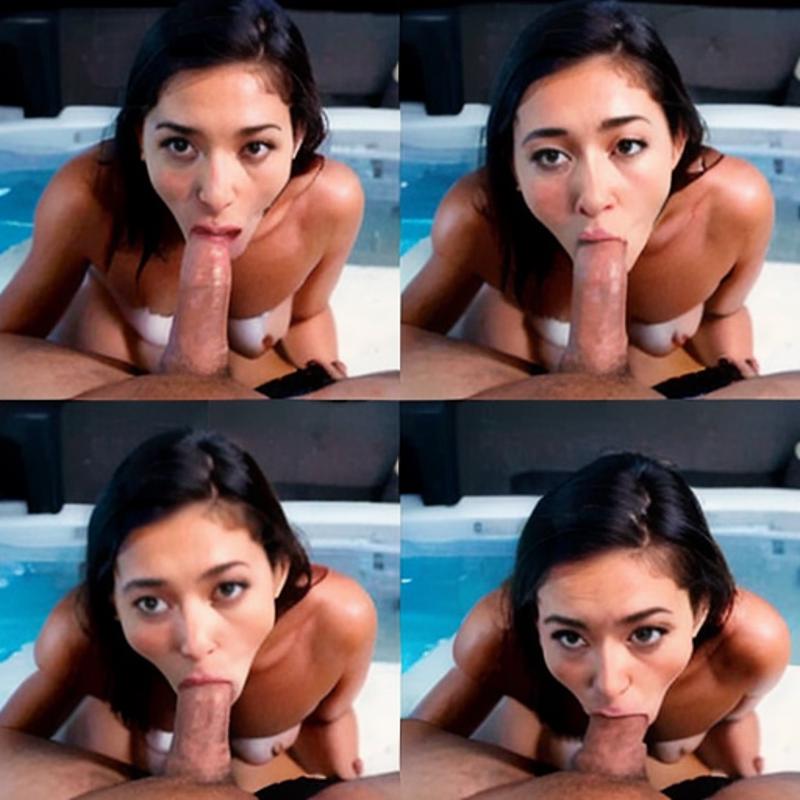
For those who doesn't understood it yet - It's not 4 images it's one in 2x2frames set.
Adding details
Some of the models can be picky and refuse to give you a frame set. In that cases We will need to help it with this tags:
1girl (4girls if nothing helps, but that leads to different girls in raw picture, sometimes);
2x2frames;
a series of pictures of {action} (based on Lora tag).
Here is the new prompt parametrs (negative and other parametrs are the same):
{Prompt: 1girl, (2x2frames), a series of pictures of blowjob, <lora:DDpovbj_1ot:0.75>}
Now, let's add some details about girl:
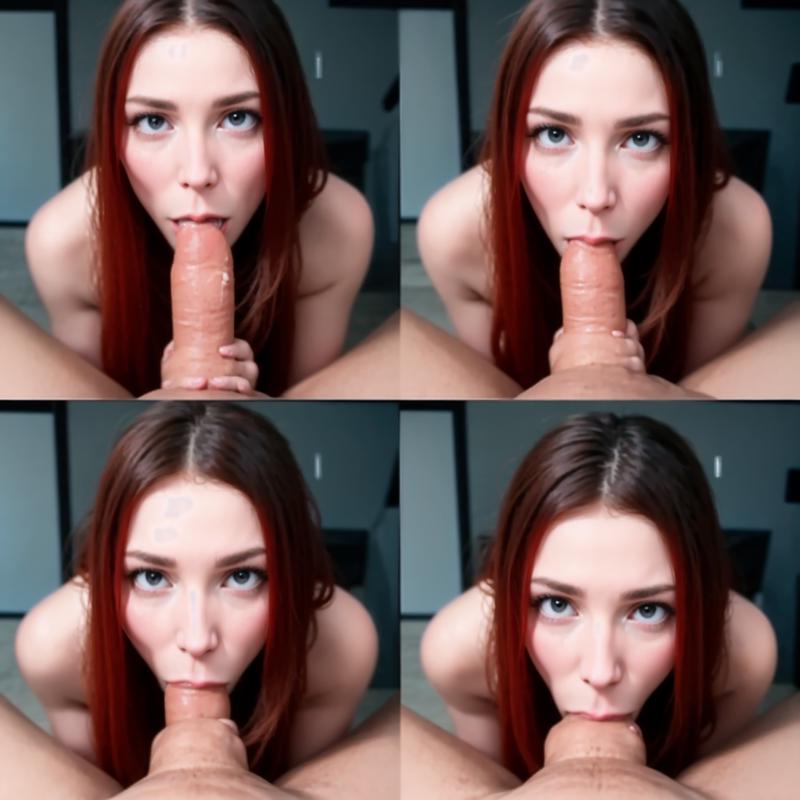
{Prompt: 1girl, (2x2frames), a series of pictures of blowjob, <lora:DDpovbj_1ot:0.75>, long ((ginger)) hair, petite, perfect face, perfect eyes, masterpiece, best quality, high quality, 4k, ray tracing}
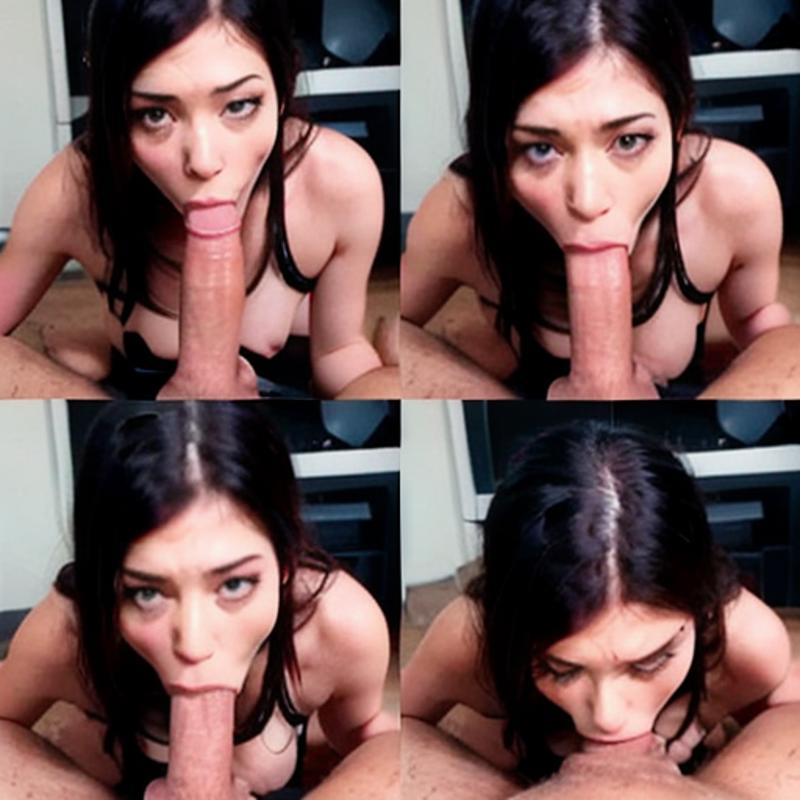
Here is what i get:
It's not perfect - I don't like fingers, most likely it'l cause more flickering, so let's try to find a better seed with the same prompt.
I liked this one (seed 173730505):
After that, we send this image to img2img tab, and upscale it.
Finetuning and upscaling
Here are two ways to do that (there are not the only ones):
img2img with higher resolution;
Ultimate sd upscale.
img2img
The first one - if you have enough Vram you can just process this image with higher resolution. For example with 2048x2048. But we should lower the Lora weight to prevent artifacts and lower the denoising strength, to prevent the image from falling apart.
We may use different seed, and higher denosing strength if we want more variety. But let's stick as close as we can to the raw picture.
Here is the prompt:
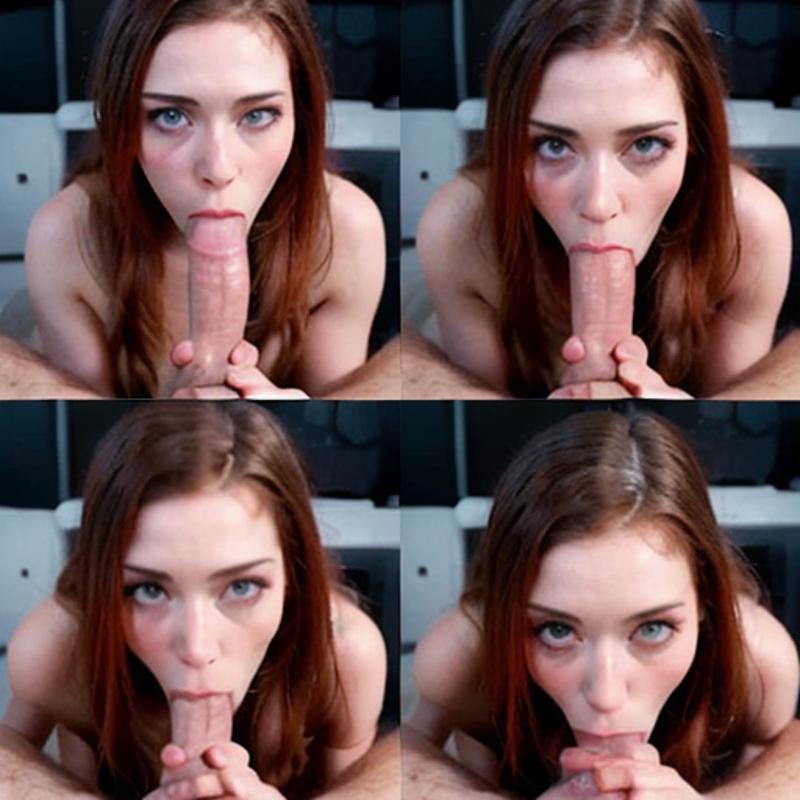
{Prompt: 1girl, (2x2frames), a series of pictures of blowjob, <lora:DDpovbj_1ot:0.5>, long ((ginger)) hair, petite, perfect face, perfect eyes, masterpiece, best quality, high quality, 4k, ray tracing
Negative prompt: 3d, sepia, painting, cartoons, sketch, (worst quality:2), (low quality:2), (normal quality:2), lowres, bad anatomy, bad hands, normal quality, (monochrome), ((grayscale)), (ugly:2.0), badhandv4, BBN, easynegative, poor quality
Steps: 25, Sampler: DPM++ 2M Karras, CFG scale: 7, Seed: 173730505, Size: 2048x2048, Model hash: 6ac5833494, Model: perfectdeliberate_v20, Denoising strength: 0.4, Clip skip: 2, Mask blur: 4}
Still blurry, and have morbid fingers, but I'll take it for example.
Ultimate sd upscale
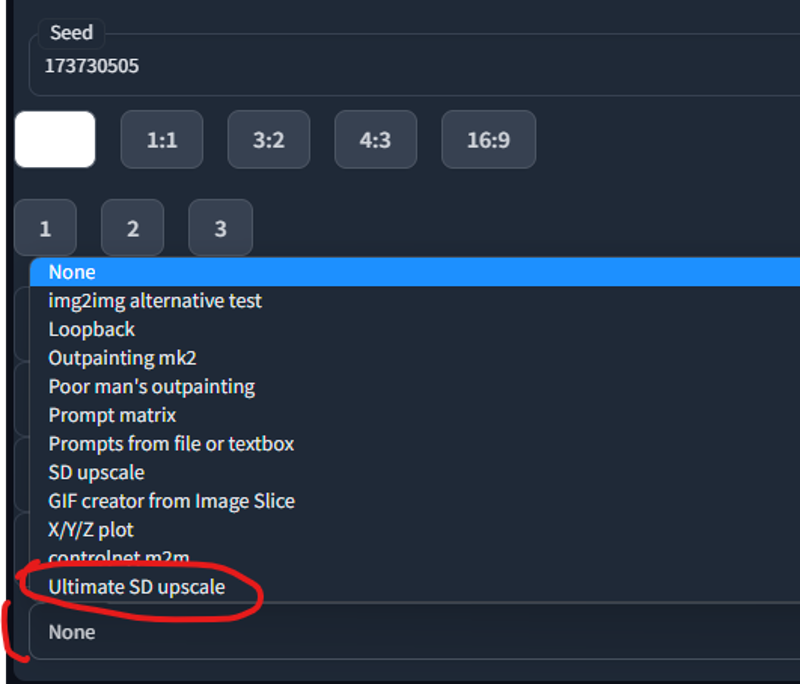
If you don't have enough Vram you can use Ultimate sd upscale. This extension could be downloaded and installed through extensions tab in your automatic1111 and reload your UI.
You can find it in the sripts dropdown:
Here is the prompt:
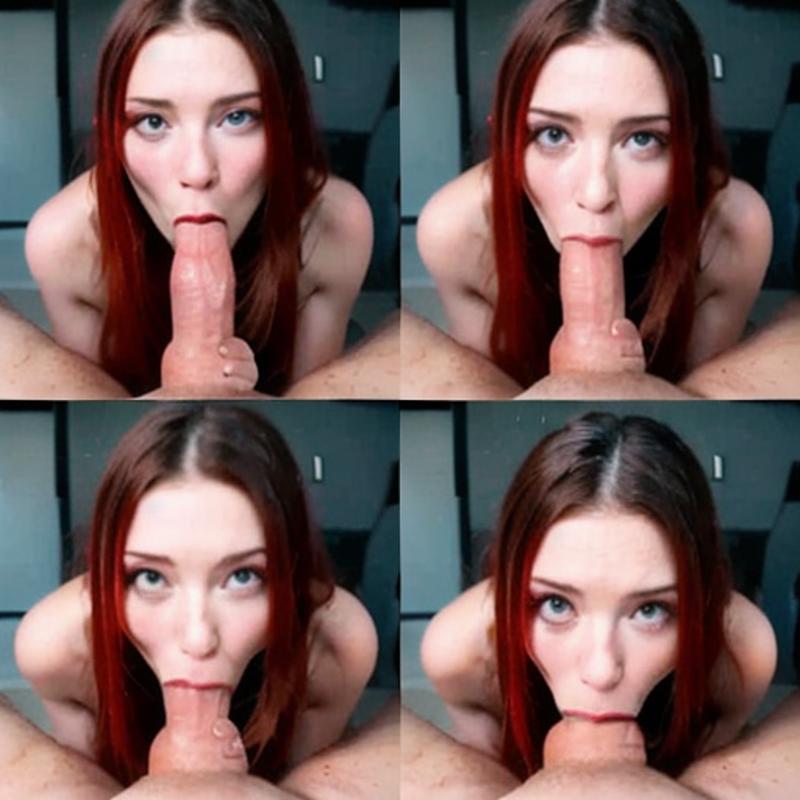
{Prompt: 1girl, (2x2frames), a series of pictures of blowjob, <lora:DDpovbj_1ot:0.5>, long ((ginger)) hair, petite, perfect face, perfect eyes, masterpiece, best quality, high quality, 4k, ray tracing
Negative prompt: 3d, sepia, painting, cartoons, sketch, (worst quality:2), (low quality:2), (normal quality:2), lowres, bad anatomy, bad hands, normal quality, (monochrome), ((grayscale)), (ugly:2.0), badhandv4, BBN, easynegative, poor quality
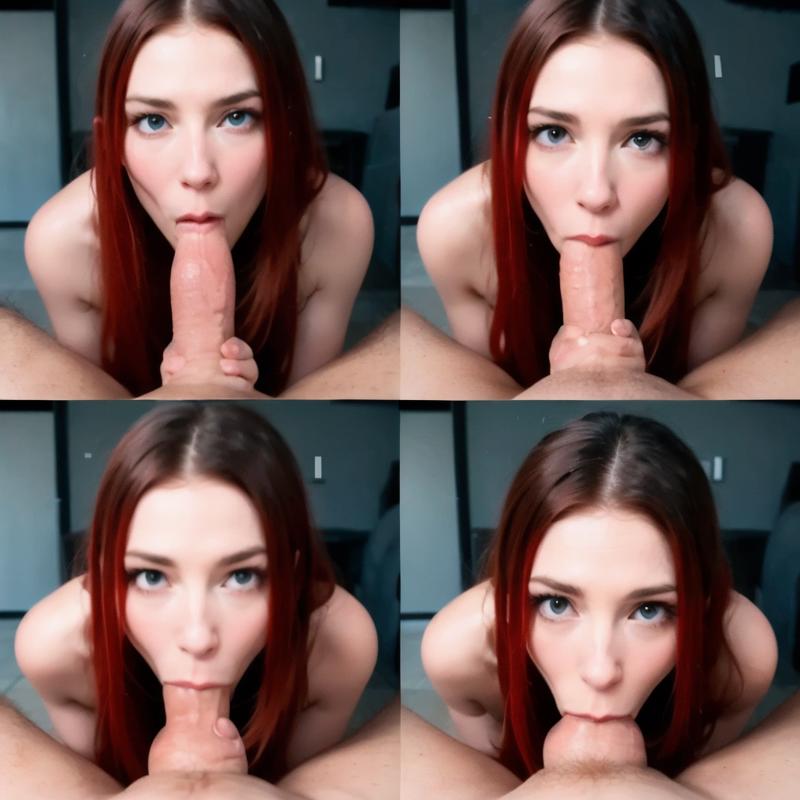
Steps: 25, Sampler: DPM++ 2M Karras, CFG scale: 7, Seed: 173730505, Size: 1024x1024, Model hash: 6ac5833494, Model: perfectdeliberate_v20, Denoising strength: 0.3, Clip skip: 2, Mask blur: 4, Ultimate SD upscale upscaler: 4x-UltraSharp, Ultimate SD upscale tile_width: 512, Ultimate SD upscale tile_height: 512, Ultimate SD upscale mask_blur: 8, Ultimate SD upscale padding: 32}
Here is the result:
And finaly we are going to the Gif making.
Making a GIF
Again, there are lots of ways to do that, here is the "lazy" one.
DigitalDreamer (many thanks to him again) made a script that may help to make gifs inside AUTOMATIC1111 (it's the one that attached to that tutorial). Just place it inside the "scripts" folder and restart UI. You'll find it in the UI down bellow in "scripts" dropdown. Use 2 when you made 2x2frames, and 3 for 3x3frames. It will make a gif and put it in your outputs folder.
So let's send the last made picture to img2img, and set denoising strenth to 0.
Then we will change script "GIF creator by image slice", and set number of cut's to 2. Duration can be left untouched (for 3x3frames you may want to make it longer, because you'll get 9 pictures instead of 4).
The result will be in the attached files)
That's it)
Enjoy, and have a peacefull day and life)
Feel free to ask any questions here in comments, or in my discord channel.
Also I am making games with AI arts. They will be free in the future, but if you want to participate in making or have an early access - you can support me on patreon)
Description
Deizor's variation of the slice script (allows to choose a number of vertical&horizontal slices)
FAQ
Comments (47)
肉棒受尽了折磨,
肉棒:我需要假期!
if you modify the script like this you can accept even images that are 2x3 and thing like that for images created in 512x768
import os.path
import modules.scripts as scripts
import gradio as gr
from modules import sd_samplers, shared
from modules.processing import Processed, process_images, StableDiffusionProcessing, create_infotext
import modules.images as images
from modules.shared import opts, cmd_opts, state
from PIL import Image
import os
class Script(scripts.Script):
def title(self):
return "GIF creator from Image Slice"
def show(self, is_txt2img):
return True
def ui(self, is_txt2img):
num_cuts_h = gr.inputs.Slider(minimum=2, maximum=8, default=2, step=1, label="Number of horizontal cuts/slices")
num_cuts_v = gr.inputs.Slider(minimum=2, maximum=8, default=3, step=1, label="Number of vertical cuts/slices")
gif_duration = gr.inputs.Slider(minimum=5, maximum=1000, default=150, step=5, label="GIF duration (ms)")
ping_pong_checkbox = gr.inputs.Checkbox(label="Ping-pong animation", default=True)
return [num_cuts_h, num_cuts_v, gif_duration, ping_pong_checkbox]
def cut_image(self, image, num_cuts_h, num_cuts_v):
width, height = image.size
cut_width = width // num_cuts_h
cut_height = height // num_cuts_v
parts = []
for i in range(num_cuts_v):
for j in range(num_cuts_h):
left = j * cut_width
upper = i * cut_height
right = left + cut_width
lower = upper + cut_height
parts.append(image.crop((left, upper, right, lower)))
return parts
def run(self, p, num_cuts_h, num_cuts_v, gif_duration, ping_pong_animation):
proc = process_images(p)
gens = proc.images
save_image_tuple = images.save_image(gens[0], p.outpath_samples, "", 0, "-Original", opts.samples_format)
save_image = save_image_tuple[0]
image = Image.open(
save_image) # Cut the image into equal parts and create a GIF with optional ping-pong animation
cut_parts = self.cut_image(image, num_cuts_h, num_cuts_v)
gif_filename = os.path.splitext(save_image)[0] + "_gif.gif"
if ping_pong_animation:
cut_parts = cut_parts + cut_parts[-2:0:-1] # Create a ping-pong sequence
cut_parts[0].save(gif_filename, format='GIF', append_images=cut_parts[1:], save_all=True, duration=gif_duration,
loop=0)
print(f"GIF created: {gif_filename}")
os.remove(save_image) # Delete the original saved image
return Processed(p, gens, 0, "")
Thanks for the guide! I can't get SD ultimate upscale method to work with GIF creator script because not enough vram to process the upscaled image even with denoise at 0. I will try 2x3 or 2x4
Instead of upscayl use Real-ESRGAN which is same as upscayl uses. Its free, command line / terminal, so much faster. You do not need any settings ususally just "upscale -i dir-in -i dir-out" and all filea are 4x.
Я не совсем понимаю как создать набор изображений x*x
The gif creator you attached always creates a gif of 256x256 always no matter what. What's the point of going through all that upscaling trouble if the gif will be 256px? Am I missing something?
If you actually have to send the image to img2img and regenerate it again at 2k resolution then the whole point about using an upscaler due to VRAM issues is useless, since you're forcing to generate a 2k image again just to use the gif slicer, which once again gives us the same VRAM issue as another user mentioned. And yes, I did set denoising strength to 0. Isn't the script supposed to simply slice the image instead of also trying to generate it?
in img to img when youre creating the gif adjust the resolution to 1024 to get a 512 gif. If you can take it to 2048 and you will get a 1024 gif.
If you have imagemagick / ffmpeg installed on your computer, you can do your conversion to a gif with something like this, no Python script required:
convert ../00298-1819686959-3x3framespng -crop 512x512 +adjoin frame%03d.png
ffmpeg -f image2 -framerate 3 -i frame%03d.png frames.mp4
You will almost certainly want to tweak the value of framerate.
Where do i type this? This is super vague....
@gantagoodsai You would type it in a terminal window, but if you're not already working in the terminal a lot you may not have imagemagick / ffmpeg installed. Still worth a try perhaps.
What are the settings you use for the upscaler. Somehow it messes um the complete image.
@spamcollect For hiresFix - 0.4 denoising str, for sd upscale - dunno I don't use it, for sd ultimate upscale extension - I scale image to desirable size and set height and width to the point where one tile is exactly like one frame one the upcoming image (one tile is 512x512, for example, for 3x3frames 1536x1536) and denoising str no more then 50. Another way is through img2img with higher resolution, same seed and denoising str no more than 60)
@aDDont thank you, I was trying to set the tile according to the source image
Instead of upscayl use Real-ESRGAN which is same as upscayl uses. Its free, command line / terminal, so much faster. You do not need any settings ususally just "upscale -i dir-in -i dir-out" and all filea are 4x.
The final stage of cutting the file into 4 parts isn't working for me. It will create 2 images, one of them being a copy of the 4 tiles, and another which is the top left tile, so I am missing the 4 tiles from the top right and 2 lower ones.
Alternatively you can use GifGen or just split it manualy with photoshop or gimp)
it said, "TypeError: Script.run() missing 3 required positional arguments: 'num_cuts', 'gif_duration', and 'ping_pong_animation'" help!
那么您提到的数字梦想家的脚本,到底是哪一个,怎么使用呢,恳请您讲解一下。
Do you think this can be used to animate a pre-existing image?
@amalgamhpc Probably not, there are better ways to do that at least)
@aDDont really? What is that?
@amalgamhpc https://civitai.com/models/108836/animatediff-motion-modules here for example)
@aDDont thank you. doesn't look like anything available for naughty animations, huh? that's too bad
@amalgamhpc There are only two ways of making naughty animations that could provide decent results for now - img2img with control net or my frames Loras, unfortunately :( I would like to see more stable stuff(
@aDDont thanks for the info
how dy even put them together ;-;
I downloaded both scripts but only one of them shows up under "scripts". When I then run the script "GIF creator" through img2img it just produces another png. What am I doing wrong?
@Caingon13386 It makes a gif and put it to the outputs folder. Have you checked it there?
@aDDont Yes I did. Got tired of it not working and did a clean install of SD and now it works....sigh....thanks anyway
img to img change perceives the entire picture as a sector of 4-9 sections, rather than taking the picture and inserting it 4-9 times into each section
You can try to use ultimate upscale with the size of tile equal the size of one frame. Also you can use control net, or lower the weight) But yeah it's unstable)
im use Upscale SD upscale
Target size typeform: img to img
Upscaler: None
Type: Chess (768x768) (Original img: 256x256)
Seams fix:
Type: None
That's correct?
@genasTRED Yeah, but there is also tile size. You should upscale the image to the amount that will be a frame res. For example if your base image is 768x768 you can img2img it to x3 (2304x2304) by using sd upscale and tilesize should be 768x768.
@aDDont Find problem, but doesn't find solve. Image upscaling to x3, but Ultimade SD Upscaler Make grid not for multiply images, but by every part of one image
Find solution: In directory \stable-diffusion-webui-amdgpu\outputs\img2img-grids\anydate the generating image is stored in cases where Batch count = 4 or 9. That is, you need to turn the Denoising strength to 0 and starting generate
sorry for stupid question: Where to place this script? "a script that may help to make gifs inside AUTOMATIC1111 (it's the one that attached to that tutorial). Just place it inside the "scripts" folder and restart UI."
Is it just the 'GenGif.py' from the zip that needs to be put into 'scripts'? I've rebooted 3 times and can't find the script, I'm not sure what's wrong, neither txt2img nor img2img can find a usable script
For the life of me I can only get this to generate 2x2 frames.
Edit: I'm a dumbass, I wasn't changing the resolution to 768x768.
Anyway to adapt it to inpainting?
@orakiosama it should work with inpainting and img2img, I believe)